Enterprise Manager is a great product to help manage multiple Veeam Backup and Replication Deployments from one location. I want to walk through deploying and setting up the latest version of Veeam Enterprise Manager 9.5 Update 4 which will give you a good overview of the interface.
Some of the great features of Enterprise Manager,
Multiple VBR Server Management
Centralized Reporting
Password loss protection for encrypted backup or backup copy jobs
1-Click File-level Restore
1-Click Application Item-level Restore
Microsoft Exchange Mailbox Items Restore
Microsoft SQL Server Database Restore
Oracle Database Restore
Self-Service File Restore
Self-Service Backup Portal for vCloud Director
RESTful API Service
I will also be putting together another post showing you how to configure Veeam Enterprise Manager as a multi-tenant backup portal for vCloud Director so subscribe for updates!
Ok let’s get it installed
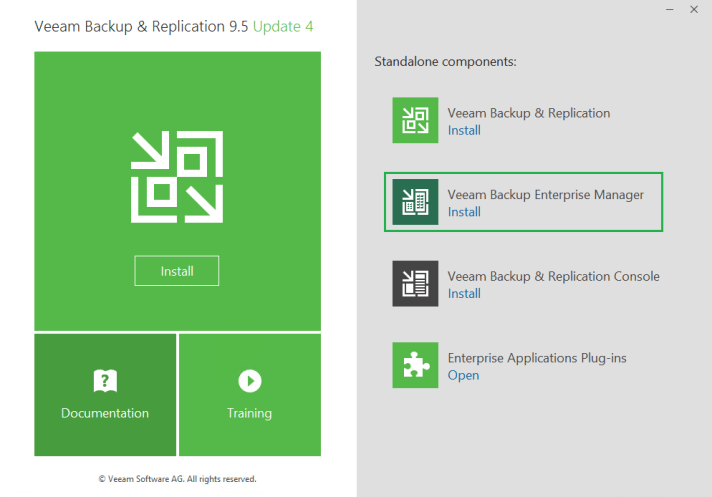
Launch the Setup and click on Veeam Backup Enterprise Manager
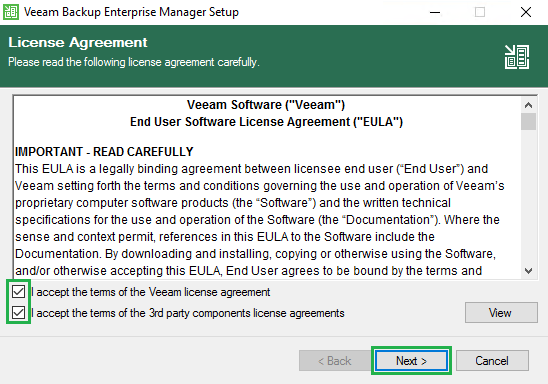
Accept the license agreement by ticking both boxes and click Next
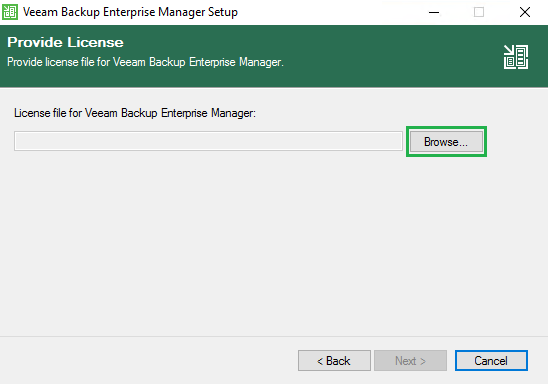
Click Browse and locate your license file and click Next
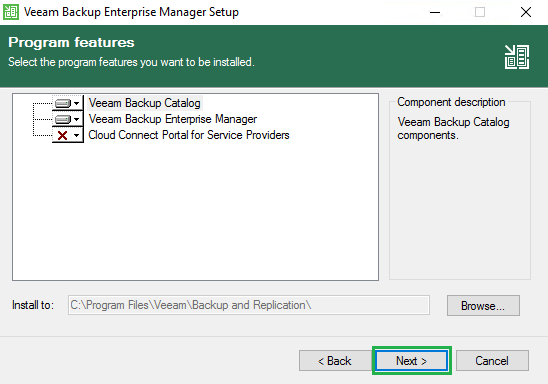
We want to install the default options here so click Next
I will cover the Cloud Connect Portal for Service Providers in a later post.
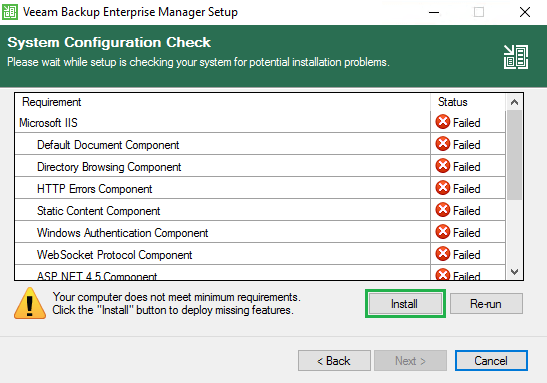
The next step checks the system for the installation pre-requisites. As you can see if it finds anything missing it will list them out here. Click Install to deploy the missing features
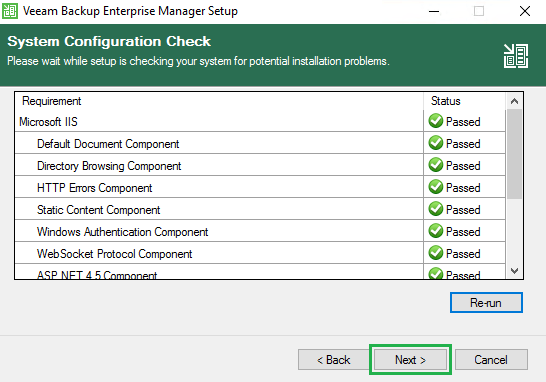
Once the missing features are installed click Next to continue
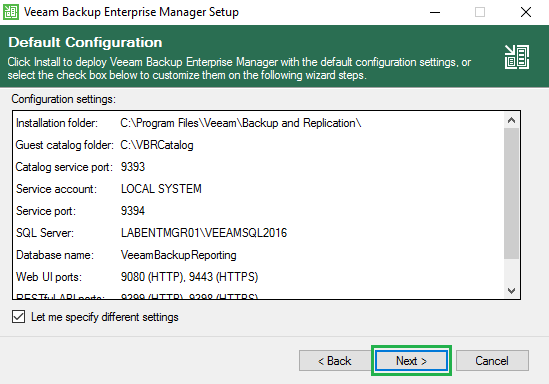
I have a separate SQL server instance so in order to use that instead of a local instance click on Let me specify different settings and click Next. If you want to run with the local install just leave the box un-ticked and hit Next
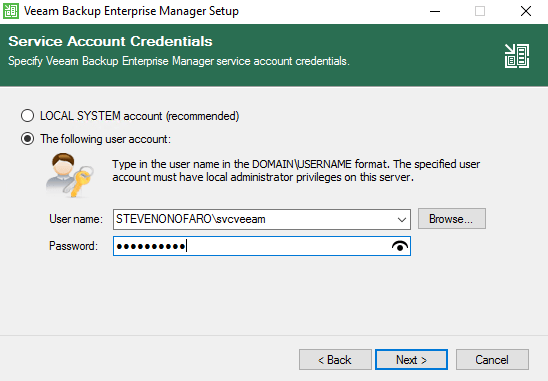
Here we specify the service account we are going to use. Make sure this account is a local administrator on the Veeam Enterprise Manager Server. Then click Next
On my SQL Server I created a new database called EntManager and set my svcveeam user account as the db owner.
Below we specify the path to the SQL Server and the name of the Enterprise Manager Database. Then we need to specify the account we are using to connect to SQL. I have logged into this server with my svcveeam service account which I granted access to the EntManager database.
Select Windows authentication and then click Next

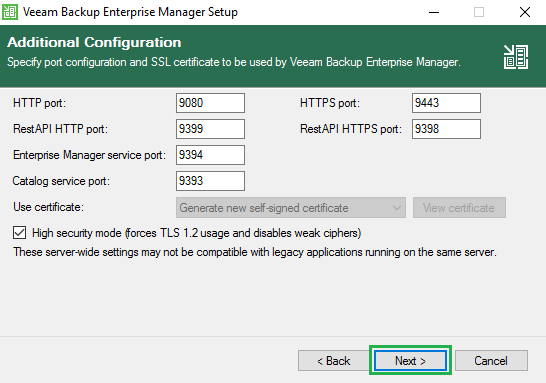
Take note of the ports that will be used and click Next
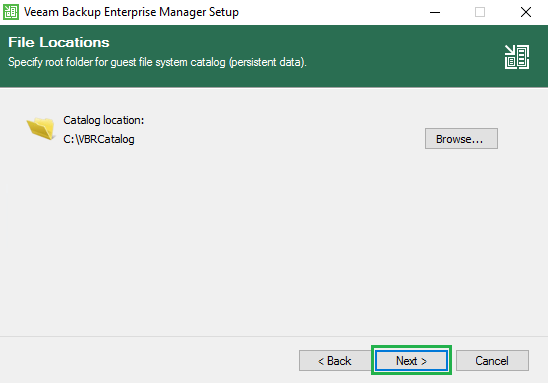
For this example we will go with the default values. Click Next
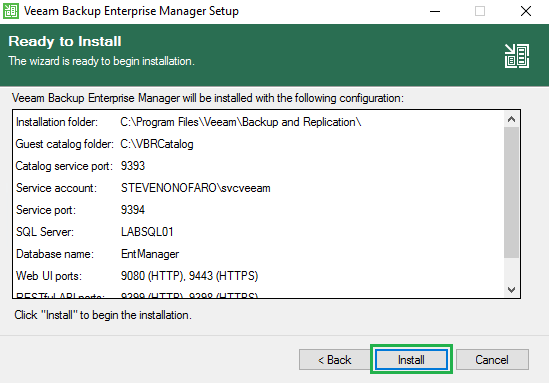
Review the settings and click Install
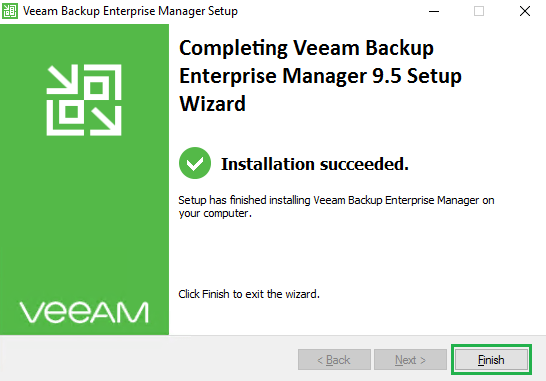
Once the installation completes click Finish
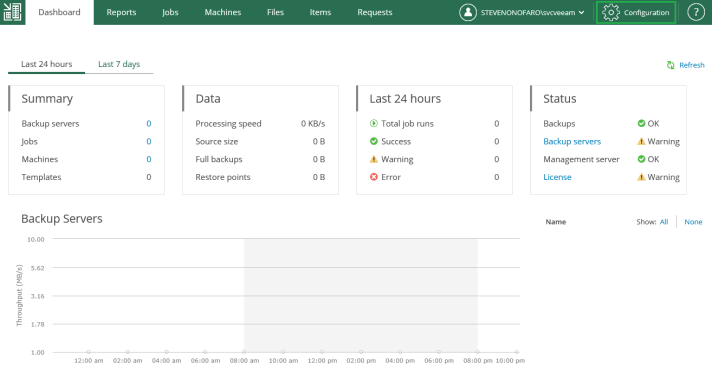
Launch Enterprise Manager from the icon on the desktop
The new look Enterprise Manager interface will now open. It now time to connect Enterprise Manager to our Veeam Backup Server. Click on Configuration located at the top right hand corner of the menu
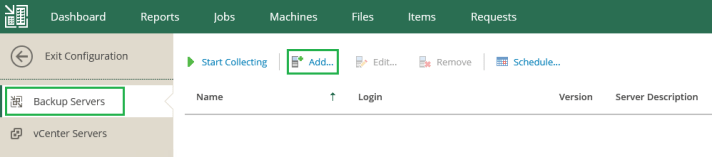
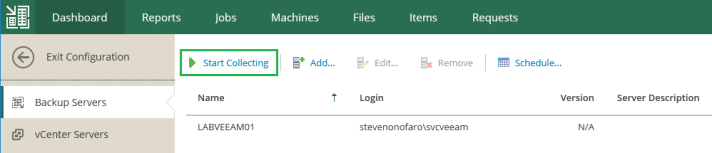
Click on Backup Servers on the left hand menu and then click Add
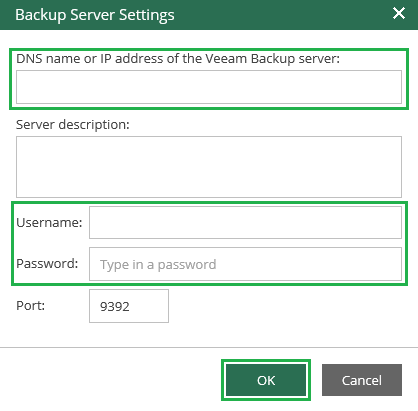
Then enter the DNS name or IP of your Veeam Backup & Replication Server and the logon credentials below. Then click Ok
The Veeam Backup Server has now been added to Enterprise Manager. Click Start Collecting to kick off the data collection process
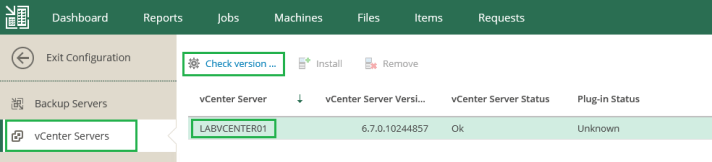
Next we are going to install the plugin on vCenter. Click on vCenter Servers in the left hand menu, then click on your vCenter Server to highlight it and then click Check Version
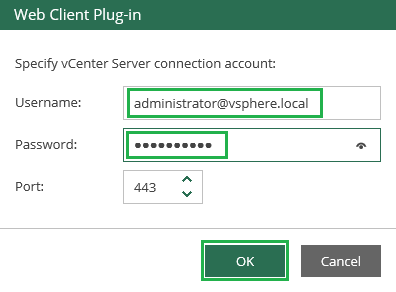
Then when prompted enter your vCenter credentials and click Ok
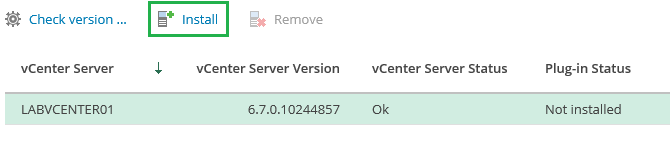
Now with our vCenter highlighted we can click Install. This will install the plugin into the web client
Once complete you will see the following screen

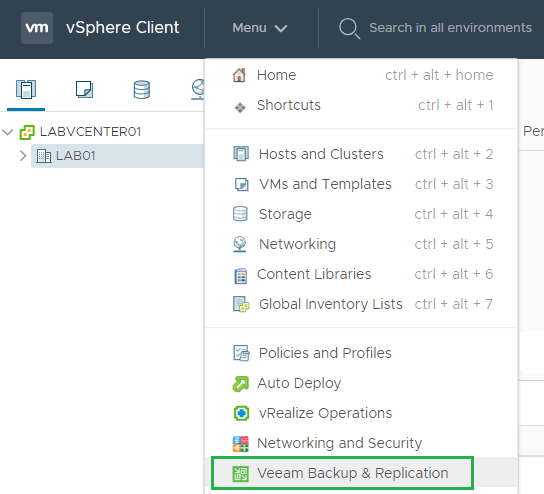
Then if you open up vCenter you will notice a new menu item
When you launch the plugin make sure the account that you have logged into vCenter with has access to connect to the Enterprise Manager Server otherwise it will not connect
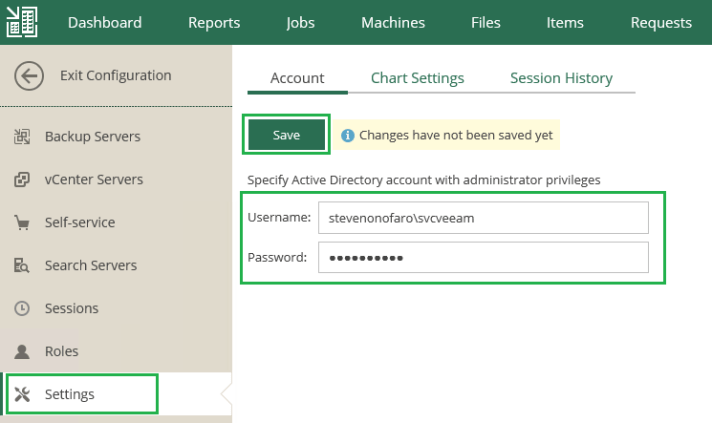
Now specify an AD account here which has administrative privileges. Then click Save
Licensing can be added or updated from the Settings section on the left hand menu. To do this click on Install License then select the license file and click Open. Then when prompted click Yes

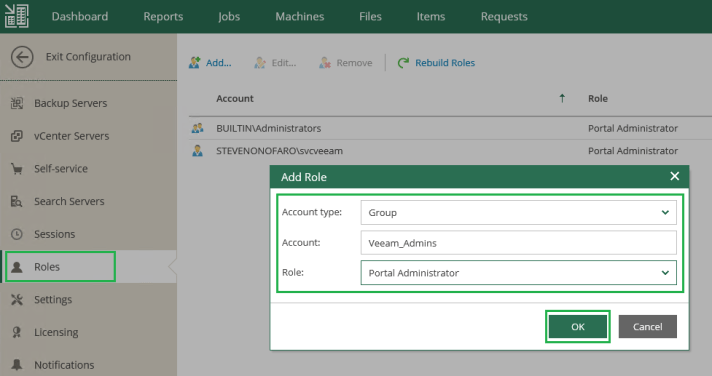
Roles can be assigned to users or groups from the Roles section on the left hand menu. Click on Add then select either group or user, then enter the username or group name and select a role. By default you can choose from Portal Administrator, Portal User and Restore Operator
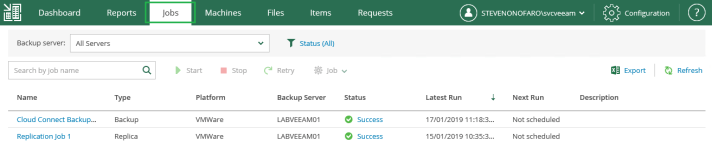
Most importantly users can manage backup and replication tasks by click on the Jobs button on the main menu at the top of the page
From the Machines menu you can kick off VM restores, manage Failover Plans, Delete backups and Perform Quick Backups

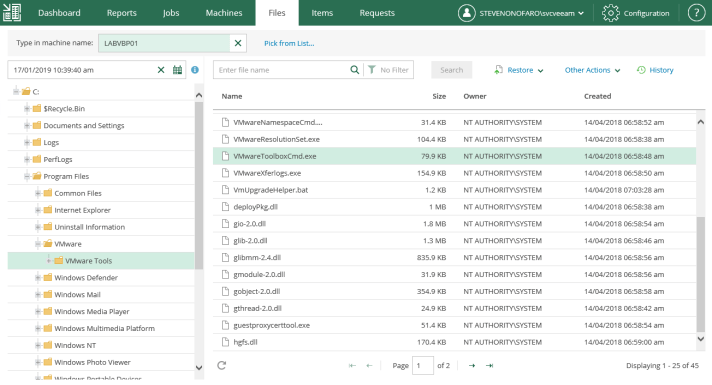
The Files menu will allow you to mount backup jobs and perform file level restores, just pick the date and restore point and mount the job. Locate the file you need to restore and click Restore. You can restore or keep the file and even download it straight to the server you have launched the portal from
I hope this post has helped you guys get started with Enterprise Manager 9.5 Update 4!
Stay tuned for my next post when I will walk you through integrating Enterprise Manager 9.5 Update 4 with vCloud Director 9.5 to create a multi-tenant custom backup portal
Subscribe for post updates and follow me on twitter @steveonofaro
