One of the new options available in Veeam Backup & Replication v11 is the ability to add Google Cloud Storage in as a Capacity Tier option for your Scale-Out backup repository. With each new release we are seeing the object storage options available to users grow. Whether you want to use your own on-premise solution or leverage one of the public cloud providers Veeam have you covered.
With that said let’s first run through creating your new Google Cloud Storage Bucket.
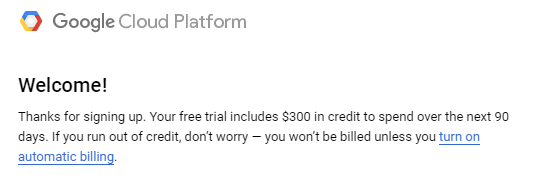
When you first sign up to GCP you can leverage the Free Tier program. Be sure to check the Free Tier usage limits as some of the options are only available from certain regions.
https://cloud.google.com/free/docs/gcp-free-tier
Your free trial also includes $300 in credit to spend in the next 90 days which is great if you are just getting to know the platform.
I will be leveraging my Cloud Storage from the Australia-southeast1 location which is based in Sydney. This unfortunately doesn’t fall under the free tier bracket. Luckily Google provides a monthly estimate calculator which you can use when you first create your bucket.
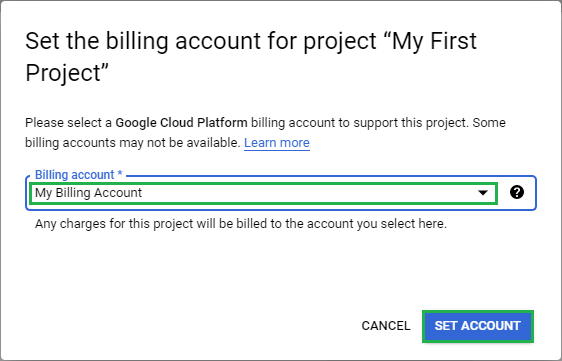
After logging in you select the drop-down menu from the top left and then click on Storage. As I am not using Cloud Storage from one of the US Regions (which falls under the free tier) I need to click on Enable Billing before I can create a bucket.

Next up select your billing account from the drop-down menu and click Set Account.
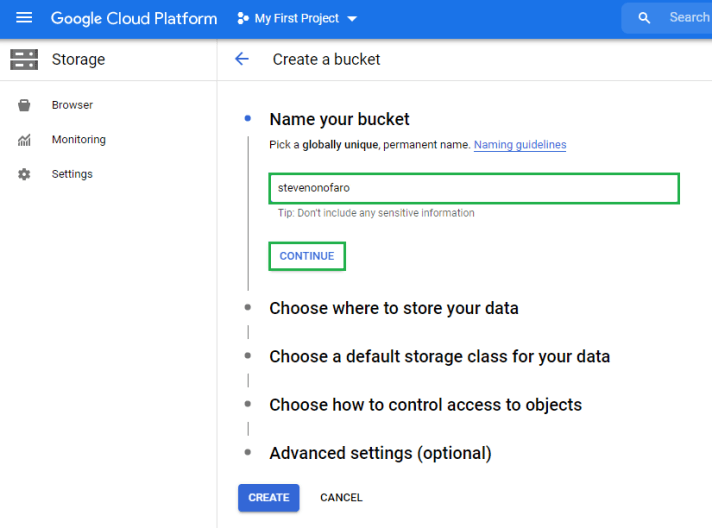
Now the Create Bucket option is no longer greyed out. Click Create Bucket.

Enter a bucket name and then click Continue.
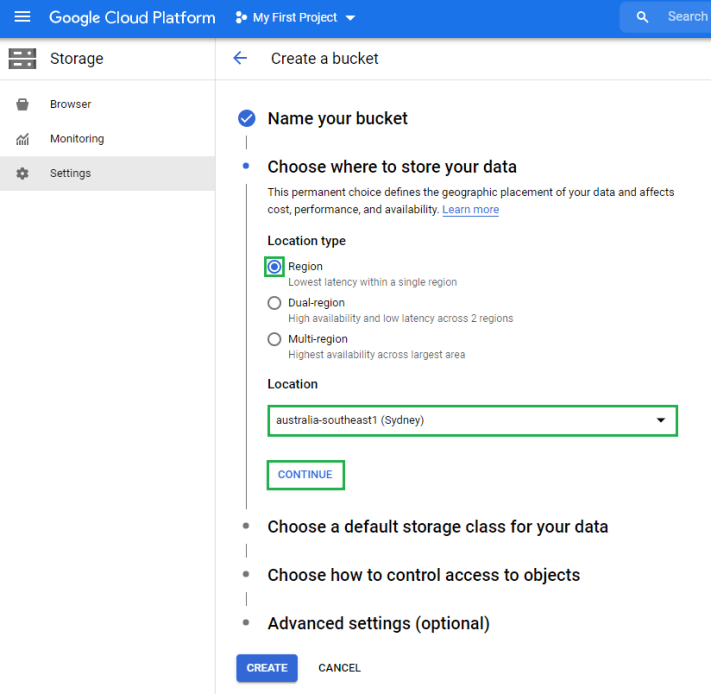
Next up select where you would like to store your data. I just need a single region for this example, so I have selected the first option Region. Then select your location from the drop-down menu and click Continue.
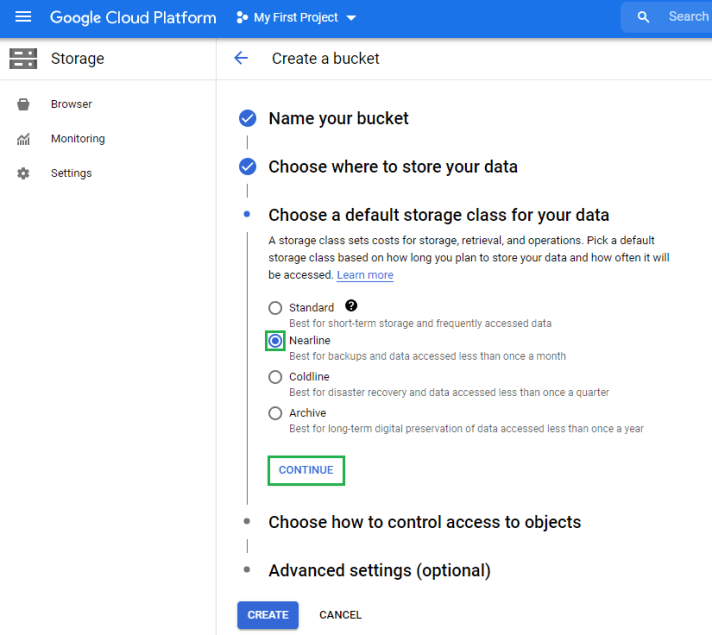
Currently only Standard and Nearline are supported by Veeam v11 so select one of these options. In this example I have selected Nearline. Remember which option you select here as you will need it later during the configuration in VBR.
Then click Continue.
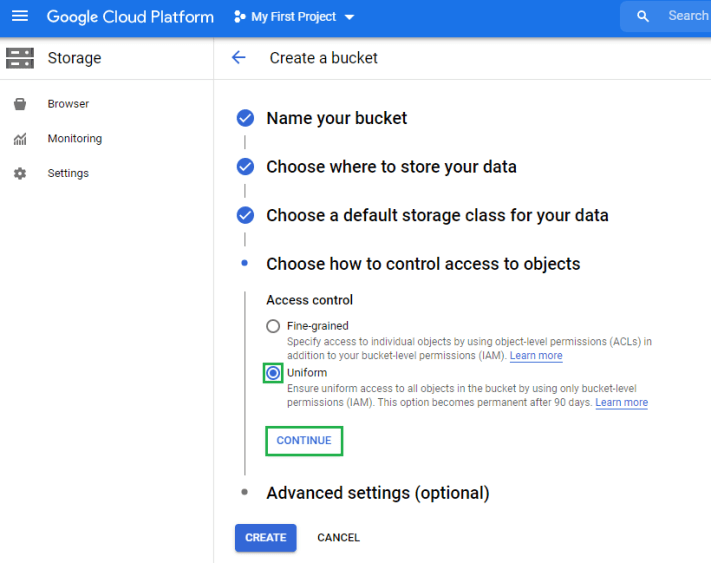
Select your preferred Access Control method and click Continue. I am just keeping things simple here and have gone with Uniform.
For the encryption settings I have just selected Google-managed key. Then click Create.

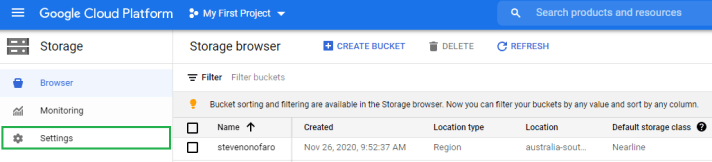
Once complete your bucket will be created.

Now we need to configure the Access Keys so that you can connect to the bucket from VBR. Select Settings from the left-hand menu. Again, this is my lab so I am keeping things simple here.
Then select Interoperability.

Scroll down and Set your default project. I have left mine as the default name.

Then click on Create A Key.

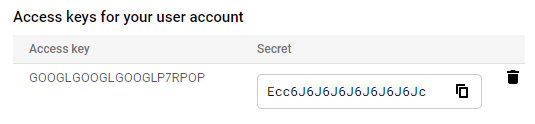
Take a copy of your Access key and Secret as we will need this when creating the connection from the VBR console. The access key and secret you see below have been modified.
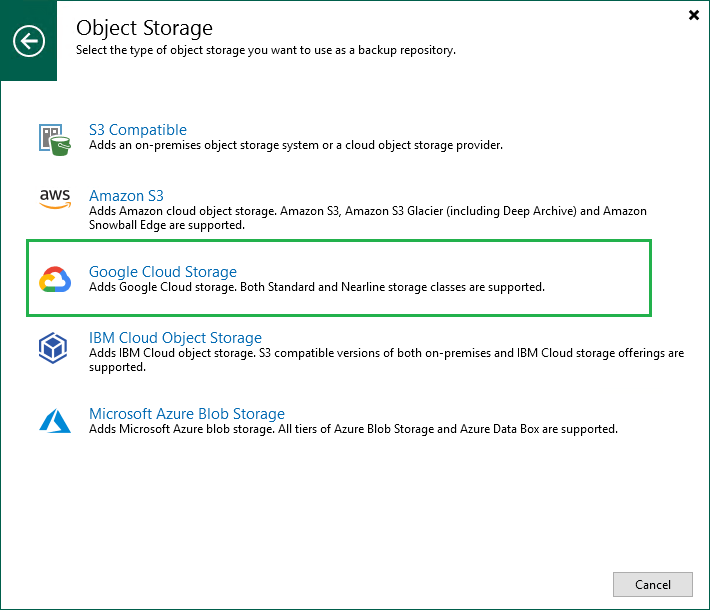
Next up open your Veeam Backup & Replication 11 console and click on Add Backup Repository. Then select Object Storage.

Then click on Google Cloud Storage.
Add in a Name and Description for this new Object Storage Repository. Then click Next.

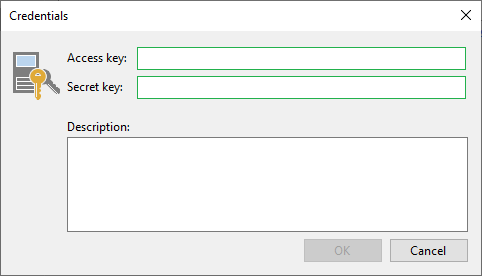
Click on Add and enter in your Access key and Secret Key, then click Ok.
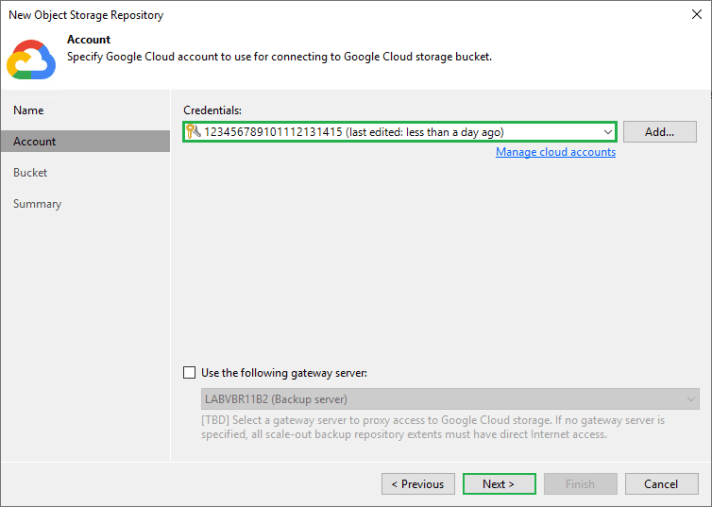
Once your access key has been added you can now select a gateway server to proxy access to Google Cloud Storage.
Then click Next.
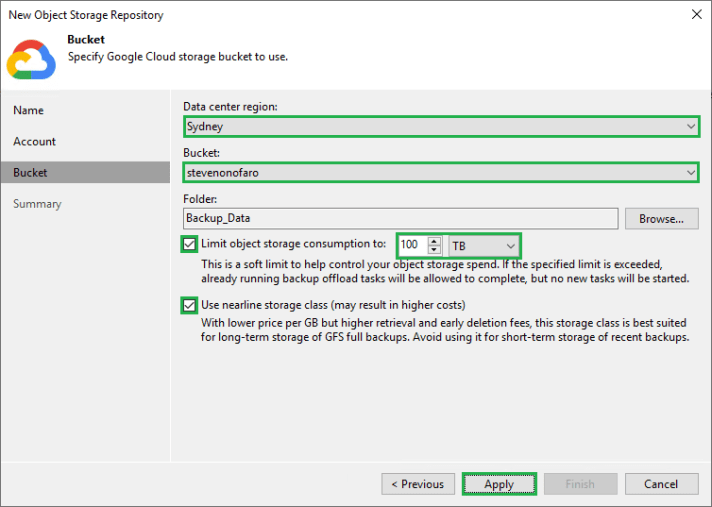
First up you will see your Data center region. Then select your bucket name from the drop-down menu and set the folder you would like to use.
Select the checkbox next to Limit object storage consumption to and set your soft limit if required.
You will also notice there is no option to make the backups immutable just yet. I am sure this is something that will come in due course, possibly by utilizing Googles retention policy settings. This is just me taking a guess, but we will see what happens.
Then you have the option to select the nearline storage class for a lower price per GB. I created my bucket using nearline storage so I have enabled this.
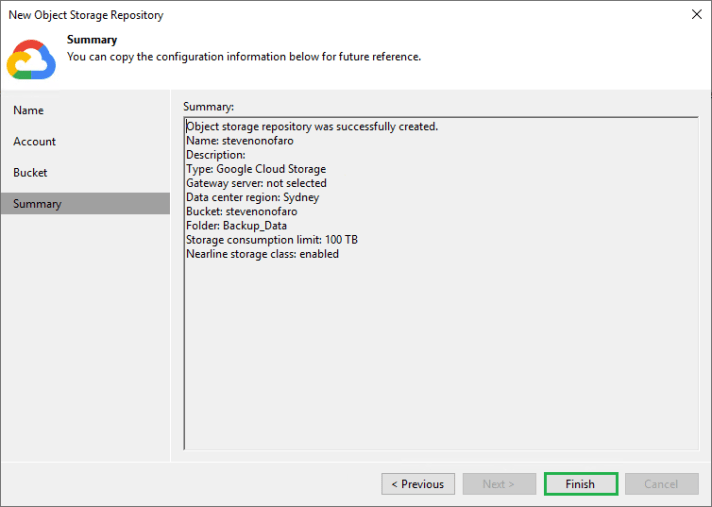
Once complete click Apply.
Then click Finish.
That’s it! Your new Google Cloud backup repository is now connected as a repository in VBR.

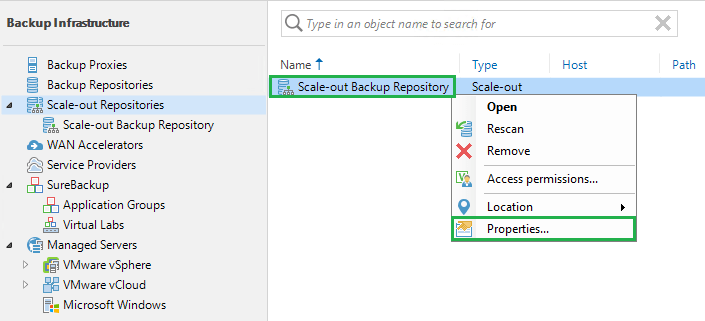
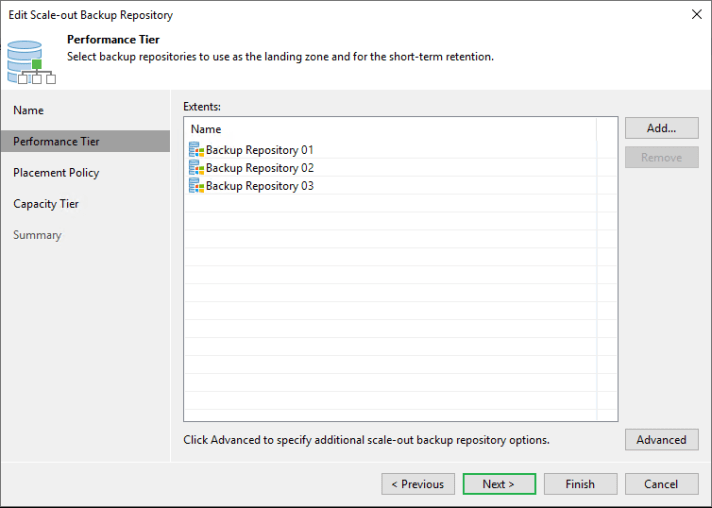
Now let’s run through adding it to my existing Scale Out Backup Repository. Right click the SOBR and select Properties.
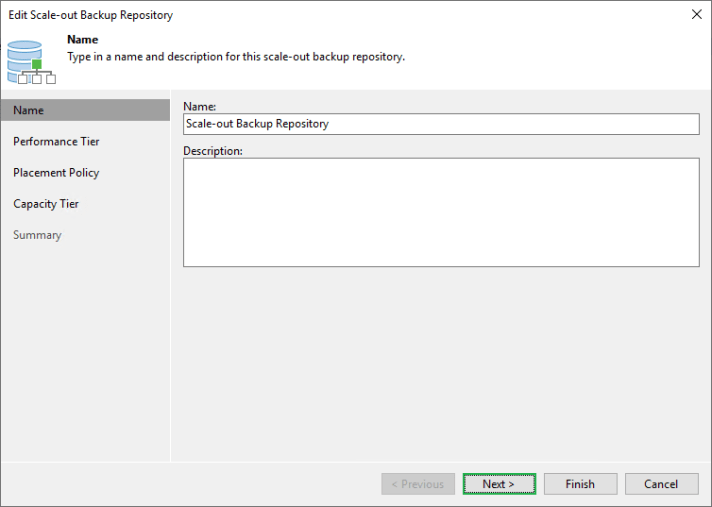
Select Next.
Note – You can skip ahead and just click on Capacity Tier but I thought I would show each section.
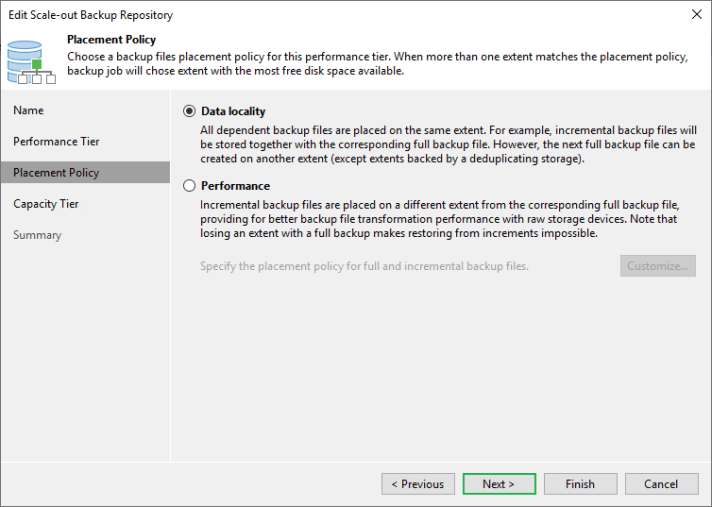
Then click Next.
Click Next.
Click on the check box next to Extend scale-out backup repository capacity with object storage. Then select the Google Cloud Object Storage repository from the drop-down menu.
You then have the option to copy backups to object storage after they are created or to Move backups to object storage as they age out of the operational restore window.
In this example I have selected Copy backups to object storage as soon as they are created. Once the normal backup job is complete the offload job to copy the data to the capacity tier will start.
Once complete click Apply.

Click Finish.

For this example I have just created a new backup job using the newly edited Scale-Out Backup Repository.

The backup itself will run and then once complete the Offload job will start.

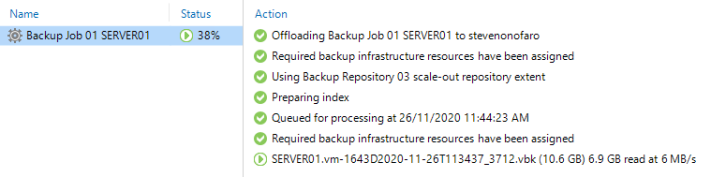
As the data is copied over the directory structure on the Google Cloud capacity extent is laid out in the following way by the VBR server,

When the job has completed you will notice the Object Storage option in the left-hand menu. Once selected you will see the job that was recently run. You will also see how many restore points are available to restore from and the various restore options available.

That’s it from me, stay tuned for more updates and features coming out with Veeam Backup & Replication v11!
