-
Upgrade to Cloud Director 10.2
First off before we begin the upgrade its important to take a snapshot of the appliance. To do this shutdown the appliance from vCenter and then take a snapshot. Once complete power Cloud Director back on.
If you have multiple Cloud Cell’s then log into one of the appliances on port 5480 to identify which is the primary appliance (write that down) as we will need to use this cell later on to back up the database.
The current version of Cloud Director in my lab is 10.1.2.16779297
Then download the appliance update package from VMware.

Next up use putty to ssh to your Cloud Director Appliance and run the following command,
mkdir /tmp/local-update-package

Then copy the update package to the newly created local-update-package directory on the appliance. To do this I just used winscp and connected to the appliance and transferred the file.
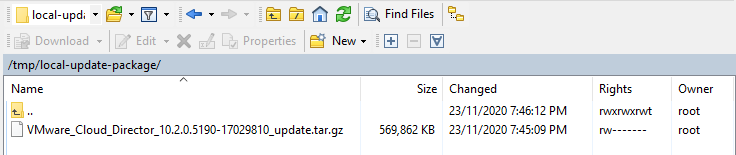
Then browse to the newly created directory cd /tmp/local-update-package

Now extract the package in the local-update-package directory by running the following command,
tar -zxf VMware_Cloud_Director_10.2.0.5190-17029810_update.tar.gz

Next we need to set the newly created local-update-package directory as our update repository for the appliance. To do this run the following command,
vamicli update –repo file:///tmp/local-update-package

Now let’s check that it has set our new directory as the local update repository. To do this run,
vamicli update – -check
You should see an output like the image below, it should show the package we downloaded as an available update.

Then shutdown the Cloud Director cell by running the following command,
/opt/vmware/vcloud-director/bin/cell-management-tool -u administrator cell –shutdown
You will be prompted for the administrator password.

Next let’s kick off the upgrade, to do so run the following command,
vamicli update – -install latest

If you have multiple cell’s then you will need to complete all of the previous steps on each cell before upgrading the database.
Next up we need to back up the database, if you only have the one cell then this is easy. If you have more than one, then as I mentioned earlier you can identify which is the primary by connecting to the cell ip on port 5480. To back up the database we need to be connected to the primary cell before running the following command,
/opt/vmware/appliance/bin/create-db-backup

Now let’s complete the database upgrade, this can be run from any cell.
/opt/vmware/vcloud-director/bin/upgrade
You will be prompted with “Do you wish to upgrade the product now?” Enter Y to continue with the upgrade.
During the process it will ask if you have taken a backup of the database, to continue enter yes to continue here also.
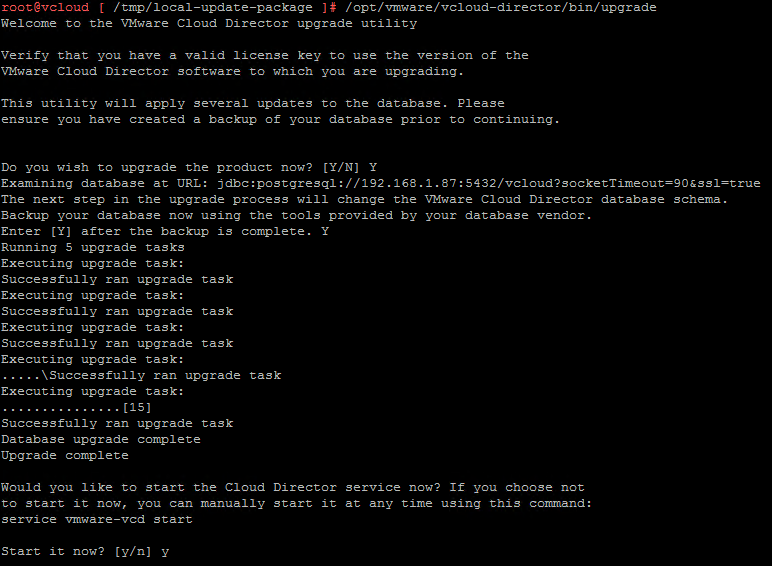
Once complete it will prompt you to start the cell, enter y to start the services.
You will then need to restart each of the cells after the upgrade is complete, to do this run the following command,
shutdown -r now

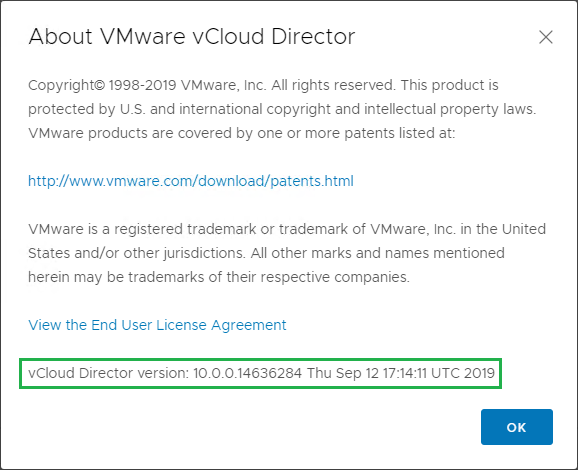
Once the Cloud Director cell has rebooted you will then be able to login to your newly upgraded appliance.
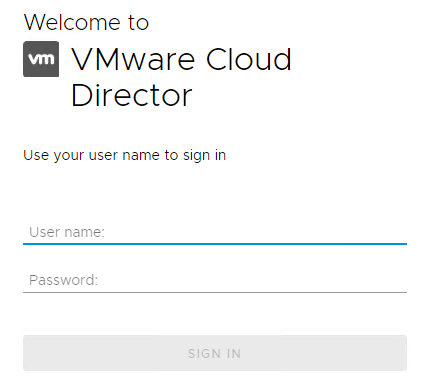
Then if you click on the drop-down menu and select About you will see the newly upgraded version.

As always use the subscribe box above for new post notifications and follow me on twitter @steveonofaro
-
Veeam Enterprise Manager 10 – How to modify the default theme
In a previous post I walked you through how to modify the default theme of Enterprise Manager 9.5. Now it’s time to do the same with Enterprise Manager 10. I have been playing with Enterprise Manager for a while now and I especially like the ability to integrate the product with vCloud Director. After using the Enterprise Manager plugin for vCloud Director I wanted to make a few changes to the theme so that I could better integrate it with our customized vCloud theme. The below guide covers some of the basic changes you can make to the main Enterprise Manager Portal theme and also the Self-Service Backup Portal.
This is default Enterprise Manager 10 main menu.

We are going to edit the following files to change the default Veeam green to blue for this example. Take a backup of each file before continuing,
C:\Program Files\Veeam\Backup and Replication\Enterprise Manager\WebApp\scripts\build\production\MainApp\resources\MainApp-all_1.css
C:\Program Files\Veeam\Backup and Replication\Enterprise Manager\WebApp\scripts\build\production\MainApp\resources\MainApp-all_2.css
C:\Program Files\Veeam\Backup and Replication\Enterprise Manager\WebApp\scripts\build\production\MainApp\resources\MainApp-all_3.css
C:\Program Files\Veeam\Backup and Replication\Enterprise Manager\WebApp\scripts\build\production\MonthlyReportApp\resources\MonthlyReportApp-all.css
C:\Program Files\Veeam\Backup and Replication\Enterprise Manager\WebApp\static\assets\errors.css
C:\Program Files\Veeam\Backup and Replication\Enterprise Manager\WebApp\scripts\build\production\VCloud\resources\VCloud-all.css
C:\Program Files\Veeam\Backup and Replication\Enterprise Manager\WebApp\scripts\build\production\VSphere\resources\VSphere-all.css
Once again I have used Visual Studio Code to make the changes to each of the files. Click on File then Open File to open each one in a different tab then select Edit from the drop down menu then Replace. Enter the default green #2a6e52 colour code at the top and then your new colour code #2E86C1 below, then click the Replace All icon to the right. Click on each of the CSS file tabs and click the Replace All button. This colour will be present in each file.
Then select File and Save All.

Next we have a few more codes to change, enter the other default green #245f47 colour code at the top and then your new colour code #2874A6 below, then click the Replace All icon to the right. Click on each of the CSS file tabs and click the Replace All button. Note the second two green colour codes don’t appear in the MainApp-all_3.css and errors.css file.
Then select File and Save All.

Then again in the Find box change the colour code to #1b4735 and then change the Replace code to #21618C, then click the Replace All icon to the right. Click on each of the CSS file tabs and click the Replace All button. Note the second two green colour codes don’t appear in the MainApp-all_3.css and errors.css file.
Feel free to get more creative with your colours, I am just using a few different variations of blue for this example.
Then select File and Save All.

In the Find box change the colour code to #215741 and then change the Replace code to #21618C, then click the Replace All icon to the right. Click on each of the CSS file tabs and click the Replace All button. Note that MainApp-all_3.css and errors.css does not have this colour code present.

In the Find box change the colour code to #4e846e and then change the Replace code to #2E86C1, then click the Replace All icon to the right. Click on each of the CSS file tabs and click the Replace All button. Note that MainApp-all_2.css, MainApp-all_3.css and errors.css does not have this colour code present.

In the Find box change the colour code to #54b948 and then change the Replace code to #2E86C1 (try a lighter version of your previous colour), then click the Replace All icon to the right. Click on each of the CSS file tabs and click the Replace All button. Note that MainApp-all_2.css, MainApp-all_3.css and errors.css does not have this colour code present.

Then open the following css file,
C:\Program Files\Veeam\Backup and Replication\Enterprise Manager\web\css\prettify.css
In the Find box change the colour code to #060, #066, #080 and #044 and then change the Replace code to #2E86C1, then click the Replace All icon to the right. Click on each of the CSS file tabs and click the Replace All button.

Then select File and Save All.
Now you are ready to launch Enterprise Manager and view the new updated menu colour scheme. Initially you may need to open your browser in incognito mode to show the changes straight away.
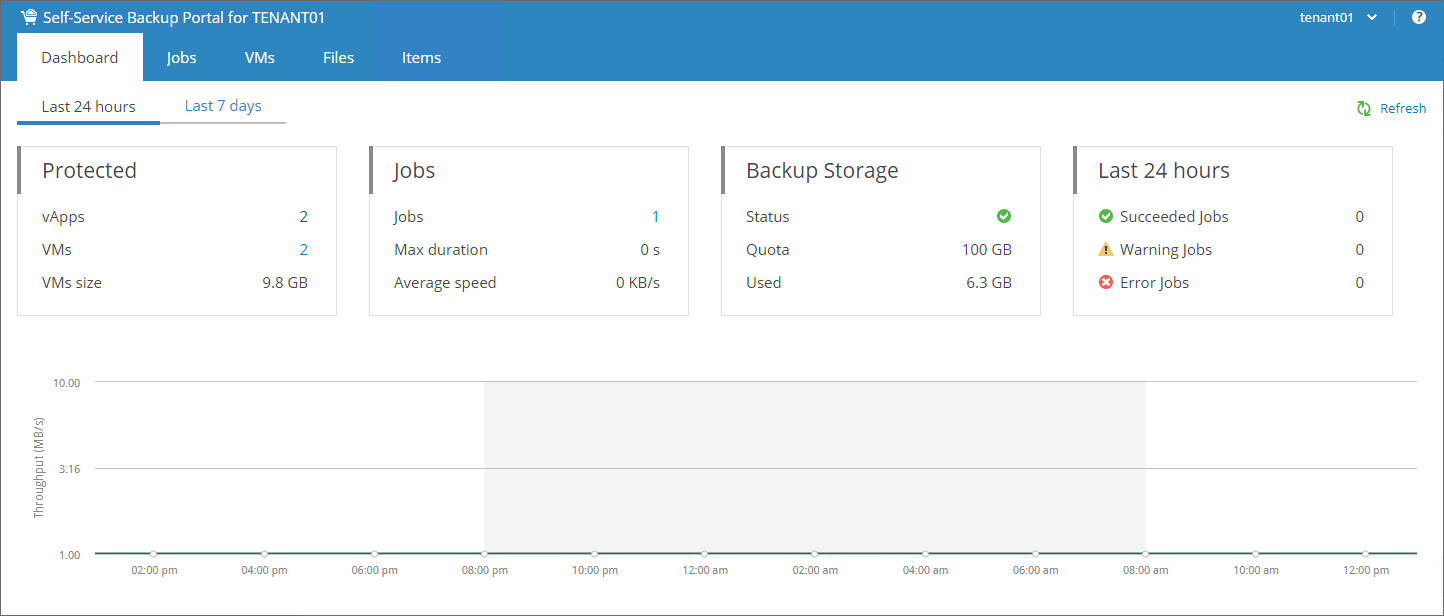
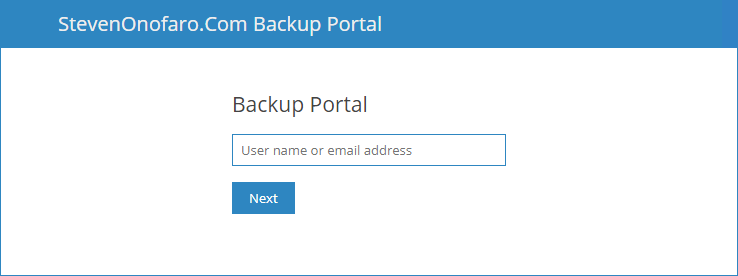
Below is an example from the Self-Service Backup Portal.
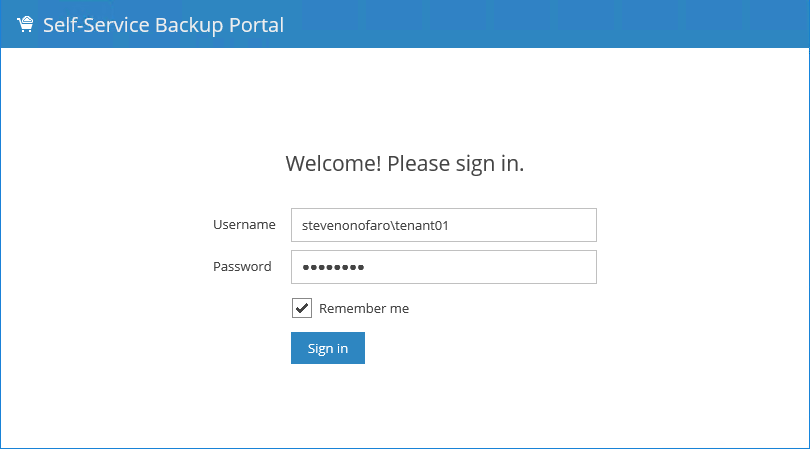
The updated view once logged in from the Self-Service Backup Portal.
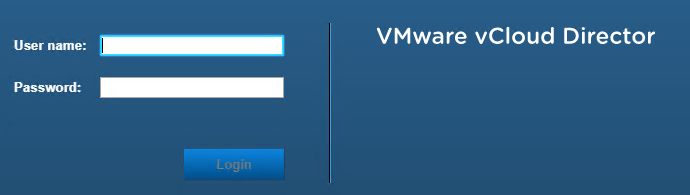
Next we need to modify the default green colour which appears when you hover over the main menu items and the user menu in the top right. Below is an example from the vCloud Self-Service Portal.

Here is an example from the main Enterprise Manager Portal.

Once again its time to change another colour code so we can repeat the same process.
Now this colour code was fun to locate! In the Find box change the colour code to #245c45 and then change the Replace code to #2874A6 (use a light colour here again), then click the Replace All icon to the right. This code only needs to be changed on the MainApp-all_2.css, MonthlyReportApp-all.css, Vcloud-all.css and vSphere-all.css.
Then select File and Save All.

Then in the Find box change the colour code to #1f4d3a and then change the Replace code to #2874A6, then click the Replace All icon to the right. This code only needs to be changed on the MainApp-all_2.css, MainApp-all_3.css, MonthlyReportApp-all.css, Vcloud-all.css and vSphere-all.css.
Then select File and Save All.

Then refresh each of the portals, now when we hover over the buttons the green background is gone and it has changed to a different shade of blue.
Example from the vCloud Self-Service Portal.

Example from the main Enterprise Manager Portal.

Now it’s time to remove the icon that displays on the left-hand side of the menu. The icon itself is very small and you can replace the image with anything you like but for this example I am just going to remove it.
Icon from the Tenant Self Service Portal.

Icon from the main Enterprise Manager Portal.

Browse to the following directory and take a backup copy of the png file.
C:\Program Files\Veeam\Backup and Replication\Enterprise Manager\WebApp\scripts\build\production\VCloud\resources\images\siteLogo16.png
Rename siteLogo16.png to old_siteLogo16.png
Close and open the page and the icon will no longer appear.

Now for the main Enterprise Manager portal
Browse to the following directory and take a backup copy of the png file.
C:\Program Files\Veeam\Backup and Replication\Enterprise Manager\WebApp\scripts\build\production\MainApp\resources\images\veeam\icons\logo32.png
Rename logo32.png to old_logo32.png

Close and open the page and the icon will no longer appear. If it doesn’t change straight away try it using incognito or inprivate browsing mode to see if it’s just cached.
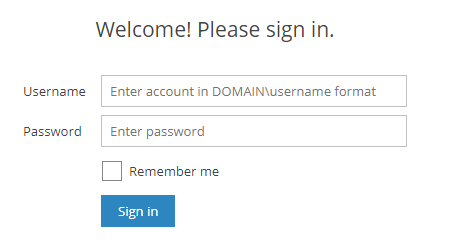
Now let’s edit the logon screen welcome message for the vCloud Self-Service Portal,
Open the following file,
C:\Program Files\Veeam\Backup and Replication\Enterprise Manager\WebApp\scripts\build\production\VCloud\login\app.js
Then click Edit, Replace and in the Find box enter Welcome! Please sign in. and in the Replace box enter the text you would like to display then click the Replace All button.

Then click File and Save All
Once again if it doesn’t update straight away just close the browser and open another incognito window as its most likely cached. The logon screen welcome message should now be updated.
You can also update the logon message for the main Enterprise Manager Portal. To do this open the following file,
C:\Program Files\Veeam\Backup and Replication\Enterprise Manager\WebApp\scripts\build\production\MainApp\login\app.js
Then click Edit, Replace and in the Find box enter Sign in and in the Replace box enter the text you would like to display then click the Replace All button.

Then select File and Save All
Once again if it doesn’t update straight away just close the browser and open another incognito window as its most likely cached. The logon screen welcome message should now be updated.
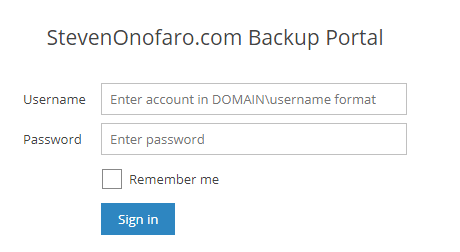
You can also modify the header section at the top of the vCloud Self-Service Portal login screen.

To do this we need to open the following file,
C:\Program Files\Veeam\Backup and Replication\Enterprise Manager\WebApp\scripts\build\production\VCloud\resources\localization.js
In the Find box enter Self-Service and in the Replace box enter the text you would like to display then click the Replace All button.

Next open the web.config file from the following location,
C:\Program Files\Veeam\Backup and Replication\Enterprise Manager\WebApp\Web.config
In the Find box enter Self-Service and in the Replace box enter the text you would like to display then click the Replace All button.

Then select File and Save.
Then close and open your browser and the portal should be updated! You may need to initially clear your browser cache or open incognito mode for it change.
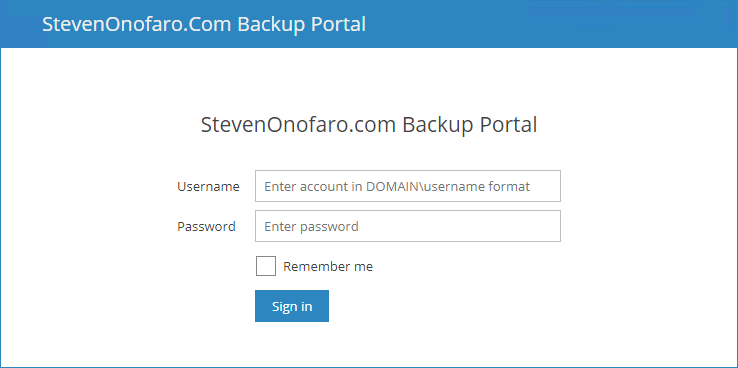
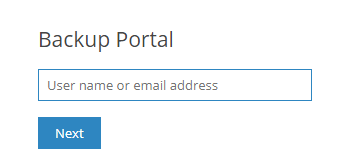
The same modification can also be made to the main Enterprise Manager Portal login screen.

To change the heading Veeam Backup Enterprise Manager which is displayed in the top left corner open the following app.js file.
C:\Program Files\Veeam\Backup and Replication\Enterprise Manager\WebApp\scripts\build\production\MainApp\login\app.js
In the Find box enter Veeam Backup Enterprise Manager and in the Replace box enter the text you would like to display then click the Replace All button.

Next open the web.config file from the following location,
C:\Program Files\Veeam\Backup and Replication\Enterprise Manager\WebApp\Web.config
In the Find box enter Veeam Backup Enterprise Manager and in the Replace box enter the text you would like to display then click the Replace All button.

Then select File and Save.
Then close and open your browser and the portal should be updated! You may need to initially clear your browser cache or open incognito mode for it change.
I hope this post has helped you guys put your own personal touch on the Enterprise Manager Portal. If you are not using it then it’s time to get on board because it’s a great product! Especially when it comes to vCloud Director Integration!
As always use the subscribe box above for new post notifications and follow me on twitter @steveonofaro
-
Smart Licence Commands Fail on HX Edge Cluster
I came across an interesting error when trying to licence a Hyperflex Edge Cluster the other day. Each time I ran the stcli license show all command I received the following message,

The cluster itself is running 4.0(2a) which turns out to be the reason why we are currently seeing this issue.
So at this point there are two options available. You can either upgrade your cluster to 4.0(2b) which requires a little more planning or contact Cisco Support and get a copy of a patch file which will resolve the issue. When you log a TAC case ask them for a copy of a file called nesla-3.0.9.jar which is directly related to Cisco Bug CSCvt13929. This patch can be applied at any time without the need for any sort of outage.
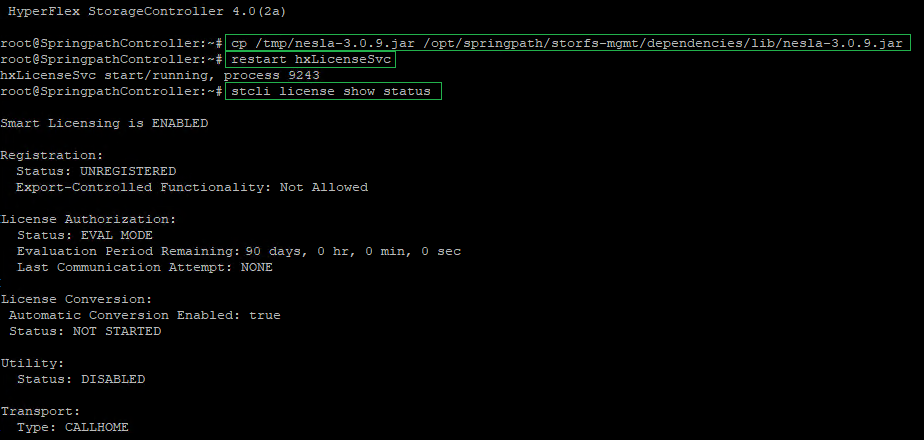
Below are the steps required to install the fix on the cluster in question,
Copy the file nesla-3.0.9.jar to the /tmp directory on each of the storage controllers using winscp.
Then run the following command,
cp /tmp/nesla-3.0.9.jar /opt/springpath/storfs-mgmt/dependencies/lib/nesla-3.0.9.jar
Then restart the service,
restart hxLicenseSvc
Give it a minute and then run,
stcli license show status
Then you should see the following,
Now you can go through the process of registering your HX Cluster.
First step is to login to your smart portal and create a token, then copy the token string.
Then SSH to one of the controllers in the cluster and enter the following command (adding your token string at the end)
stcli license register –idtoken “past in token”
Give it a minute and then check the license status,
stcli license show status
That’s it, your new HX Cluster should now be registered with your Cisco Smart Account
-
How to enable the Flex UI in vCloud Director 10.0
In the last few releases of vCloud Director more and more capabilities have been added into the HTML5 interface to bring it in line with the older Flex UI. While it has come a long way there are still a few things (refer to the release notes) missing that some people may do on a regular basis. In vCloud 10.0 when you attempt to browse to the Flex UI by appending /cloud to the end of your vCloud URL it will automatically redirect to the HTML5 interface.
The old Flex UI hasn’t been removed just yet and there is still a way to enable it. So whether there is an option you don’t have in the HTML5 interface yet or you have been working with the Flex UI for so long you are just more comfortable with it, here is how you enable it.
There are 2 options available, you can enable it for all users or just the system administrators.
Login via SSH to each of your vCloud Cells as the root user,
To enable it for all users run the following command,
/opt/vmware/vcloud-director/bin/cell-management-tool manage-config -n flex.ui.enabled -v true

If you want to only enable it for the system administrators then you can run the following command,
/opt/vmware/vcloud-director/bin/cell-management-tool manage-config -n flex.ui.enabled -v sys-admin-only
If you have more than one vCloud Cell make sure you run it on each of your cells.
Then restart the vmware-vcd service on each cell you have made the change
service vmware-vcd restart

And we are back,
If you want to disable the old Flex UI at a later stage you can run the following command to do so,
cell-management-tool manage-config -n flex.ui.enabled -v false
-
vCloud Availability 3.5 appliance DNS issues
Recently I have been deploying a few new vCloud Availability 3.5 environments and I really like the product. The ability to connect multiple vCloud Director sites together and provide a migration path between them as well as in and out of the hosted platform is something IaaS providers have needed for a long time. That being said the one thing I keep seeing with the vCloud Availability 3.5 appliance is that it does not seem to use the DNS settings you specify during deployment.
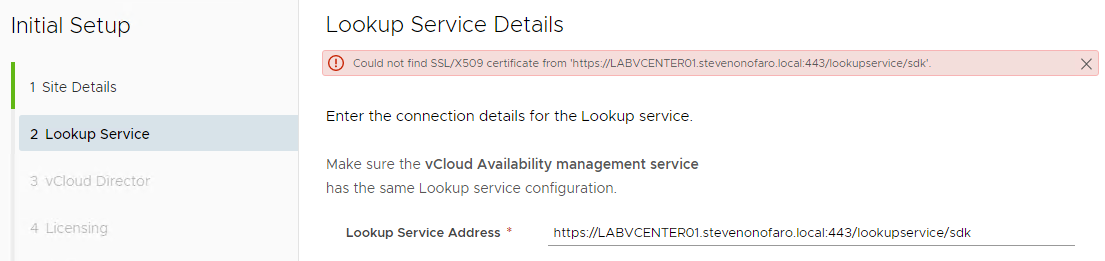
When you are installing the appliance you are prompted to select a deployment configuration. You have the option of selecting Cloud Replication Management, Cloud Replicator, Cloud Tunnel or the Combined Appliance. I have found that this DNS issue occurs with all configuration types. You will first notice the issue when trying to specify the Lookup Server Address. Instead of prompting you to accept the certificate you will be greeted with the following error as it simply cannot resolve the name. If you change it to the IP address here it will prompt with the cert straight away but that’s not a fix.
To look into this further ssh to the appliance address (if you enabled ssh during the install) otherwise just launch the web console. Login as root and attempt to ping the lookup server address which for most will be your vCenter server (if combined) otherwise it will be your separate Platform Services Controller.
You should see the following error – Temporary failure in name resolution

Then run nslookup with the server name like below. You will notice it returns the 127.0.0.53 address which is not the one you specified during the install.

To resolve this we need to modify the network configuration file. First browse to the correct directory,
cd /etc/systemd/network
Then enter the following to edit the file,
vi 10-eth0.network
Note – If you see that the file is blank then press ESC and type :q and press enter to exit out. Then list the contents of the directory with the ls command. Your file name may have been created as 10-eth0-static.network instead. I have seen this with both entries.
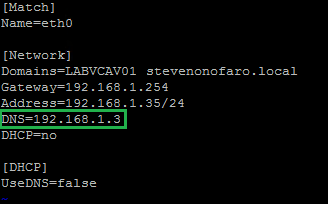
Press i to allow you to insert the address and then type in the DNS settings in the same format as below. You can add multiple DNS servers just use a space in between each one.
To save the changes press ESC then type in :wq and press Enter
Then restart the network service using the following command
systemctl restart systemd-networkd
Now try and ping your PSC again by its hostname and the issue will be resolved.
-
Synthetic Full Jobs created via the Self-Service Portal run slower by default
Recently I have been troubleshooting an interesting issue with some of my weekly synthetic full jobs. The incremental backup would run as per normal and then it would start the synthetic full which would take over 2 days. This job is quite large and I did expect it to take some time to complete but not this long. The synthetic operation itself doesn’t impact the production VM while it is being created so that is ok. My main issue is that I don’t want to miss the incremental run the next night.
Meanwhile I have other jobs configured to backup all of my management VMs in what I thought was the same way and they would run and complete without issue in a very short time frame.
In this environment I have created a forward incremental job with a synthetic full on the weekend for my management VMs which are just located in vCenter. This job itself was just created in the VBR console like you would any other job.
The second set of jobs and the one I am have having issues with was created via the Self-Service Portal in Enterprise Manager and is backing up vCloud Director VMs. Once created the job is displayed in the VBR console and can also be managed from here.
So the troubleshooting commenced with the first point of call being the storage array where the backup files are being written. With the help of support from the storage vendor we went through everything and made a few changes to the way the storage was being presented to help optimize the performance. This did help a bit, but overall didn’t resolve the time it took for the job to complete.
At this point I got in touch with Veeam support to try and make more sense of the issue. We checked through the configuration and then dived into the logs to see if anything stood out.
Below is an extract from one of the agent transform log files. The file name will have the following format – Agent.BackupJobName.Transform.Target.VMName and is located in the C:\ProgramData\Veeam\Backup\BackupJobName directory.
From the above example we can also use the following to determine how the job itself is progressing.

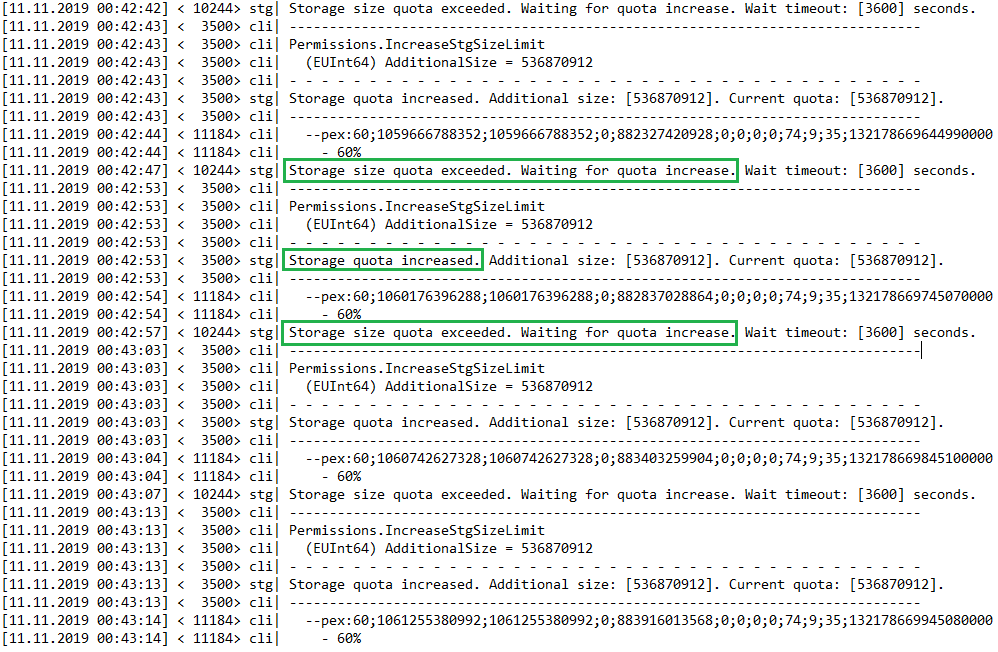
From here we can see it has processed 60% for that particular agent. The next entry 0;0;0;74;9;35 can be broken down in the following,
0 – Source Read busy % AKA “Source”
0 – Source Processing Busy % AKA “Proxy”
0 – Source Write Busy % AKA “Network”
74 – Target Read Busy %
9 – Target Processing Busy %
35 – Target Write Busy % AKA “Target”
What we found only applied to jobs created through the Enterprise Manager vCloud self-service portal and the vSphere self-service portal. By default every 10 seconds the target repository agent receives a quota of 512 MB. Once this quota is exceeded the target agent displays the message “Storage size quota exceeded. Waiting for quota increase.” So if the target writes faster than 51.2 MB/s the process will pause for 10 seconds while the job waits for the next 512 MB to be allocated.
So basically my problem is I am writing data down too fast then spending majority of the time waiting for another 512 MB to be allocated so the data can continue to be written. A good problem to have I guess.
Luckily there is a fix for this issue and it applies to Veeam Backup & Replication 9.5 Update 4, 4a and 4b. With the following registry key you can increase the default 512 MB to 2047 MB. Do not set this key any higher than 2047 otherwise you will see a drop in backup processing performance.
Open the registry editor on the Veeam Backup & Replication Server and browse to,
HKEY_LOCAL_MACHINE\SOFTWARE\Veeam\Veeam Backup and Replication
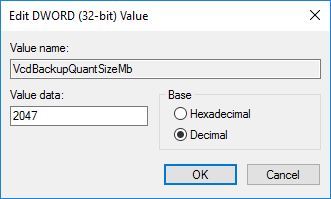
Then right click the folder and select New, then DWORD (32-bit) Value
Value Name – VcdBackupQuantSizeMb
Type – REG_DWORD
Value Data – 2047 (Decimal)
After adding this registry entry in the next run of the synthetic job completed in just under half the time that it did on a previous run. This allowed for the incremental to complete the following night.
This issue should hopefully be resolved with the release of v10 by adding in dynamic storage quota assignment.
I hope this helps some of you out there that may be experiencing a similar issue with jobs created via the Self-Service Portal in Enterprise Manager!
As always use the subscribe box above for new post notifications and follow me on twitter @steveonofaro
-
Upgrade vCloud Director 9.7 Appliance to 10
In a previous post I upgraded my vCloud Director 9.5 environment which had an SQL database over to a vCloud 9.7 Appliance with an embedded PostgreSQL database. The link for that can be found here.
To follow on from this I thought it was about time I upgraded this environment to vCloud Director 10. I put this post together to run you through how easy it was to upgrade the 9.7 appliance to version 10.
First off before we begin the upgrade its important to take a snapshot of the appliance. To do this shutdown the appliance from vCenter and then take a snapshot. Once complete power vCloud Director back on.
If you have multiple vCloud Cells then log into one of the appliances on port 5480 to identify which is the primary appliance (write that down) as we will need to use this cell later on to back up the database.
The current version of vCloud Director in my lab is 9.7.0.13634630
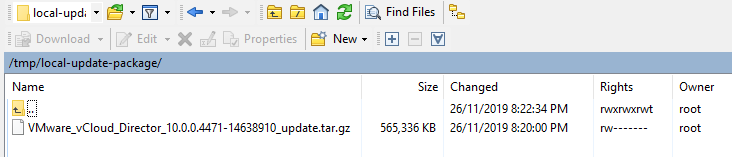
Next up download the update package from VMware. Look for VMware vCloud Director 10.0.0–Virtual Appliance update package for 10.0.0 heading and below that you should see a .gz file. At the time of downloading this the build number was 14638910 so the file name was VMware_vCloud_Director_10.0.0.4471-14638910_update.tar.gz
Next up use putty to ssh to your vCloud Director Appliance and run the following command,
mkdir /tmp/local-update-package

Then copy the update package to the newly created local-update-package directory on the appliance. To do this I just used winscp and connected to the appliance and transferred the file.
Now extract the package in the local-update-package directory by running the following command,
tar -zxf VMware_vCloud_Director_10.0.0.4471-14638910_update.tar.gz

Next we need to set the newly created local-update-package directory as our update repository for the appliance. To do this run the following command,
vamicli update –repo file:///tmp/local-update-package

Now let’s check that it has set our new directory as the local update repository. To do this run,
vamicli update –check
You should see an output similar to the image below, it should show the package we downloaded as an available update.

Then shutdown the vCloud Director cell by running the following command,
/opt/vmware/vcloud-director/bin/cell-management-tool -u administrator cell –shutdown
You will be prompted for the administrator password.

Next lets kick off the upgrade, to do so run the following command,
vamicli update –install latest

If you have multiple cells then you will need to complete all of the previous steps on each cell before upgrading the database.
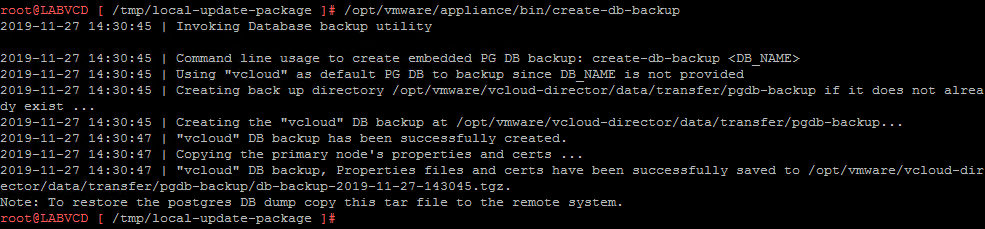
Next up we need to back up the database, if you on have the one cell then this is easy. If you have more than one then as I mentioned earlier you can identify which is the primary by connecting to the cell ip on port 5480. To back up the database we need to be connected to the primary cell before running the following command,
/opt/vmware/appliance/bin/create-db-backup
Now let’s complete the database upgrade, this can be run from any cell.
/opt/vmware/vcloud-director/bin/upgrade
You will be prompted with “Do you wish to upgrade the product now?” Enter Y to continue with the upgrade.
During the process it will ask if you have taken a backup of the database, to continue enter yes to continue here also.
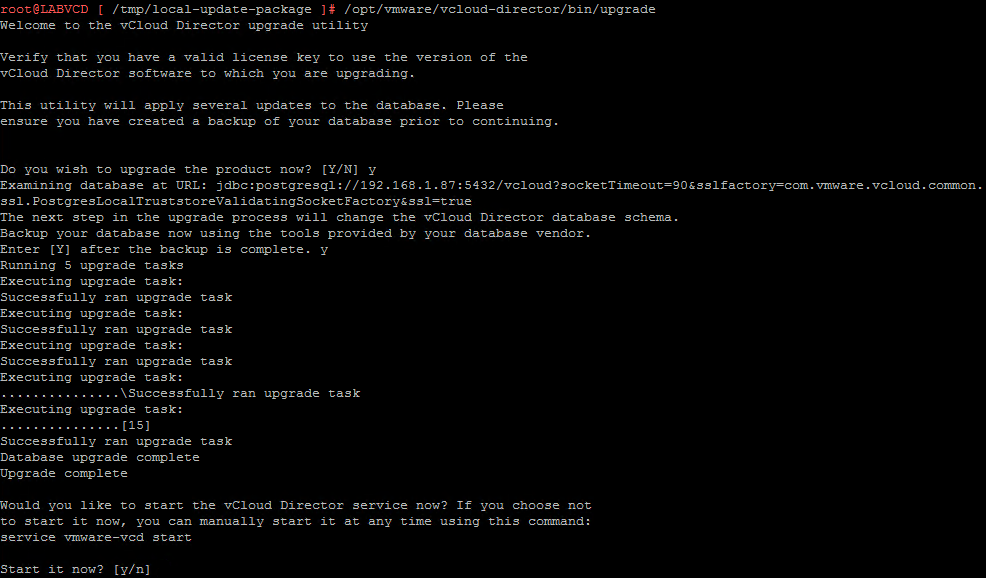
Once complete it will prompt you to start the cell, enter y to start the services
You will then need to restart each of the cells after the upgrade is complete, to do this run the following command,
shutdown -r now

Once the vCloud Director cell has rebooted you will then be able to login to your newly upgraded appliance.
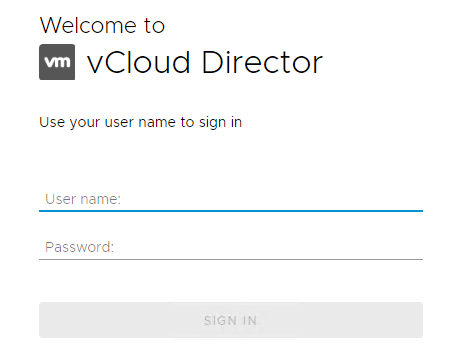
Then if you click on the drop down menu and select About you will see the newly upgraded version.
As always use the subscribe box above for new post notifications and follow me on twitter @steveonofaro
-
Veeam v10 – Linux Proxies have arrived
This year I was extremely fortunate to attend the Veeam Vanguard Summit in Prague. This event is held each year in this beautiful location and each member of the Vanguard Program is invited to attend. First off I have to start by thanking Rick Vanover, Nikola Pejkova and the entire Product Strategy and R&D Teams at Veeam for putting together this amazing event. I don’t know any other vendor that would give us this sort of access to not only the product itself but the key people that are responsible for its development.
It was really great to get a chance to meet everyone from Veeam and all of the other Vanguards from around the world. The group is filled with incredibly talented people and having the opportunity to get them all in one place made for some great content and discussion.
One of the great new additions in the upcoming release of Veeam Backup and Replication Version 10 is the announcement that Linux Proxies have arrived! This is great news for users as they now have an alternate option to just running a windows based proxy.

There are a few advantages here, using Linux means a smaller disk requirement and no Windows licensing cost for each of your proxy servers. The Windows licensing charge can really start to add up especially in larger environments that are not running data center licensing.
One of the questions I have heard asked a few times is will the Linux Proxies be released as a pre-built virtual appliance? The answer for this at the moment is no. Linux Proxies will be deployed and maintained much the same way as you would a Windows Proxy. Planned support is initially for Red Hat, Ubuntu and Debian and they will support Hot-Add mode only day one.
To test this out I have installed a few different flavours of Linux and all I have done on each is the base configuration and installed open-vm-tools. If you are deploying this in production as with any proxy deployment I would recommend you lock down the firewall to only the required ports. As this is in my lab I wanted to keep it simple to show how easy it is to get up and running.
For this example I deployed 4 VMs to act as Linux Proxy Servers. We have a Debian 9.4, RedHat 8, Ubuntu 19 and CentOS 7 server and they have each been added as proxies in VBR V10. Each VM was given 2 vCPU and 4GB of ram to keep things on an even playing field.
Let’s run through adding in the Debian server to VBR 10.
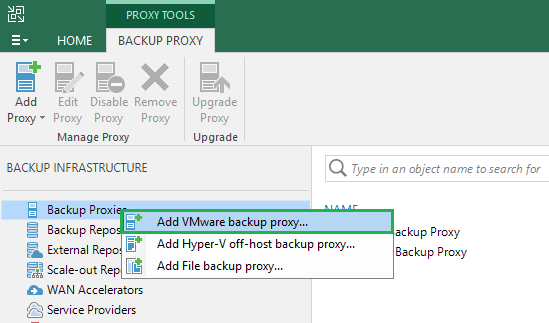
First select Backup Infrastructure, then right click Backup Proxies and select Add VMware backup proxy.
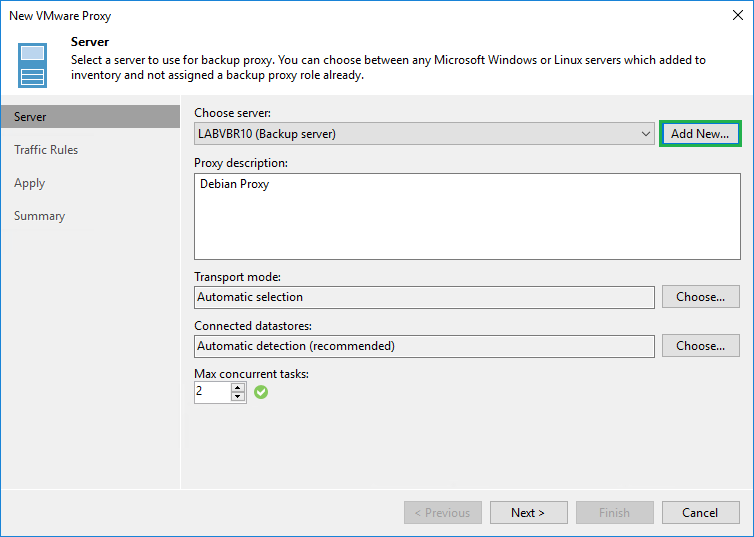
Then click Add New
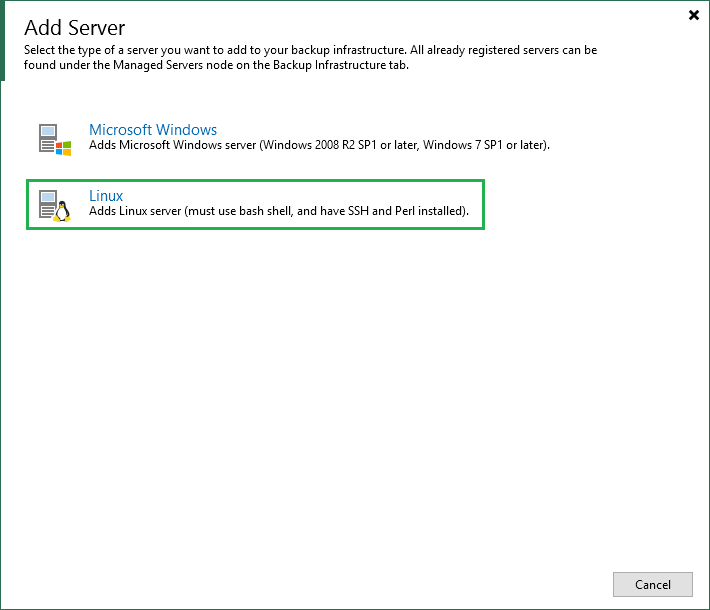
You will now notice the new option to add a Linux Server. Select Linux to continue.
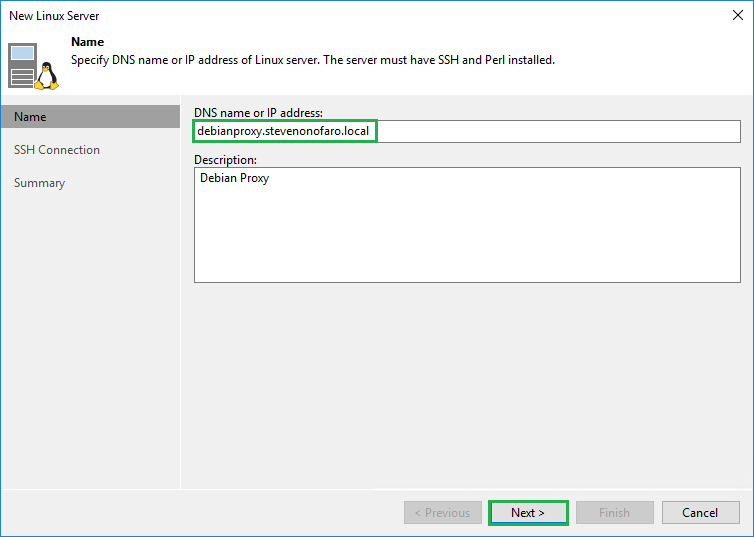
Then enter the DNS name or the IP of the new Linux VM and add a description. Then click Next.
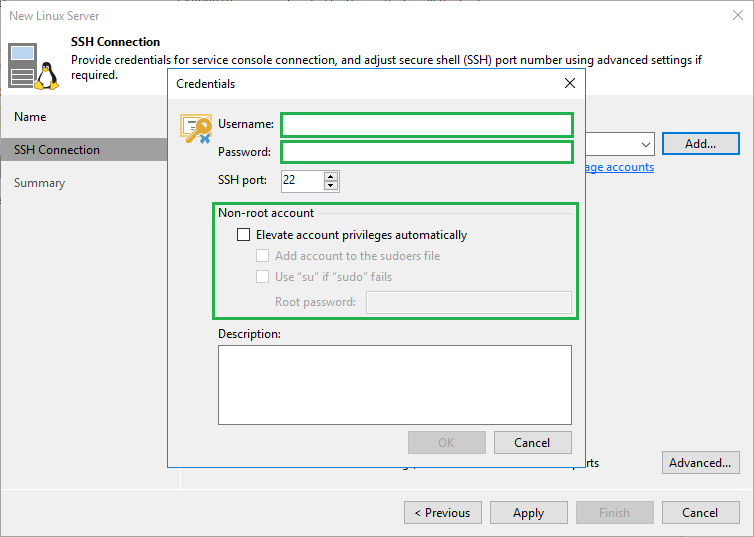
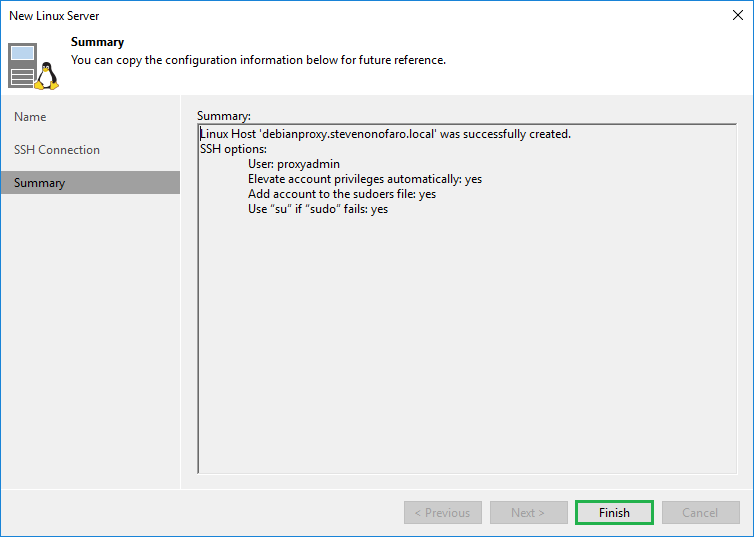
On the SSH Connection screen click on Add to enter the credentials you need to connect to the Linux Server. You also have the option here to select Elevate account privileges automatically, Add account to the sudoers file, Use “su” if “sudo” fails and enter a root password. Once you have entered the required information click OK.
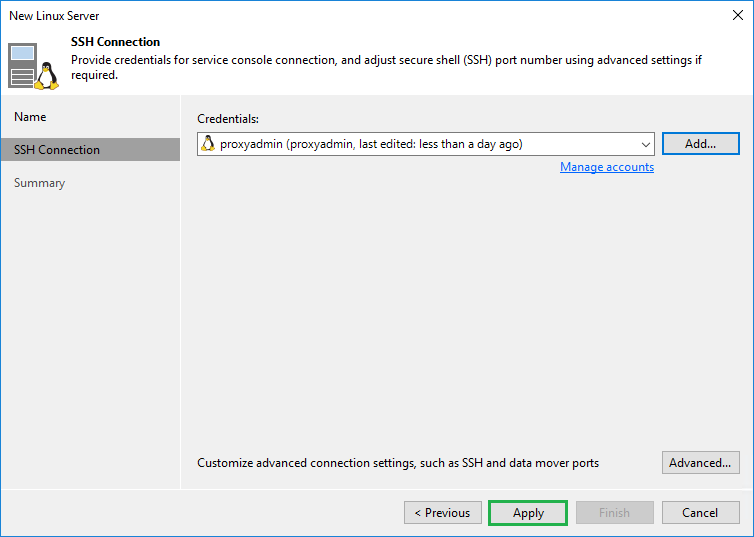
Then click Apply
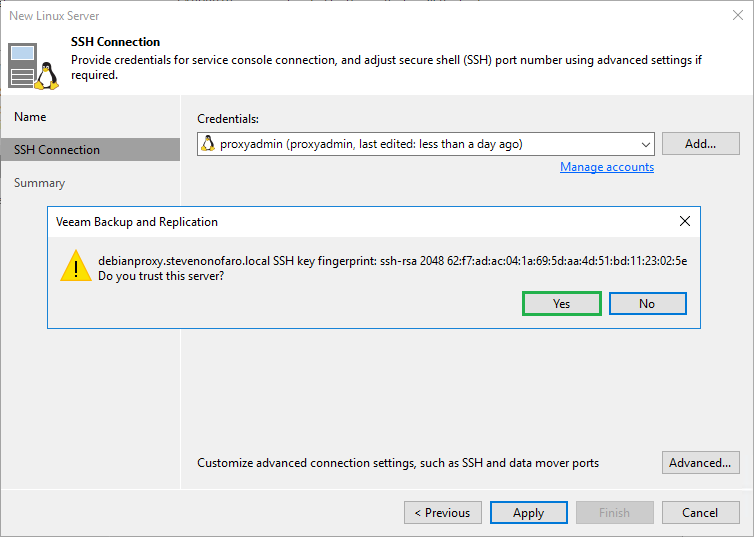
Select Yes on the SSH key fingerprint prompt.
Then select Finish.
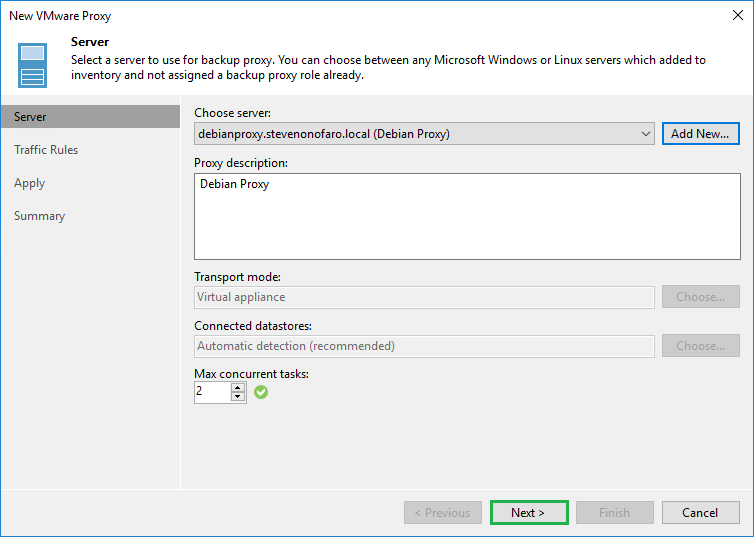
Update the description and depending on the current sizing of your proxy make sure the Max concurrent tasks will meet your requirements. Click Next.
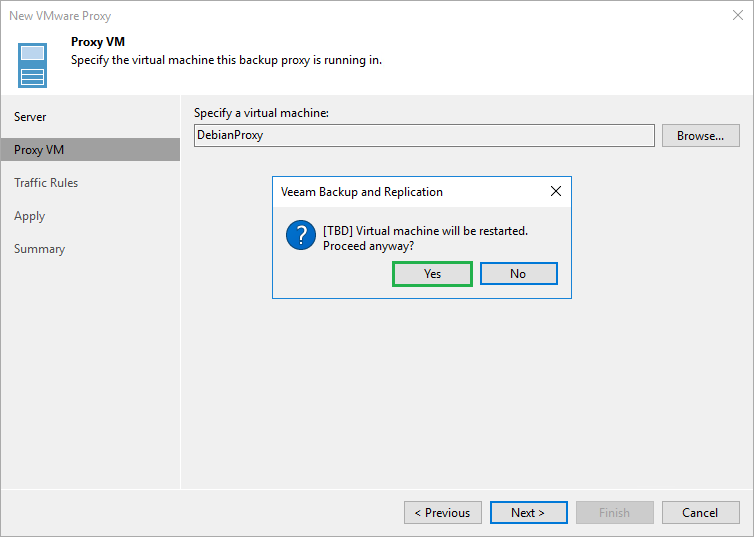
You will then be prompted to select the VM that this backup proxy will be running on. Click Browse and locate the VM.

Click Yes on the prompt that notifies you that the Virtual machine will be restarted.
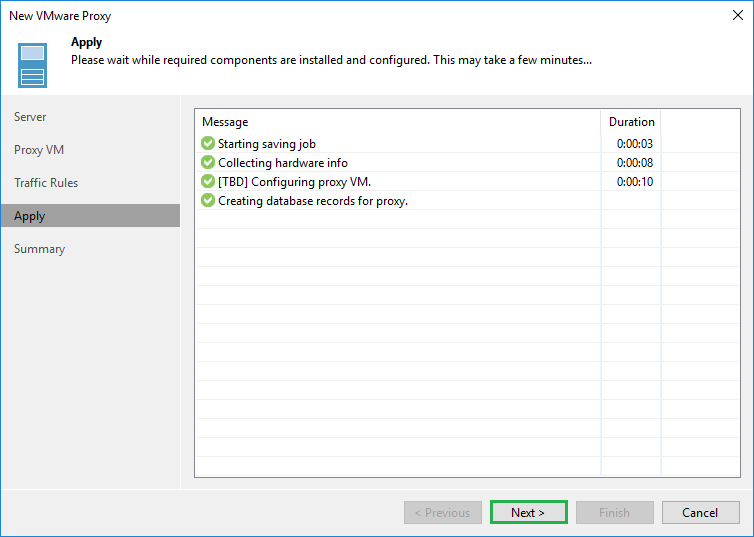
Then click Apply
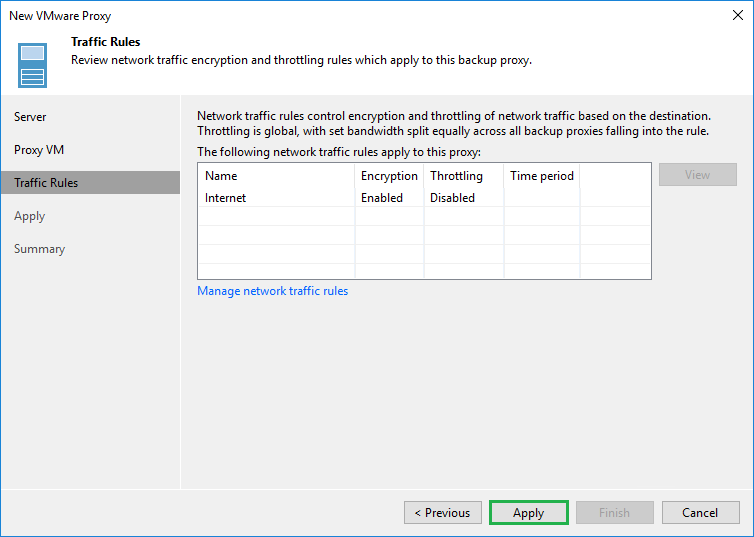
Once complete click Next
Then click Finish
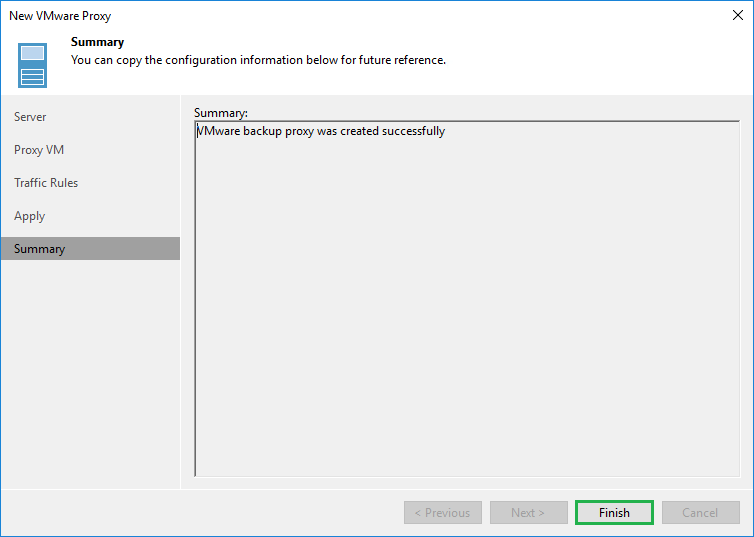
You will then see the newly created Linux Proxy added below.

I then repeated this same process and added in the Redhat, CentOS and Ubuntu Linux Servers. Each of the different Linux Proxies can been seen below,

I then setup 4 backup jobs, each backing up the same VM in my lab and I manually selected a different proxy for each job.
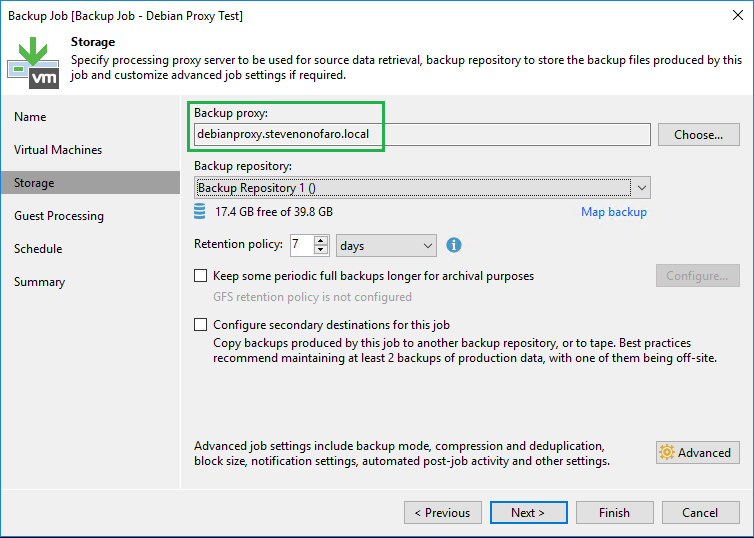
The Proxy will initially be set to Automatic Selection under the storage section of the job. From here you can click Choose and select the preferred server.
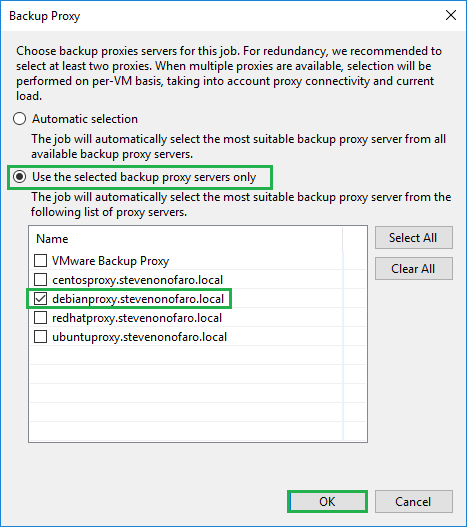
The Backup Proxy selected will then be displayed. You may even notice something else that has changed here but we will leave that for a later post.
Below is a list of the newly created jobs. Now it’s time to run each one individually and see how they perform.

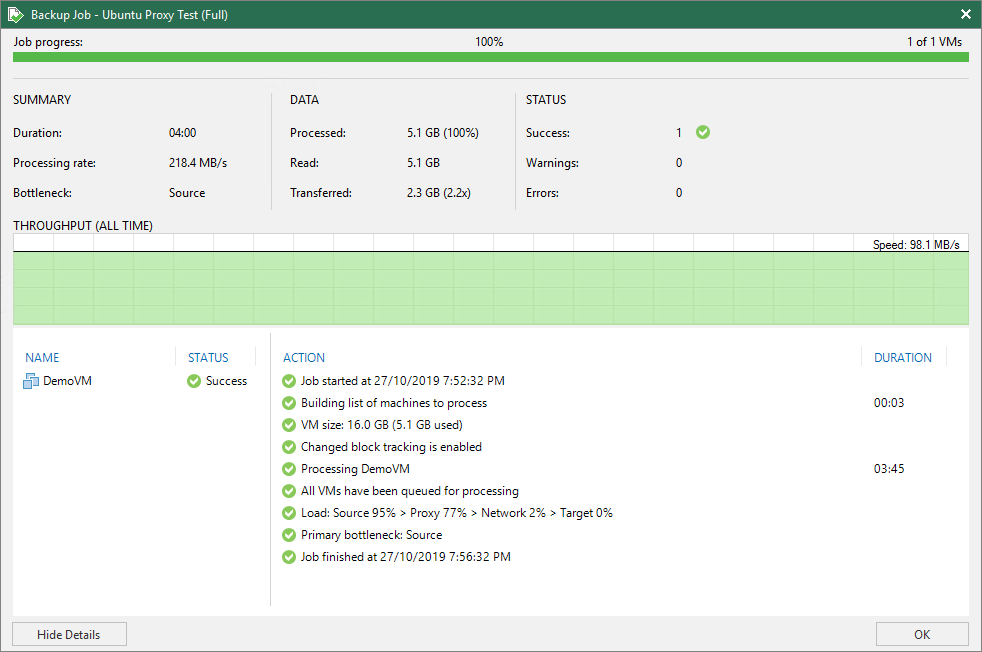
Here are the results in no particular order, each job was run as a Full on a newly created VM.
Ubuntu 19 Proxy Results below,
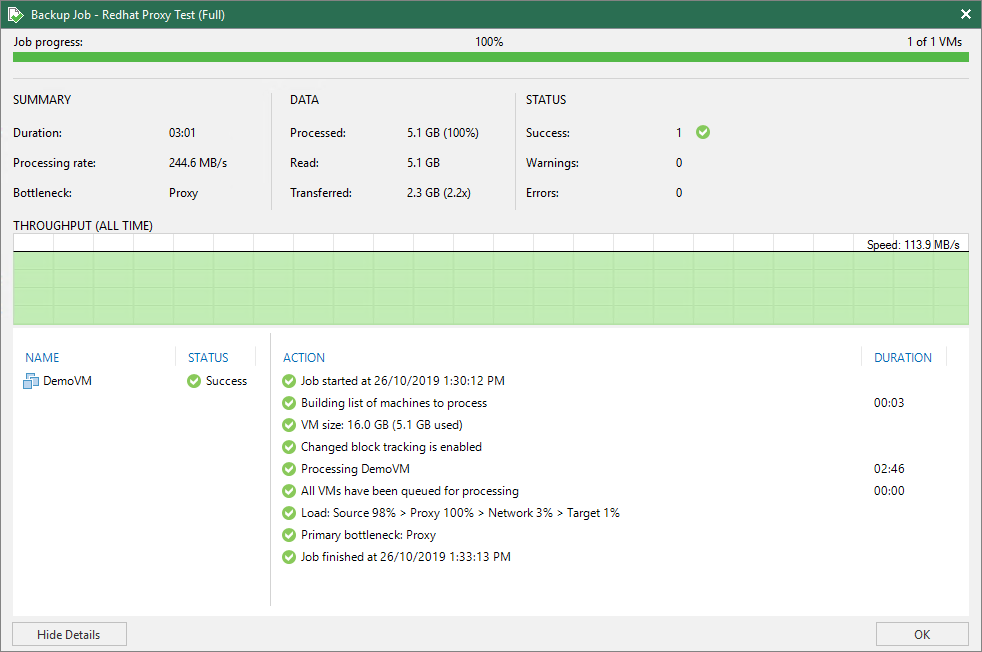
Redhat 8 Proxy Results below,
CentOS 7 Proxy Results below,

Debian 9.4 Proxy Results below,
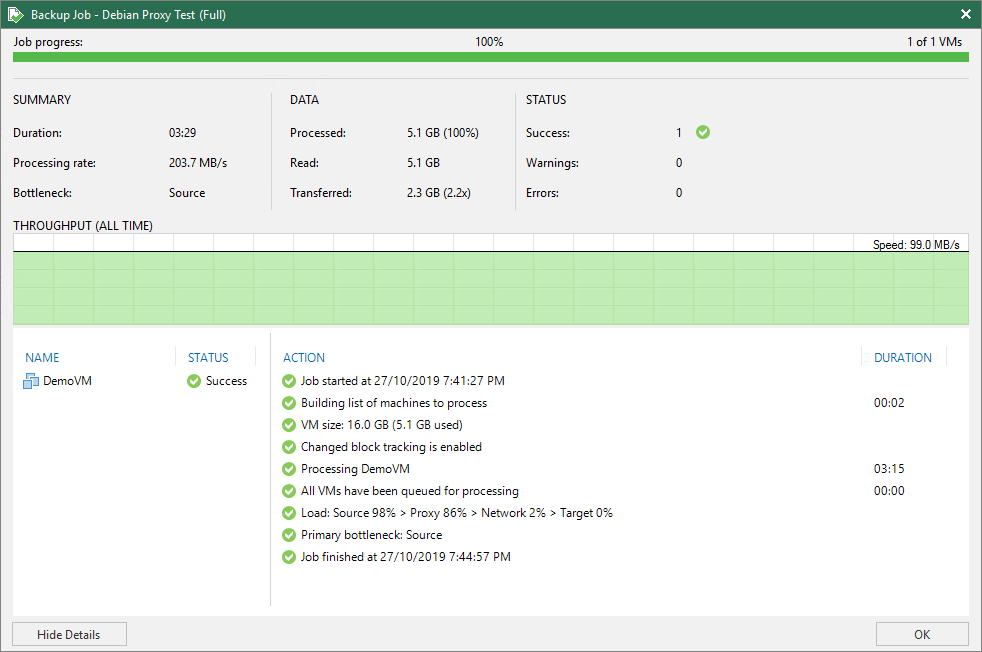
The results only varied a little and I did stagger the time of day at which I ran some of the backup tests. The processing rate and throughput however was fairly consistent and in my lab environment CentOS 7 seemed to perform slightly better.
While we are on the topic of proxies I wanted to highlight this project by Anthony Spiteri – Project Otosukeru
Anthony has put together a way to have Veeam Proxies automatically deployed and configured for ephemeral use by Veeam Backup & Replication jobs. It has the ability to deploy Veeam Backup Proxy VMs to vSphere and configure them in Veeam Backup & Replication and also the ability to remove the configuration and destroy the VMs.
A pre and post script can be configured within the Veeam Job and can be run every time the job is executed. It is a great concept as Proxy VMs tend to just sit there idle during the day, why not free up resources during that time and only deploy them when they are required.
Well that’s enough from me! Keep your eyes open for more V10 highlights in the coming weeks as the Vanguards test out all of the latest features!
@steveonofaro
-
Deploying Cisco HyperFlex Edge Cluster via Intersight over 4G – Part 1
When I heard Cisco were releasing Hyperflex Edge Nodes that do not require the use of fabric interconnects I was very keen to take them for a test drive. Without the fabric interconnects there is no UCS Manager so the configuration is done using Cisco Intersight. Another plus is you no longer have to deploy the traditional minimum 3-Node cluster, you can deploy them as a 2-Node cluster which is perfect for edge locations.

Cisco HyperFlex Edge 2-Node clusters requires the use of Cisco Intersight for initial deployment and ongoing operations as it acts as the cloud witness.

Intersight is Cisco’s software as a service management platform and comes in two license editions,
Base Edition
- Free version, supports Cisco UCS and HyperFlex
- Global monitoring of health and inventory status
- Integration with Cisco TAC support
- Customized dashboards
- Tagging and basic search
- Context launch of element managers
Essentials Edition
- Includes all the functionality of the Base Edition
- Contains policy-based configuration with service profiles
- New virtual appliance deployment option
- Has remote management and vKVM
- Incorporates firmware management with scheduled updates
- Consists of HCL compliance check and upgrade recommendations
- Supports the OpenAPI standard
As I will be covering off how to deploy a 2 Node Edge Cluster from Intersight I will be using the licensed version which is Essentials Edition.
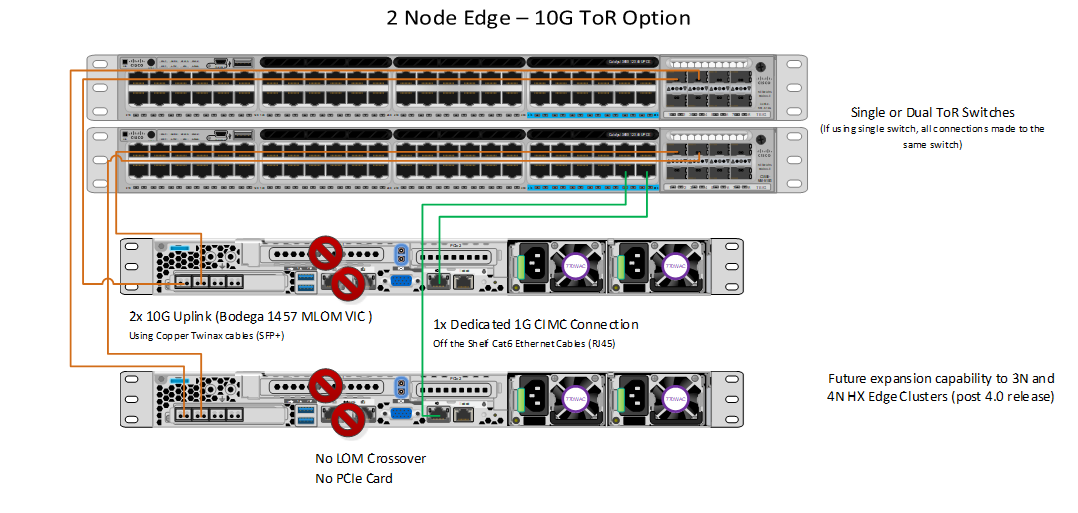
Below are some examples of the cabling requirements of a Hyperflex 2 Node Edge Cluster. You can also deploy this using a single switch but for extra redundancy I always go with two.
The first is the 1 Gigabit Ethernet top of rack option.
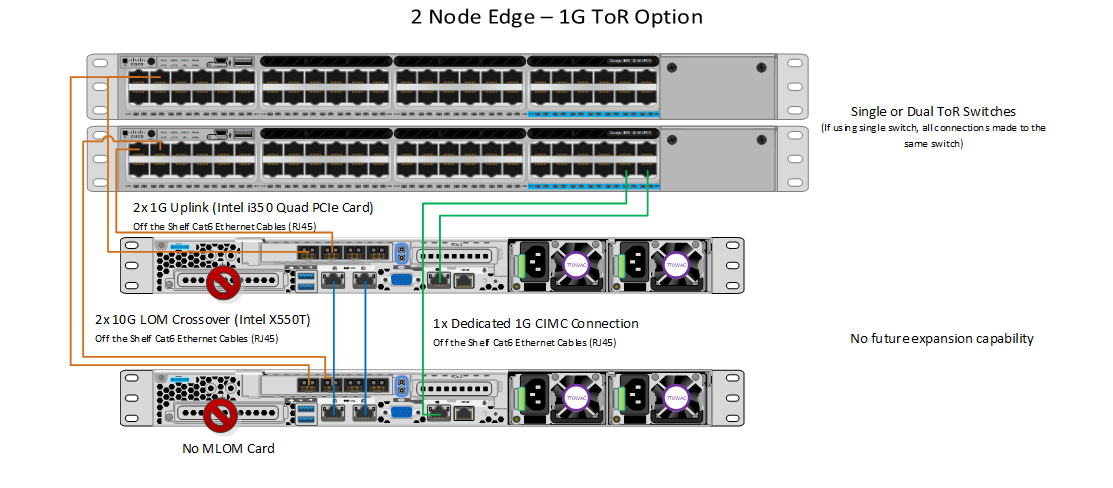
The second is the 10 Gigabit Ethernet top of rack option. For this deployment I have chosen to go with the 10GE option.
The next thing we need to do is configure the CIMC settings on each of the new nodes. To do this connect a monitor, keyboard and mouse to the server and follow the steps below,
1- Power the server on and when prompted for boot options press F8 to enter the IMC Config Utility.
2 – Update the default password (Cisco123) with your new password.
3 – Next set the IP Address, check IPV4, uncheck DHCP enabled and enter values for CIMC IP, Subnet Mask an Gateway.
4 – For the VLAN set it to enabled and enter the VLAN ID if you are using trunk ports. Leave it blank if you are using access ports.
5 – Press F10 to save your settings and press ESC to exit the utility.
6 – Open your web browser and login to the CIMC page using the IP Address specified.
7 – Login with the newly set credentials and update any other settings you require.
8 – Repeat this process on each of the Hyperflex Edge Nodes.
For this example I wanted to treat it like a proper Remote Edge Cluster, it doesnt have to just be used for this purpose but I wanted to demonstrate how easy it is to setup. I don’t even have a proper internet connection at this location which is needed to connect to the Cisco Intersight Servers.
All I have is two 10G top of rack switches, a simple 4G Router connected to the switches and two new Hyperflex Edge Nodes. We just need to be able to resolve svc.intersight.com and allow outbound connections on port 443.
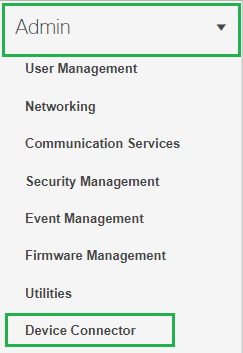
Log into the CIMC on each of the Servers and from the menu on the left hand side expand Admin and then select Device Connector
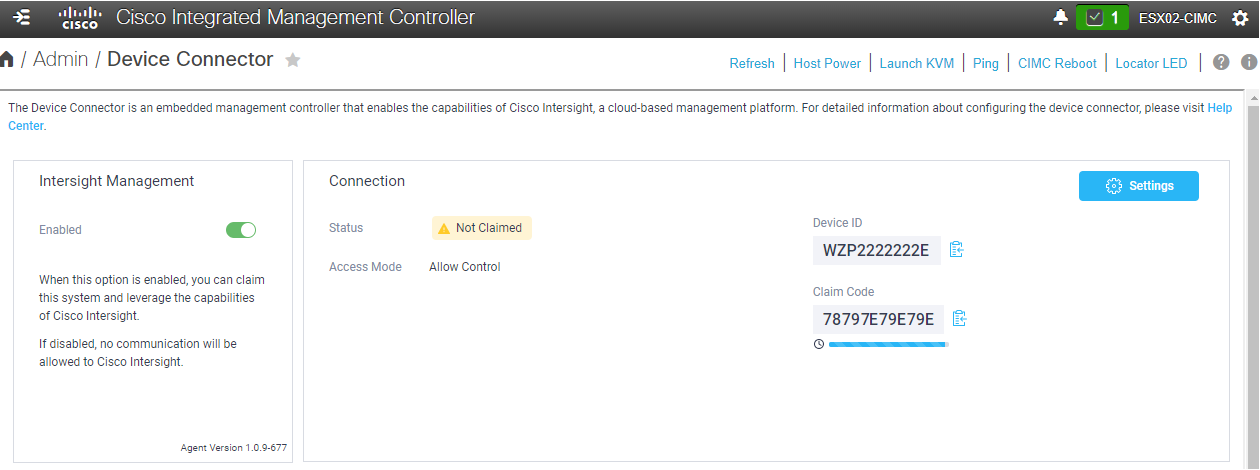
Next make sure Intersight Management is set to Enabled. Then copy the Device ID and the Claim Code into notepad ready for the following step.
Note – I have modified all of the below device ID’s and IP addresses to generic entries.
Now it’s time to login to Cisco Intersight. If you haven’t already created an account now is probably a pretty good time to do so – https://intersight.com/
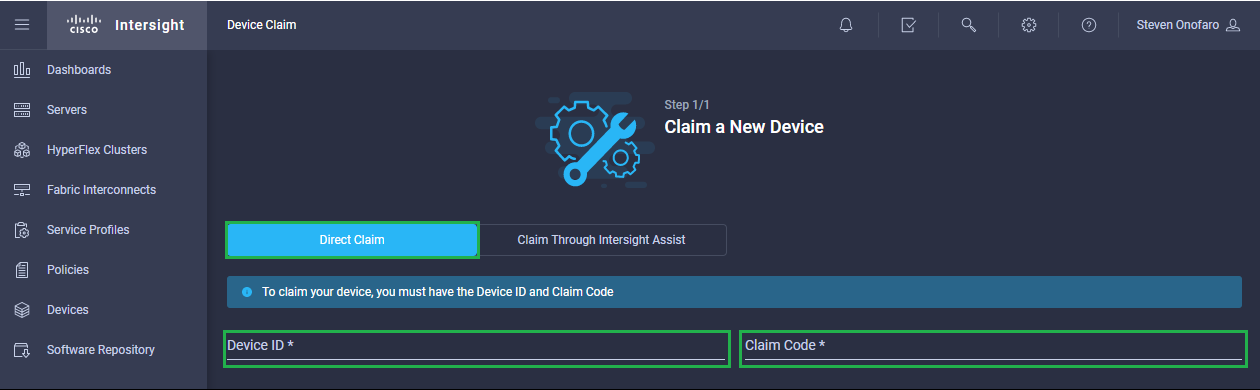
Once logged in select Devices from the left hand menu and then click Claim a New Device
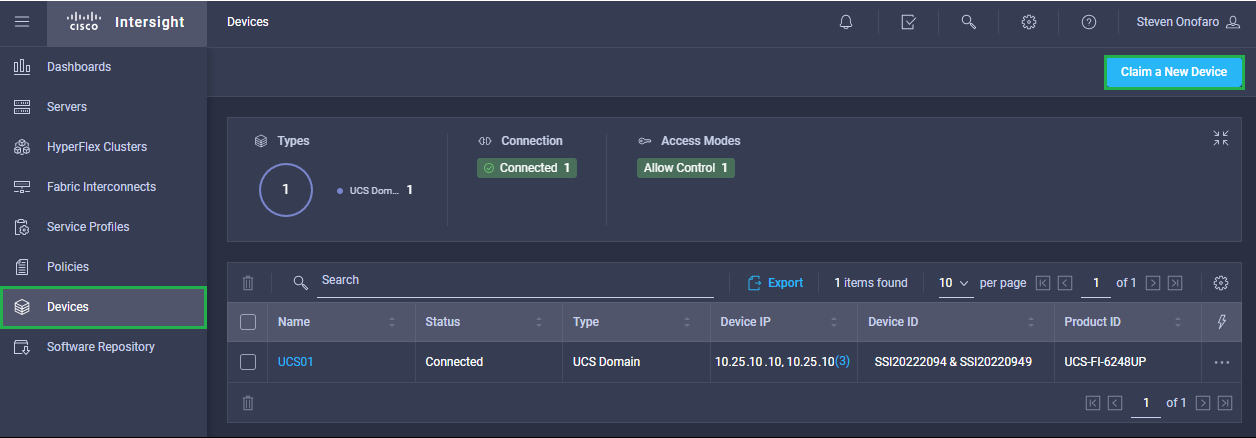
Now open that notepad file where you copied the Device ID and the Claim Code and paste each in the corresponding boxes below and click the Claim button in the bottom right hand corner of the screen
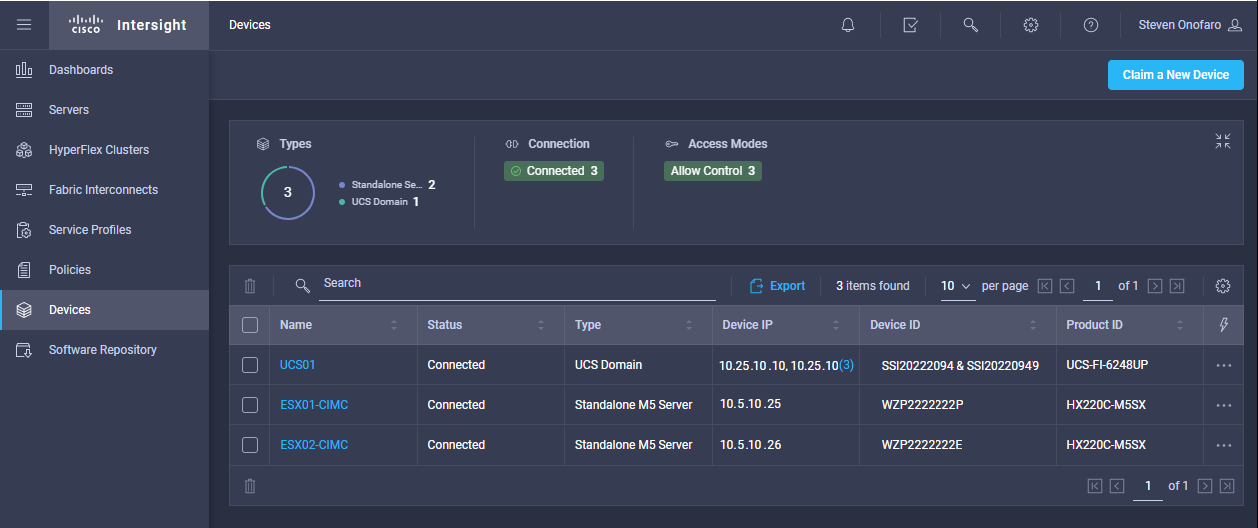
Add each of your servers in until they are all listed on the Devices screen
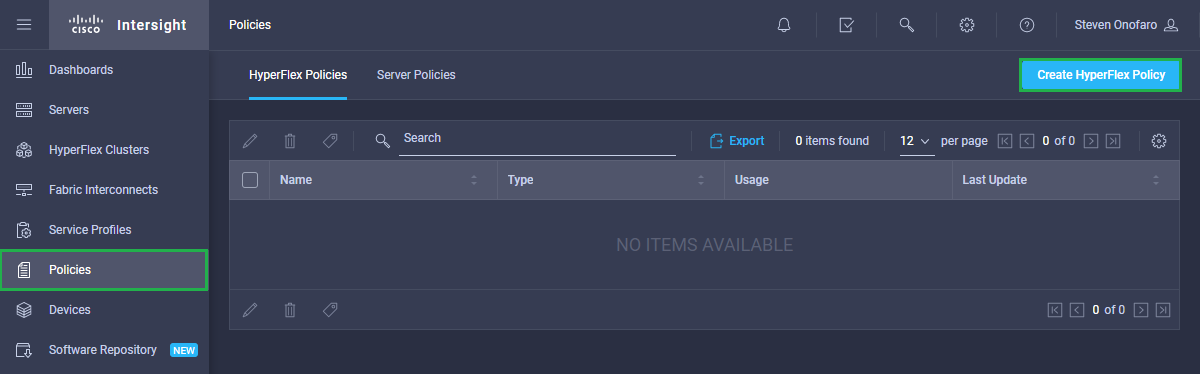
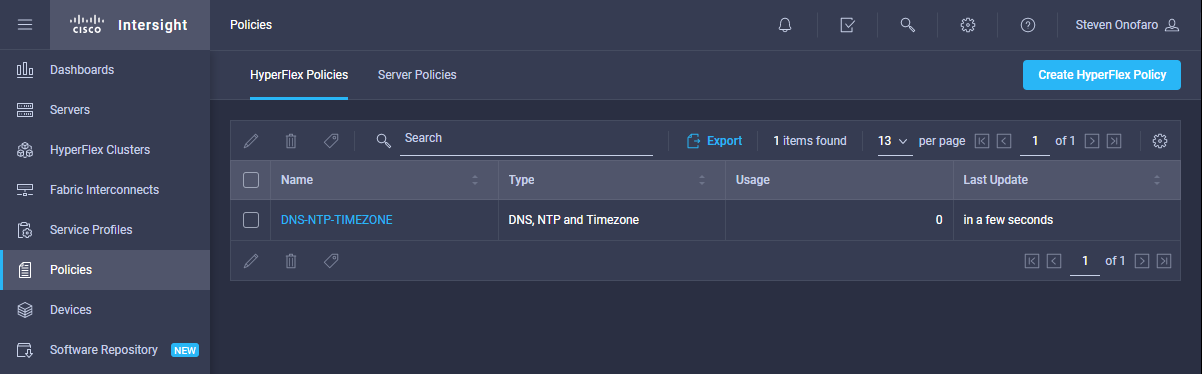
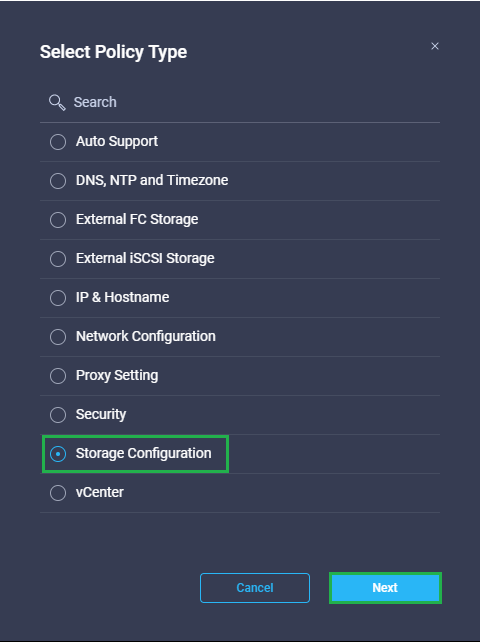
Then select Policies from the left hand menu and then click Create HyperFlex Policy. We are going to create a New Hyperflex Policy that we will use to apply to the 2 Node Edge Cluster
Now we need to select the Policy Type that we are going to create. Select DNS, NTP and Timezone and click Next
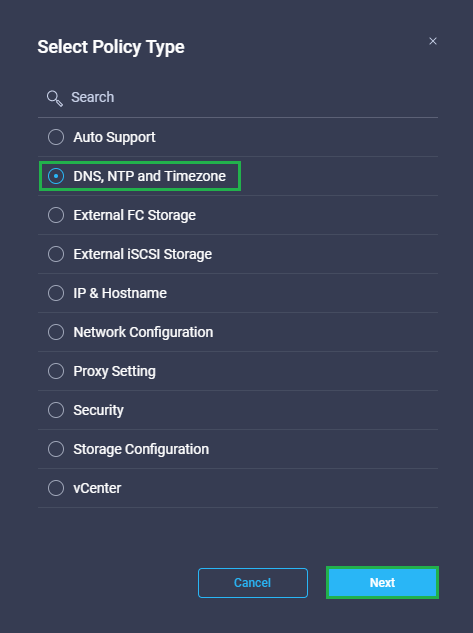
DNS, NTP, and Timezone Policy—Configures DNS, NTP, and Timezone on all servers.
Enter a Name for the policy and click Next

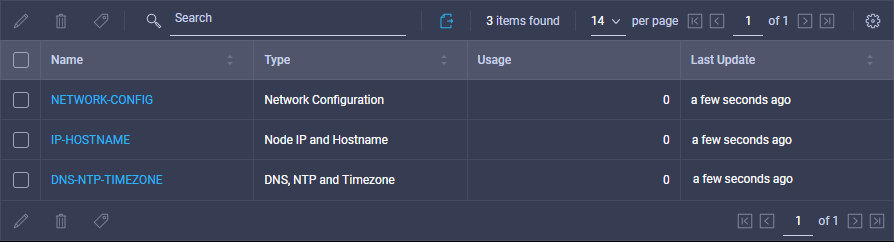
Select your Timezone from the drop down menu, then set your DNS Suffix. Then enter your preferred DNS and NTP Servers. Once complete click Create
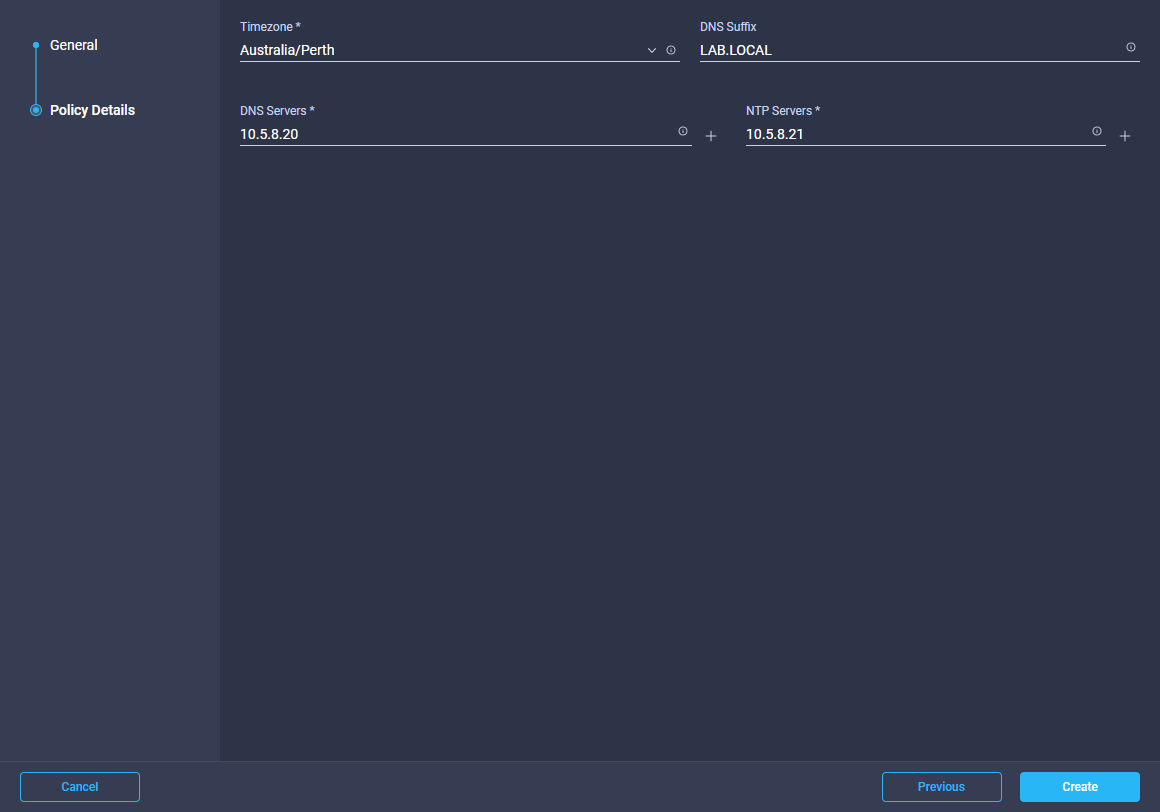
The newly created policy will now be displayed
Then click on Create HyperFlex Policy and select IP & Hostname and click Next
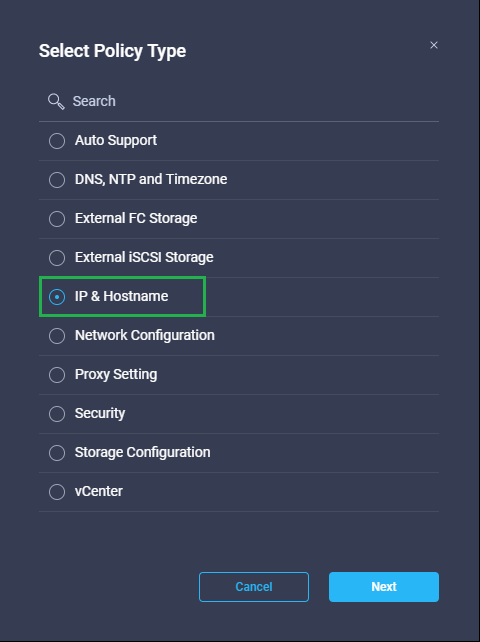
IP & Hostname Policy—Configures the management IP pool.
Then enter a Name and click Next
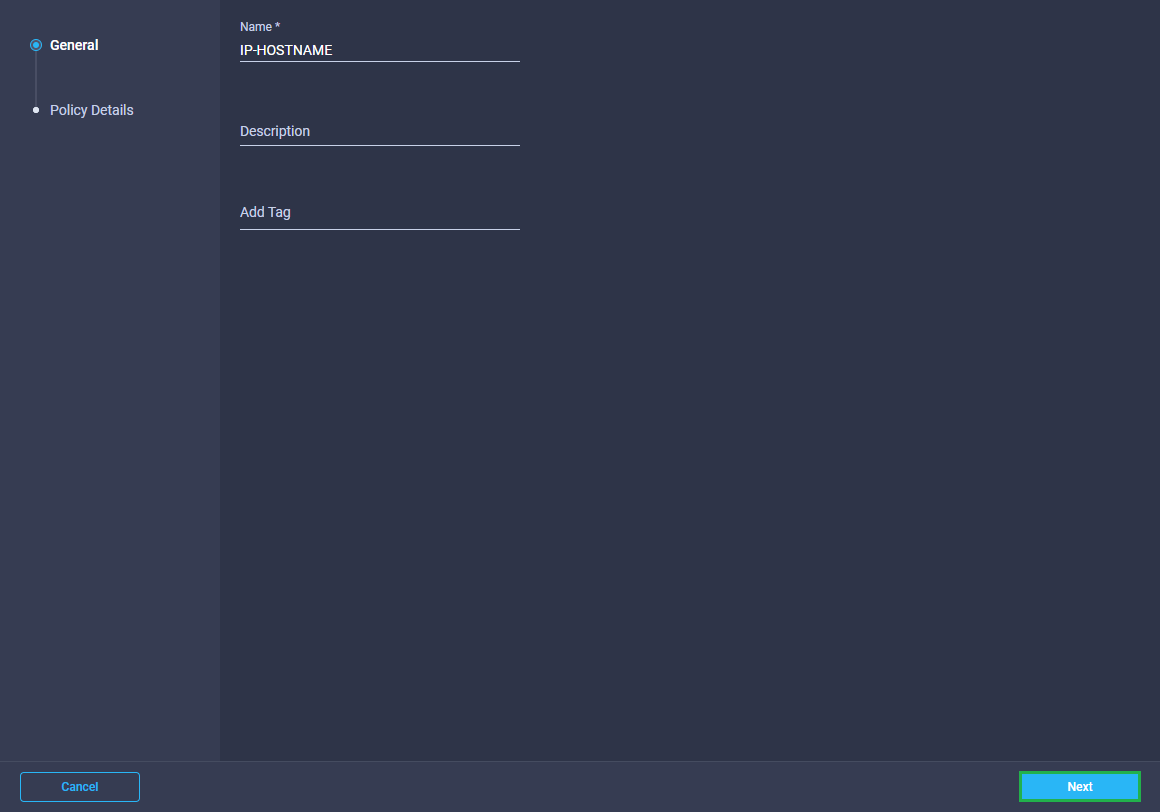
Next we need to enter the Hostname Prefix and all of the Management IP’s that will be used to configured the 2 node HyperFlex Edge Cluster. Once complete click Create

The newly created policy will be displayed alongside the one we created earlier
Then click on Create HyperFlex Policy and select Network Configuration and click Next
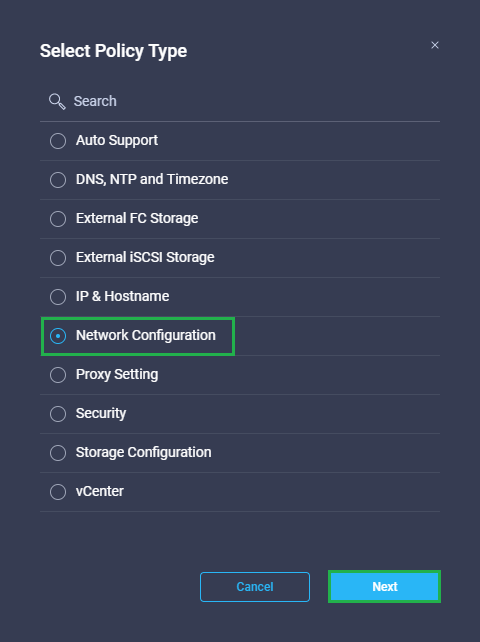
Network Configuration Policy—Configures the Management VLAN ID, MAC Prefix, Uplink Speed and Jumbo Frames for the Edge clusters.
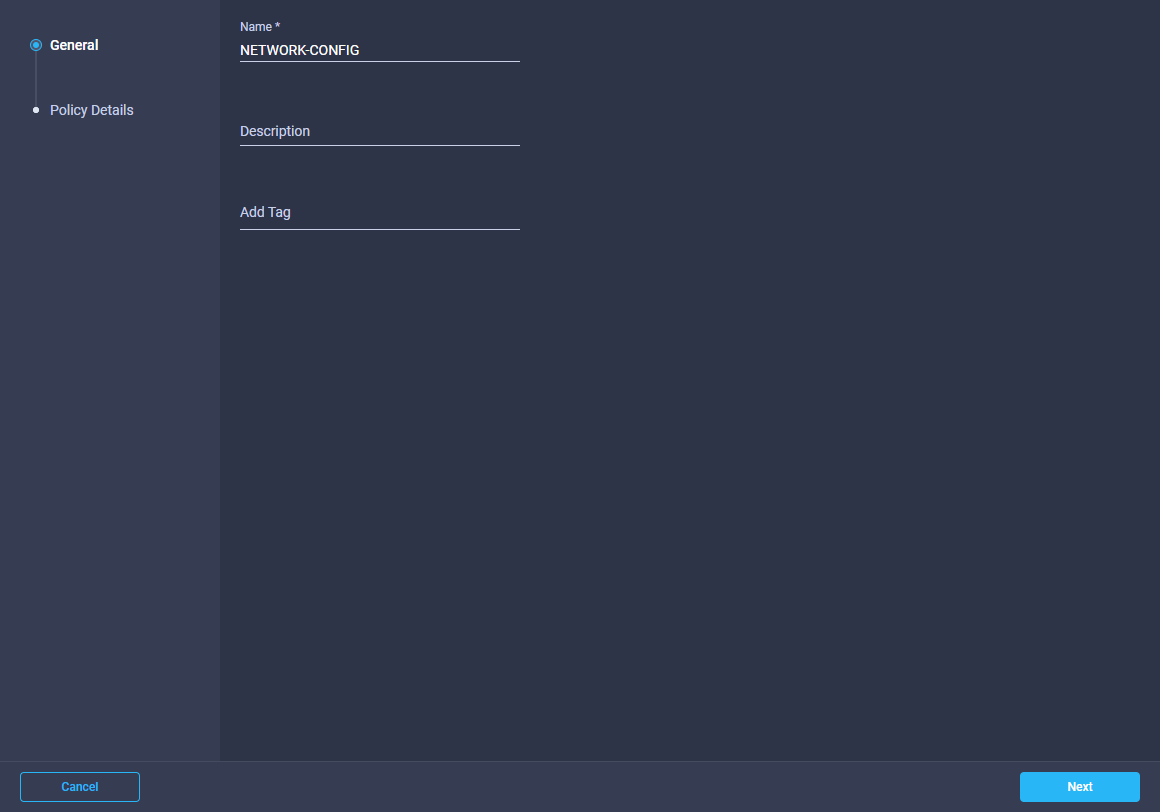
Enter a Name for the policy and click Next
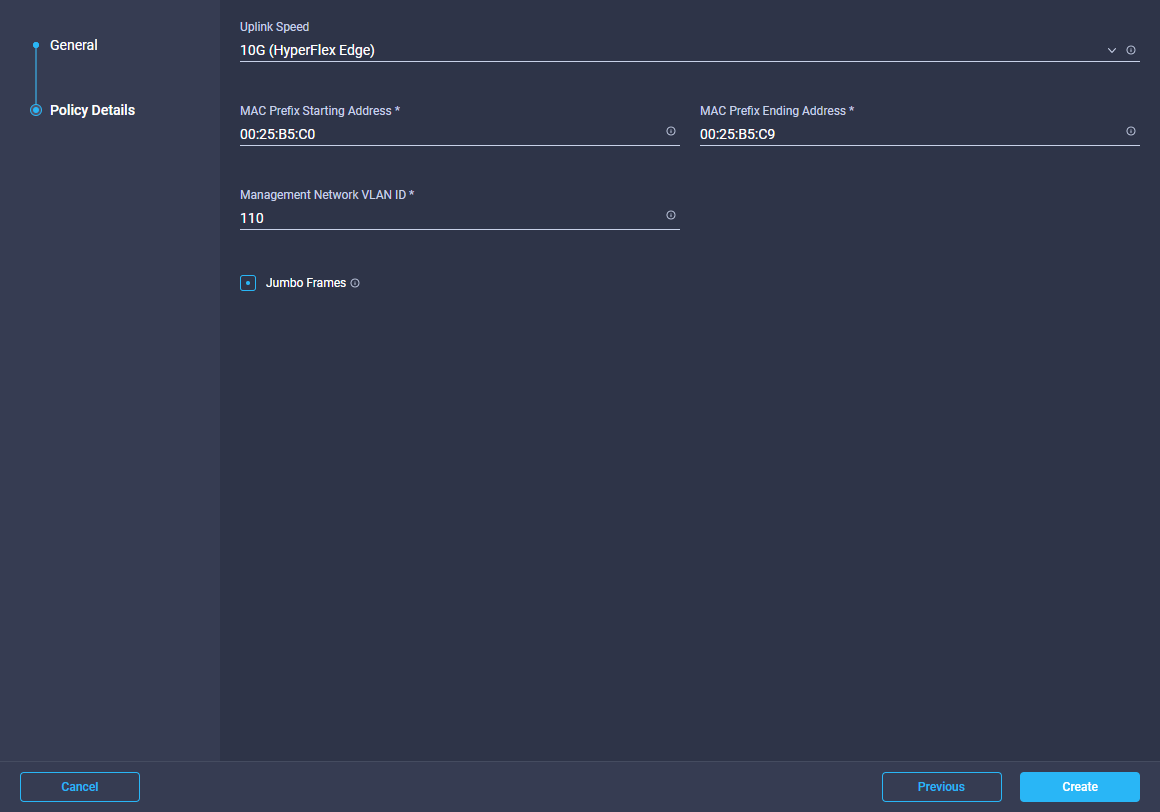
Next select the uplink speed you are going to use, you can select 10G or 1G from the drop down menu. I have put a diagram for each configuration at the start of the post. For this install I will be using 10G.
Then enter the MAC Prefix you would like to use and enter your Management Network VLAN. Also Jumbo frames is always enabled when you select 10G for a 2 Node Edge setup. Once complete click Create
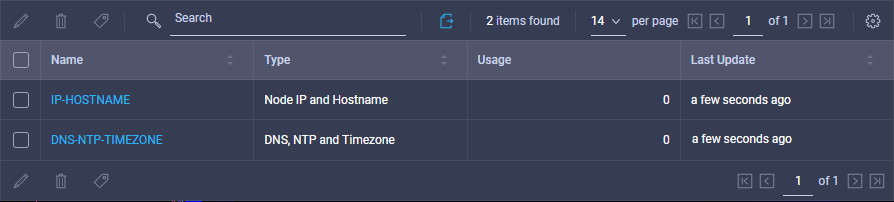
The newly created policy will be displayed alongside the others we created earlier. Starting to see a pattern forming here?
Then click on Create HyperFlex Policy and select Security and click Next
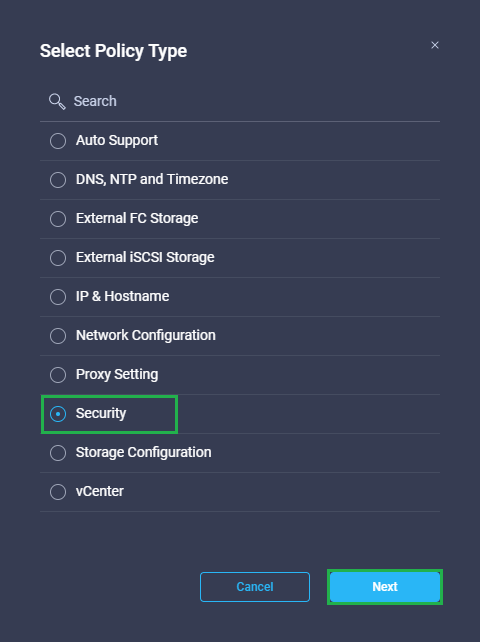
Security Policy – Configures ESXi and Controller VM password for the HyperFlex Edge Cluster.
Enter a Name for the policy and click Next

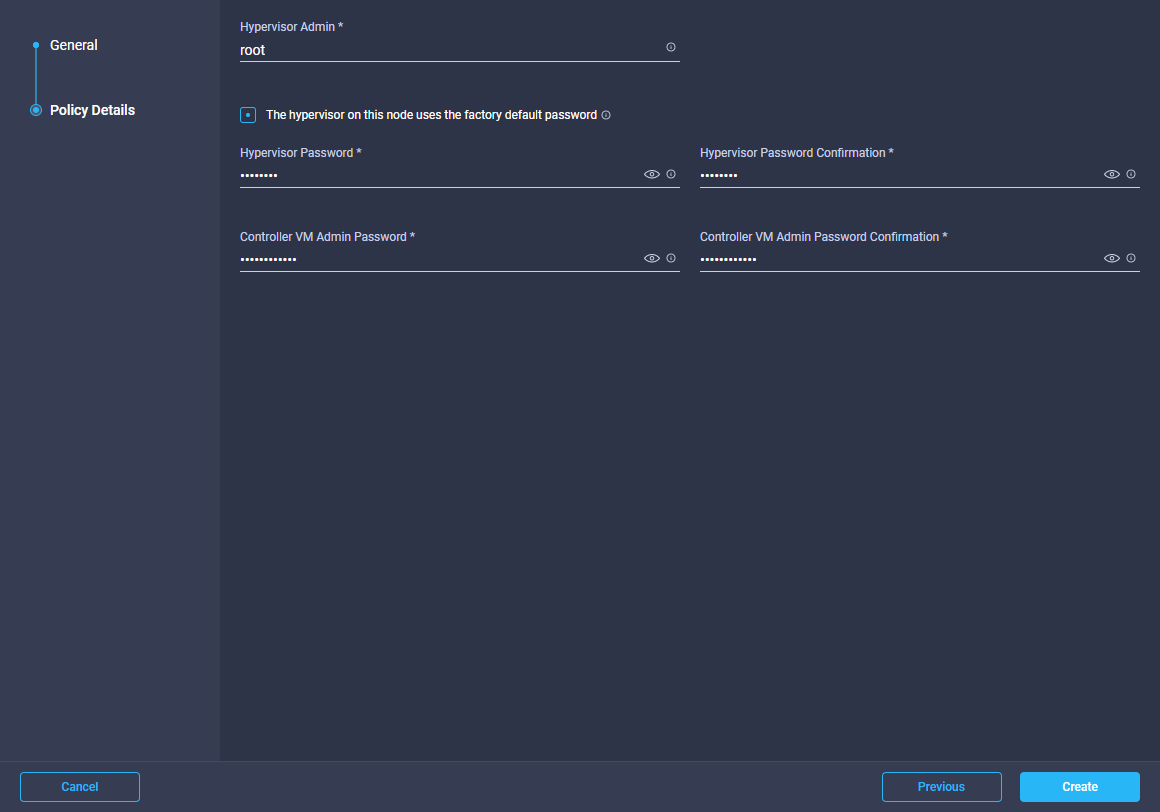
Now we need to enter the Password we would like to use for the Hypervisor and the Controller VM Admin. Once you have entered these click Create
The newly created policy will be displayed alongside the others we created earlier
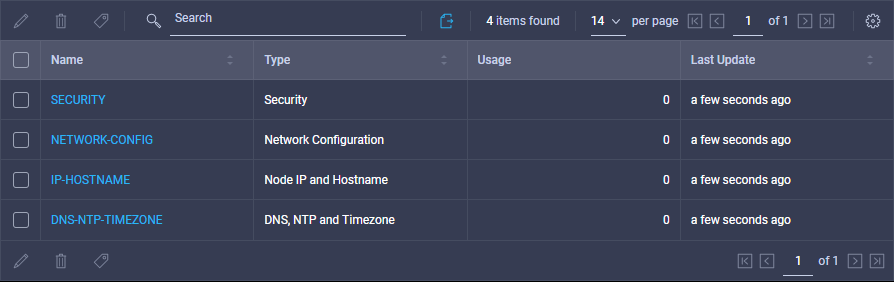
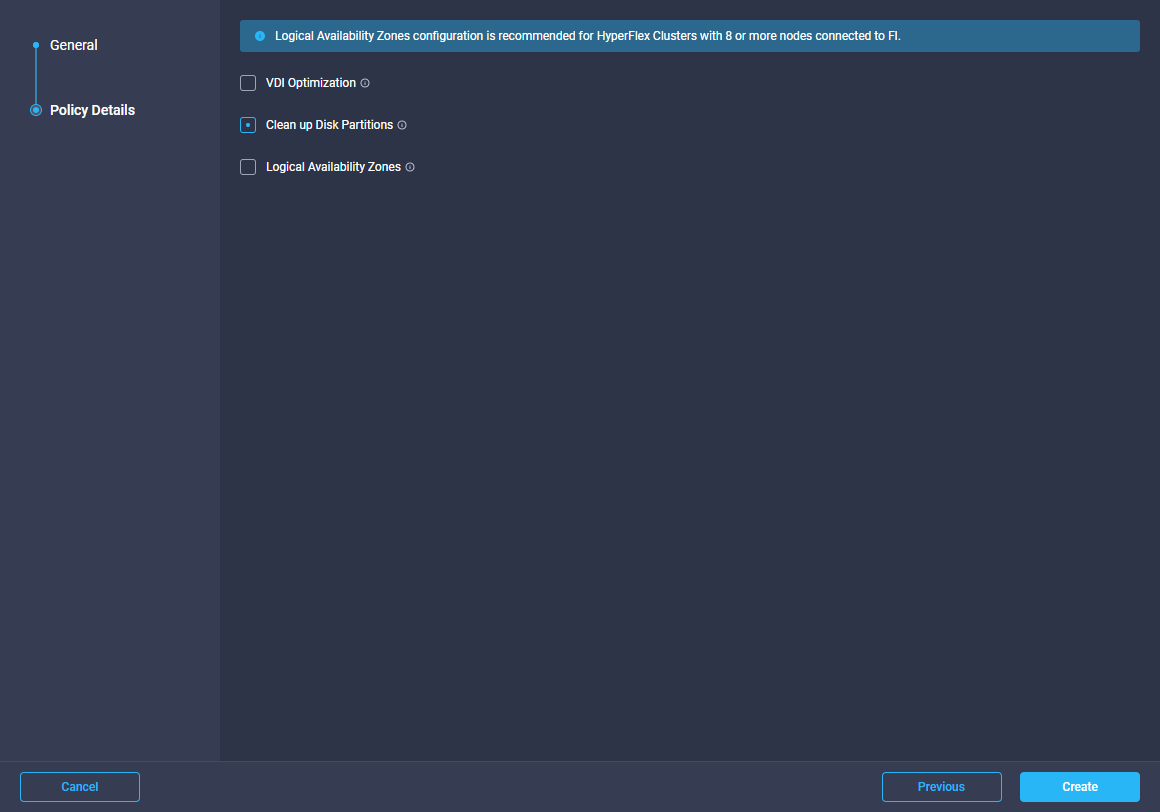
Then click on Create HyperFlex Policy and select Storage Configuration and click Next
Storage Configuration Policy – Options for VDI Optimization (for hybrid HyperFlex systems) and Disk Partitions clean up.
Enter a Name for the policy and click Next

Select Clean up Disk Partitions and click Create
The newly created policy will be displayed

As this installation is an Edge Cluster I don’t have any other infrastructure in this location that I could be running VMs on. So because of that I won’t be creating a vCenter policy to add to this service profile. If you did have a vCenter server already in the location you are deploying your Edge Cluster then you can add the Policy in here.
I will cover how to connect the nodes to vCenter manually in the next post as it shows you can build everything from the ground up out at a remote site.
That brings us to the end of Part 1. In Part 2 I will cover off how to use the Policies to create a Hyperflex Cluster Profile and apply it to the 2-Node Edge.
-
vCloud Tenant file restores via Veeam Enterprise Manager when UAC is enabled
I really like the way Enterprise Manager integrates with vCloud Director and provides tenants with an agentless way to backup and restore VMs and files. At the same time it provides a simple self-service portal that we can now integrate directly into vCloud Director with a custom plugin.
When a tenant attempts to restore a file back to a VM within vCloud Director, Veeam will first try and connect to the VM from the mount server via the network which in this case will not work as there is no direct connectivity (for good reason). Creating a connection between the VCD Org Networks and the Backup Management Network isn’t really an option here so instead it will then use the vSphere Guest Interaction API to complete the restore. Up to vSphere 6.0 this was referred to as VMware VIX API but from vSphere 6.5 it is now referred to as VMware vSphere Guest Interaction API.
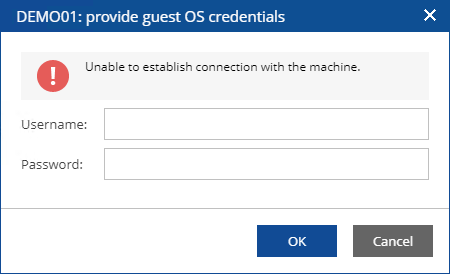
But what do we do if a tenant calls up and says hey I keep getting an error when I restore files back to my VMs, it keeps saying Unable to establish connection with the machine.
Let’s explore a couple of ways to help them resolve their issue.
When performing a file level restore you do need to provide either the built in local administrator account of the VM or if the VM is joined to a domain then the domain administrator account. The error we are seeing here is being caused by UAC – User Account Control being enabled. In a lot of companies this may be pushed out via group policy or it might just be enabled on the server you are trying to restore some files too.
One option is you can request the group policy be changed so that you can then disable UAC on the VM. More than likely the response to this request will be no.
If it’s not currently set via group policy but it is still enabled you can just disable it yourself but you then need to restart the server for it to take effect which in most cases isn’t ideal.
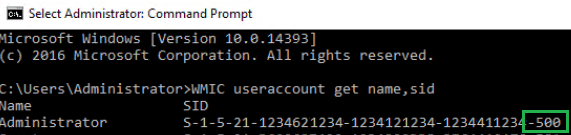
So where does that leave us.. Well first you can check to ensure you are using the actual built-in administrator account by opening an elevated command prompt and entering the following command – WMIC useraccount get name,sid
Make sure the SID ends in -500 to ensure that it is the built-in account
Now the built-in administrator accounts are supposed to be exempt from UAC so if you were able to just disable UAC you can test again and it should just work.
If you were informed by a polite sysadmin that there is no chance they are going to let you disable UAC you have one other option available. The best part about this approach is that it doesn’t require a reboot.
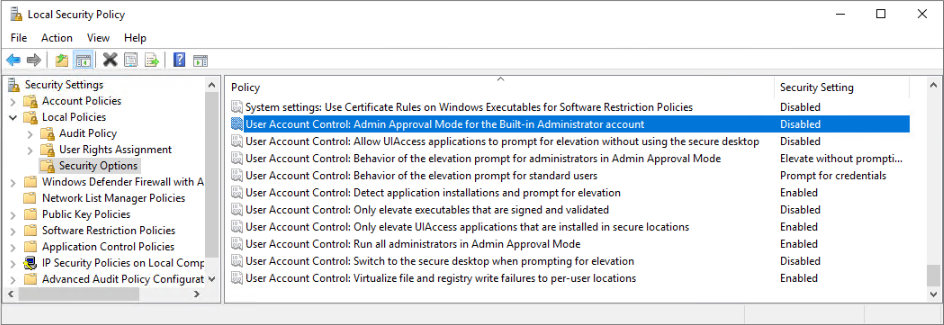
Open the Local Security Policy on the server and then expand Local Policies, then expand Security Options. There will be a policy there called “User Account Control: Admin Approval Mode for the Build-in Administrator account“, set this policy to Disabled.
You can always re-enable this policy if need be after the file restore is complete or you can leave it disabled. Best part is no reboot required.
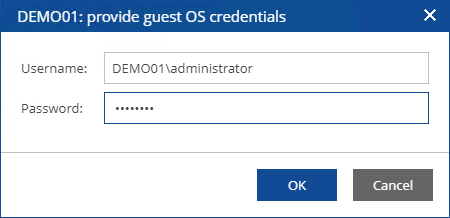
Then try to restore your file again and when prompted enter your Administrator credentials.
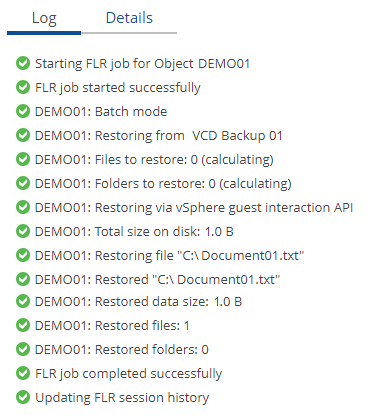
There you go, file restore completed successfully.
-
Subscribe
Subscribed
Already have a WordPress.com account? Log in now.
