-
The snapshot creation on CBT enabled VM fails with error Failed in vmreparent vmkfstools clone1
I came across an interesting issue the other day after deploying some infrastructure at a new site. I had deployed a new Hyperflex Cluster and was doing some testing with HX version 3.5(2e). After migrating some test VMs over to this new cluster I configured the backups to use HX Snapshots and kicked off a test job.
The job started as per normal but when it attempted to create the HX Snapshot it failed and then switched over to creating a VM Snapshot instead.

The backup still completed fine but not using the method in which I had intended.
After looking into the issue from the vSphere Web Client I noticed the following error,
A snapshot operation cannot be performed.
Result: Failed in vm_reparent vmkfstools clone1 – out_vmkfstools_clone1: 255 clone_vmdk_path1: It then referenced the vmdk location and server name.
I then tried to just use the Hyperflex Data Platform Plugin from the vSphere Web Client to manually create a snapshot. Same issue which ruled out it being related to the backup software in any way.
So even though I knew it would also fail I tested it from the HX Connect Web Client and sure enough same issue.
Turns out there is a bug currently affecting releases – 3.5(2c), 3.5(2e), 4.0(1a), 4.0(2a). If you try to take a HX Snapshot of any CBT enabled VM it will fail. At the moment there is a workaround which will help resolve the issue until Cisco release a proper fix for this problem.
Follow the steps below,
First you need to shutdown the VM. I know this is less than ideal but stick with me and we will get it sorted.
You can disable CBT on the VM and Cisco mentions to do so but in this case I left it enabled because I wanted to see how it would go.
Check if you have any snapshots present – if so delete all existing snapshots.
If you did disable CBT you can enable it again now. As I mentioned before I skipped this step and just left it enabled.
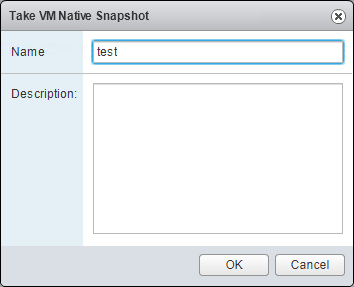
Then from the vSphere Web Client right click the VM and select Cisco HX Data Platform from the menu, then Snapshot Now

Then enter a name for the snapshot, I was creative here and just entered test
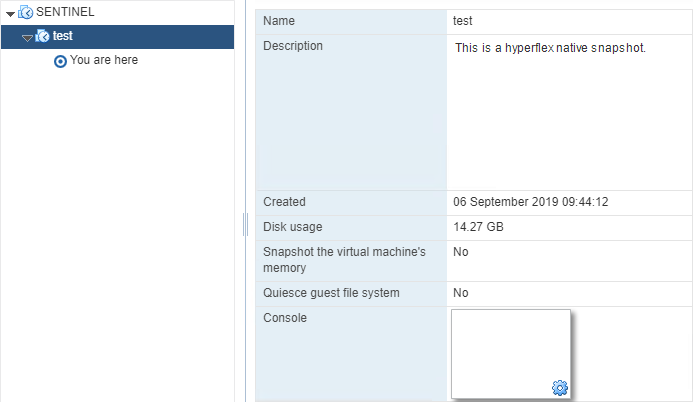
The HX Native Snapshot will then be created successfully. If you now go to manage snapshots for the VM you will see the snapshot “test” present.
You can now go ahead and power on the VM
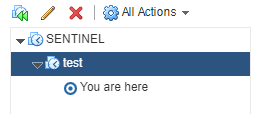
Then once the VM has powered on go back into your snapshot manager and select the test snapshot that you just created and click Delete.
Once you have done that you can add the VM to any backup job which leverages HX Native Snapshots and the backup will complete successfully from now on. You can also go and create them manually when needed.
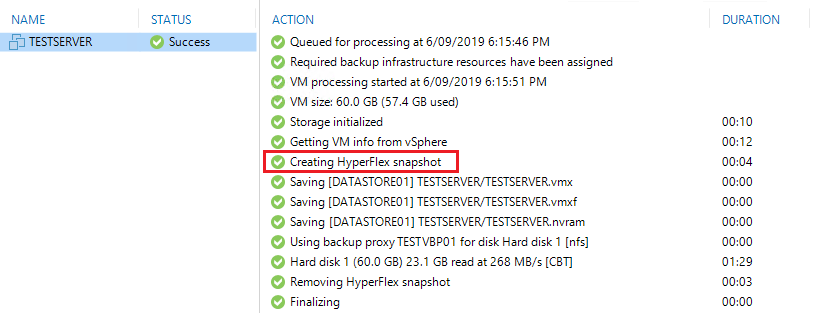
Here is an example the job being run using Veeam
One I get more information on this issue and Cisco release a fix I will put together a follow up post!
-
NetApp ONTAP 9.5 Failed to add the Cserver record in RDB The certificate has expired
The other day I had a few NetApp FAS units to setup and each one had shipped with ONTAP 9.5. The initial install on the first unit went as per normal but when it came to the cluster setup it failed with the following error – Failed to add the Cserver record in RDB . The certificate has expired.
What was worse is the fact that the certificate had expired before I even opened the box so this was always going to happen. Turns out there is a known issue with these units that were shipped with ONTAP 9.5 as the certificate was set to expire on Jul 6, 2019. Luckily there is a way to get around it.
Below is a quick run through on how to set the initial management IP’s on each node and apply the fix which will allow you to continue with the cluster setup.
Go through setting the disk tray IDs as per normal procedure prior to starting the configuration
Connect the usb console cable to Node A and use the following settings in Putty (115,200 baud with N-8-1)
Once connected start the wizard as per normal. I have added in some example IP’s below to show the process,
Welcome to the cluster setup wizard.
You can enter the following commands at any time:
“help” or “?” – if you want to have a question clarified,
“back” – if you want to change previously answered questions, and
“exit” or “quit” – if you want to quit the cluster setup wizard.
Any changes you made before quitting will be saved.
You can return to cluster setup at any time by typing “cluster setup”.
To accept a default or omit a question, do not enter a value.
This system will send event messages and periodic reports to NetApp Technical
Support. To disable this feature, enter autosupport modify -support disable
within 24 hours.
Enabling AutoSupport can significantly speed problem determination and resolution should a problem occur on your system.
For further information on AutoSupport, see: http://support.netapp.com/autosupport/
Type yes to confirm and continue {yes}: yes
Enter the node management interface port [e0M]: Enter
Enter the node management interface IP address: 10.20.30.11
Enter the node management interface netmask: 255.255.255.0
Enter the node management interface default gateway: 10.20.30.1
A node management interface on port e0M with IP address 10.20.30.11 has been created.
Use your web browser to complete cluster setup by accessing https://10.20.30.11
Otherwise, press Enter to complete cluster setup using the command line interface: Enter
The next line is where we need to exit out of the wizard and make the changes
Do you want to create a new cluster or join an existing cluster? {create, join}: Hit CTRL + C here to cancel the setup and modify the date!
Exiting the cluster setup wizard. Any changes you made have been saved.
The cluster administrator’s account (username “admin”) password is set to the system default.
Next login with the username admin and since this is a new install you won’t be prompted for a password. Then type cluster date modify -date 07/01/2019 19:00:00 and hit enter to change the date back to July 1st. Lastly type cluster date show to confirm it has changed. Example of this part below,
login: admin
******************************************************
* This is a serial console session. Output from this *
* session is mirrored on the SP console session. *
******************************************************
::> cluster date modify -date 07/01/2019 19:00:00
::> cluster date show
Node Date Time zone
——— ————————- ————————-
localhost 7/1/2019 19:01:22 +00:00 Etc/UTC
From here you should see that the date has been set back to the 1st of July.
Now it’s time to connect the usb serial cable to Node B and repeat the process.
Node B setup
You can enter the following commands at any time:
“help” or “?” – if you want to have a question clarified,
“back” – if you want to change previously answered questions, and
“exit” or “quit” – if you want to quit the cluster setup wizard.
Any changes you made before quitting will be saved.
You can return to cluster setup at any time by typing “cluster setup”.
To accept a default or omit a question, do not enter a value.
This system will send event messages and periodic reports to NetApp Technical
Support. To disable this feature, enter autosupport modify -support disable
within 24 hours.
Enabling AutoSupport can significantly speed problem determination and resolution should a problem occur on your system.
For further information on AutoSupport, see: http://support.netapp.com/autosupport/
Type yes to confirm and continue {yes}: yes
Enter the node management interface port [e0M]: Enter
Enter the node management interface IP address: 10.20.30.12
Enter the node management interface netmask: 255.255.255.0
Enter the node management interface default gateway: 10.20.30.1
A node management interface on port e0M with IP address 10.20.30.12 has been created.
Use your web browser to complete cluster setup by accessing https://10.20.30.12
Otherwise, press Enter to complete cluster setup using the command line interface: Enter
Do you want to create a new cluster or join an existing cluster? {create, join}: Hit CTRL + C here to cancel the setup and modify the date!
Exiting the cluster setup wizard. Any changes you made have been saved.
The cluster administrator’s account (username “admin”) password is set to the system default.
Once again login with the username admin and since this is a new install you won’t be prompted for a password. Then type cluster date modify -date 07/01/2019 19:00:00 and hit enter to change the date back to July 1st. Lastly type cluster date show to confirm it has changed. Example of this part below,
login: admin
******************************************************
* This is a serial console session. Output from this *
* session is mirrored on the SP console session. *
******************************************************
::> cluster date modify -date 07/01/2019 19:00:00
::> cluster date show
Node Date Time zone
——— ————————- ————————-
localhost 7/1/2019 19:01:22 +00:00 Etc/UTC
Now you should be good to continue with the cluster setup via the gui or console, enjoy!
-
Enterprise Manager 9.5 U4a issues when logging into the Self Service Backup Portal as a vCloud Tenant
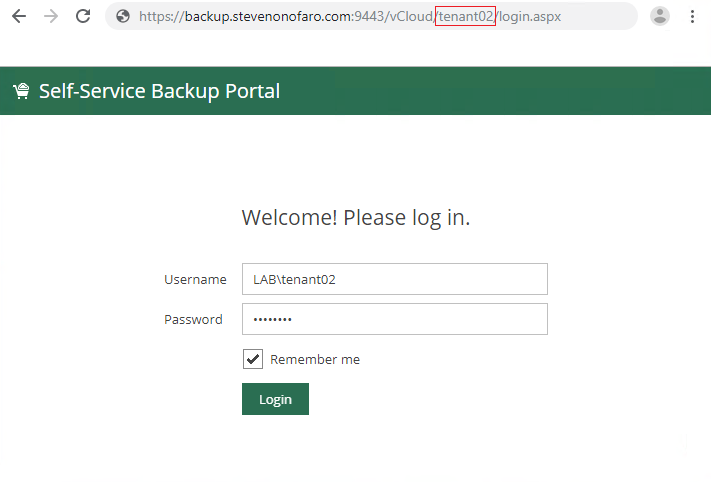
After upgrading to 9.5 Update 4a I ran into a strange issue with Enterprise Manager. When I would try and login to the Self Service Backup Portal as a vCloud tenant the login would fail. We know that the URL for the portal itself is case sensitive when it comes to the tenant org name but in this instance there was no problems there.
It turns out that if I try to login as a tenant who has any capital letters in the vCloud Org name the login would fail.

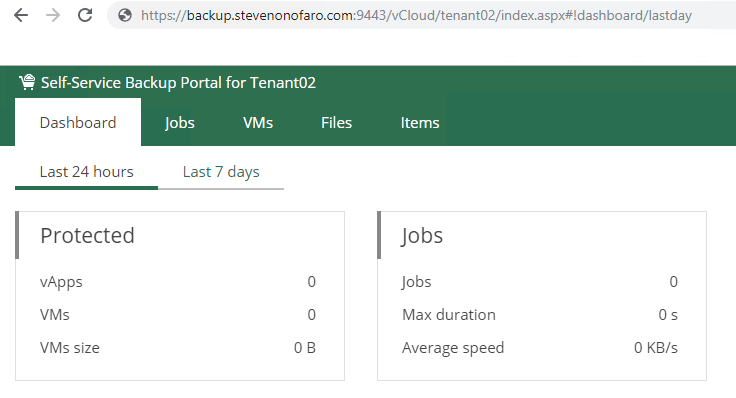
So I created a tenant with a name that was all lower case and tried to login.
This tenant was able to login without any issues.
Turns out this is a known issue and will be resolved in the next release of the software. In the meantime if you are experiencing this issue there is fix available. You will need to replace an existing dll file and add a pdb file to your Veeam Backup and Replication Server and they are available here
If for any reason this link stops working just contact Veeam support and they will be able to send you the files.
To resolve the issue you need to make the following changes on the VBR server that you have connected to vCloud Director.
Check that no backup jobs are running and stop the Veeam Backup Service.
Open C:\Program Files\Veeam\Backup and Replication\Backup and rename the existing Veeam.Backup.VcdLib.dll to Veeam.Backup.VcdLib.dll.old
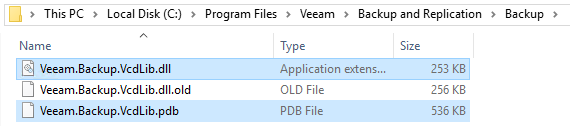
Copy Veeam.Backup.VcdLib.dll and Veeam.Backup.VcdLib.pdb from the link above into the folder.
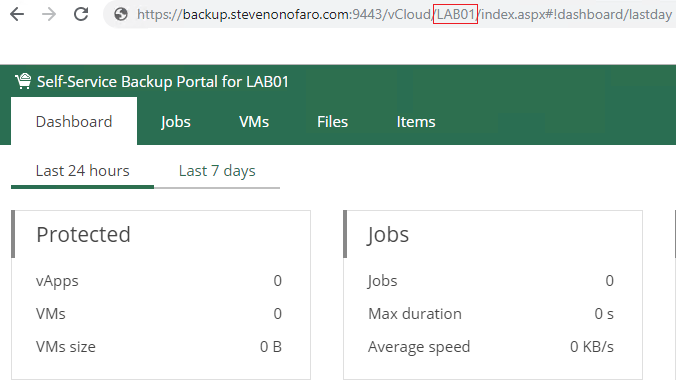
Then start the Veeam Backup Service and try again.
Now as you can see I am able to login as a tenant who has capital letters in their vCloud Org name.
-
Migrating from vCloud Director 9.5 with an SQL Database to the vCloud Director 9.7 Appliance
In a previous post I outlined how to migrate your existing vCloud SQL Database over to a PostgreSQL Database. It’s not too difficult but you do need to deploy and configure the PostgreSQL server itself first, so there are a few steps involved. Then I thought what about the people that haven’t moved over to PostgreSQL and have stayed with the traditional SQL server database? Seeing as vCloud Director 9.7 will be the last version to support SQL what are their options and can they just skip this step all together and move directly to the appliance?
Luckily the answer is yes!
Currently in my lab I have vCloud Director 9.5 installed on a CentOS 7 VM with an external SQL Database running on a SQL 2016. In this post I will go through the four main steps you need to complete to migrate over to the new vCloud Director 9.7 Appliance.
1 – Upgrade the existing instance of vCloud Director
2 – Deploy the new vCloud Director 9.7 Appliance
3 – Migrate the external SQL Database to the embedded PostgreSQL Database
4 – Copy the shared transfer service data and certificate files to the Appliance
As with any upgrade or migration make sure you have a valid backup of the VM (Use Veeam Community Edition, its free!) and you also take a separate backup of the database on the SQL Server. Then take a snapshot before you get started just to be sure.
The first step is to upgrade vCloud Director 9.5 to 9.7 on the CentOS VM.
In order to upgrade vCloud we first need to stop the services. SSH into your vCloud cell and run the following command,
service vmware-vcd stop

Then use winscp to copy the install file over to your existing cell. Then we need to switch to the location that we have the install file saved and run the following command to make the file executable,
chmod u+x vmware-vcloud-director-distribution-9.7.0-12990033.bin

You will then notice that the installation file now displays in green text and is ready to be installed.
Run the following command to start the installation,
./vmware-vcloud-director-distribution-9.7.0-12990033.bin
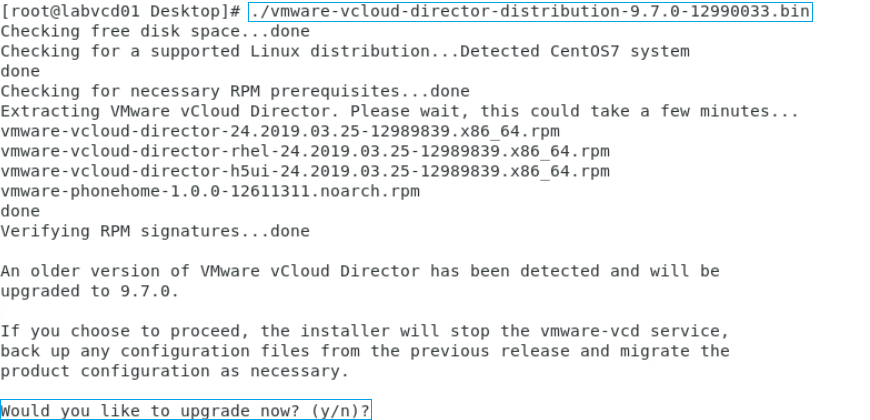
Type Y and hit Enter to start the upgrade

The upgrade from vCloud 9.5 to 9.7 is now complete
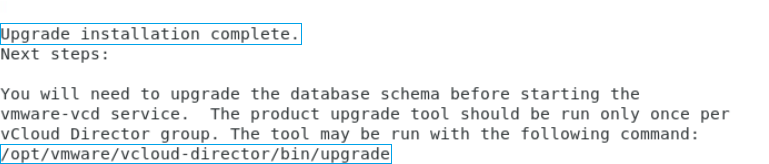
Once the vCloud Upgrade has completed its time to upgrade the database. For this example the DB is hosted on my SQL 2016 server so once again before you do this ensure you have taken a backup of the DB just in case.
Type the following to start the DB upgrade,
/opt/vmware/vcloud-director/bin/upgrade
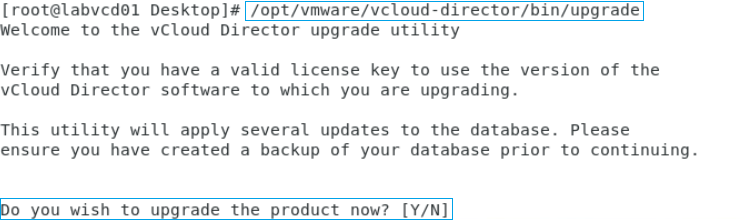
Enter Y to continue
Before the upgrade starts it will prompt you again to make sure you have backed up your database. Enter Y to continue
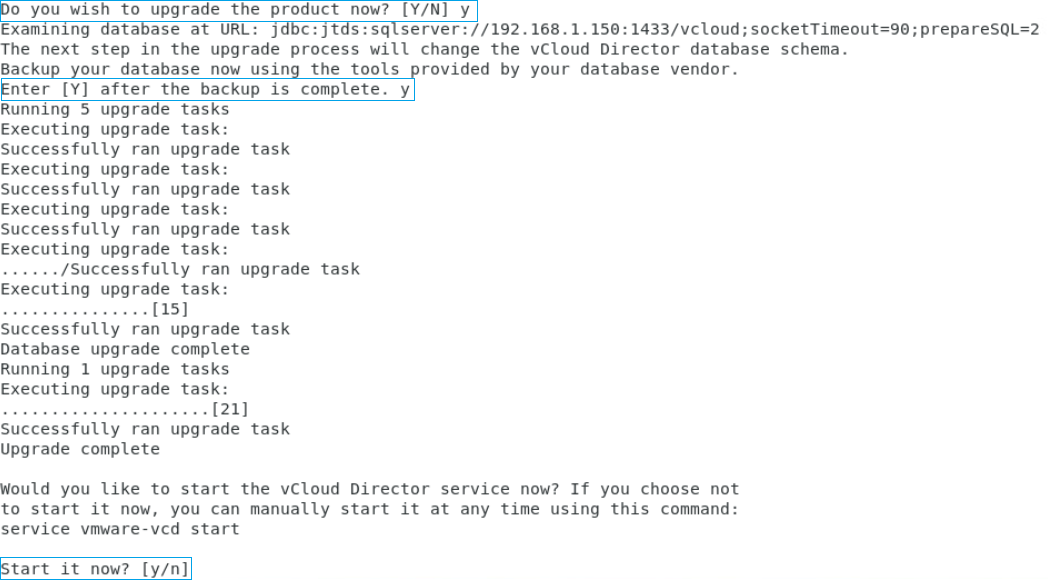
Enter Y to start the services
Both the vmware-vcd-watchdog and the vmware-vcd-cell services should now start
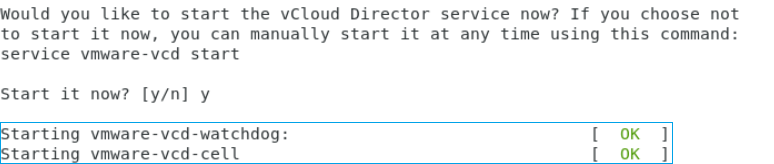
Wait a few minutes for the services to start up before attempting to login
If you check the About section you will see that vCloud Director has been upgraded to 9.7

The second step is to deploy the new vCloud Director 9.7 Appliance
The vCloud Appliance contains the VMware Photon OS, vCloud Director Services and PostgreSQL 10
Before we get started make sure you have created the required DNS entries for eth0 and eth1, both forward and reverse lookup. We will also require an NFS share to mount as the transfer store. You can do this by deploying an openfiler server and presenting the NFS share or presenting the share from a filer in your environment. If you are also just testing this out in the lab then the easiest way is to present it from a windows server.
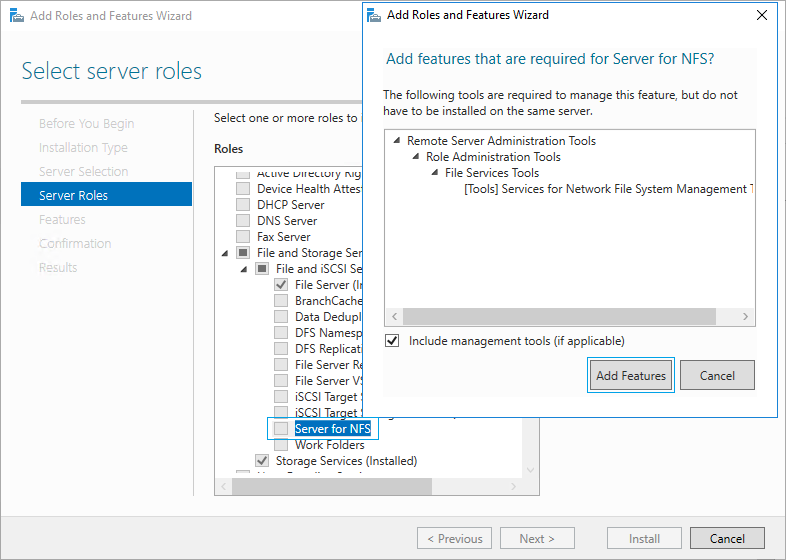
You can do that by opening up Server Manager and selecting Add roles and features. Click next through the wizard until you reach the Server Roles section, then expand File and Storage Services, expand File and iSCSI Services and tick the box for Server for NFS. Then click Add Features on the window that appears, then click Next, then Next again and Install
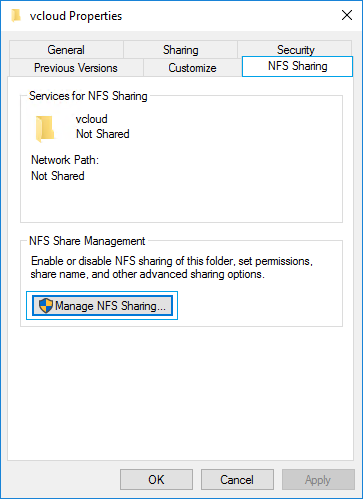
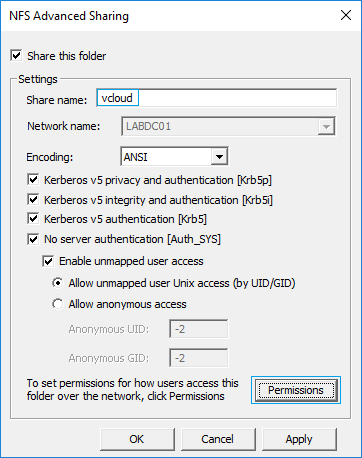
Once that is complete create a folder on the windows server that you want to use as the transfer store. Then right click the folder and select properties and click on the NFS Sharing tab. Then click Manage NFS Sharing
Then tick Share this folder and enter the share name, I have just entered vcloud for this example. Then click Permissions
Then change the Type of Access to Read-Write and tick Allow root access and click OK
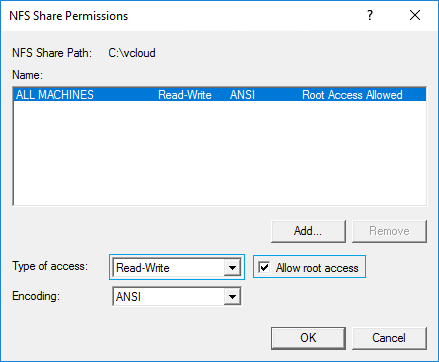
Then click OK again to close the NFS Advanced Sharing box and click Close on the folder properties. The NFS share is now created and ready to be used during the ova deployment.
I have created another DNS entry to reference this server so the new mount path will look like this,
labnfs.stevenonofaro.local:/vcloud
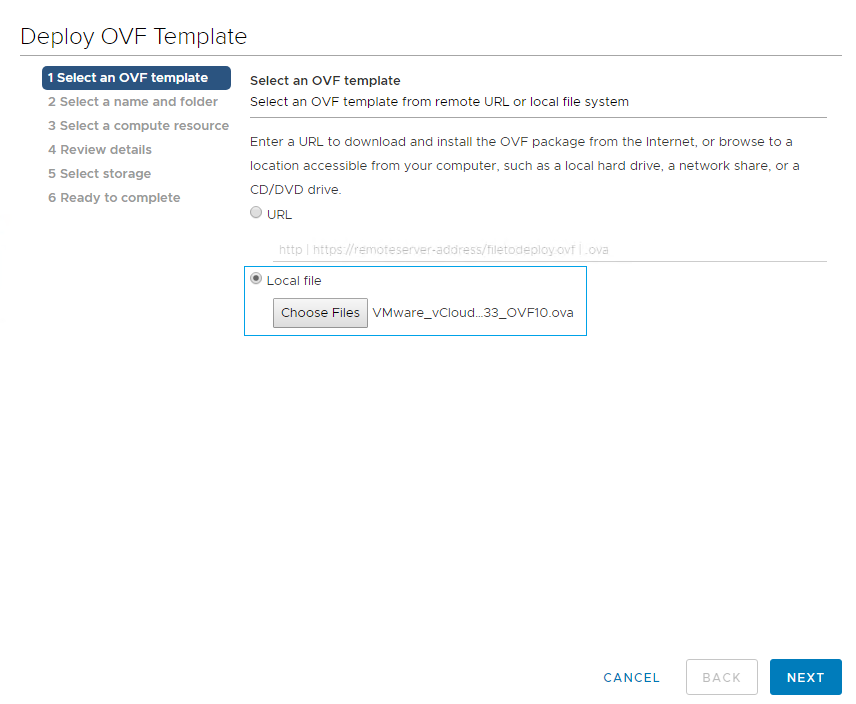
Now it’s time to deploy the ova file. Login to your vCenter server and choose the appliance ova file and click Next
Enter the VM Name and click Next

Select the compute resource and click Next

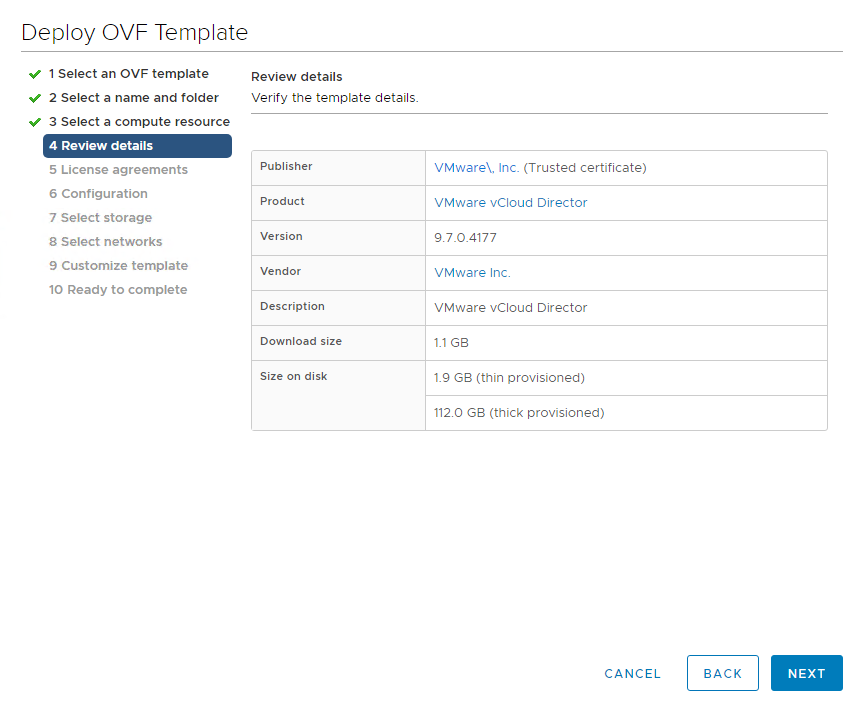
Review Details and click Next
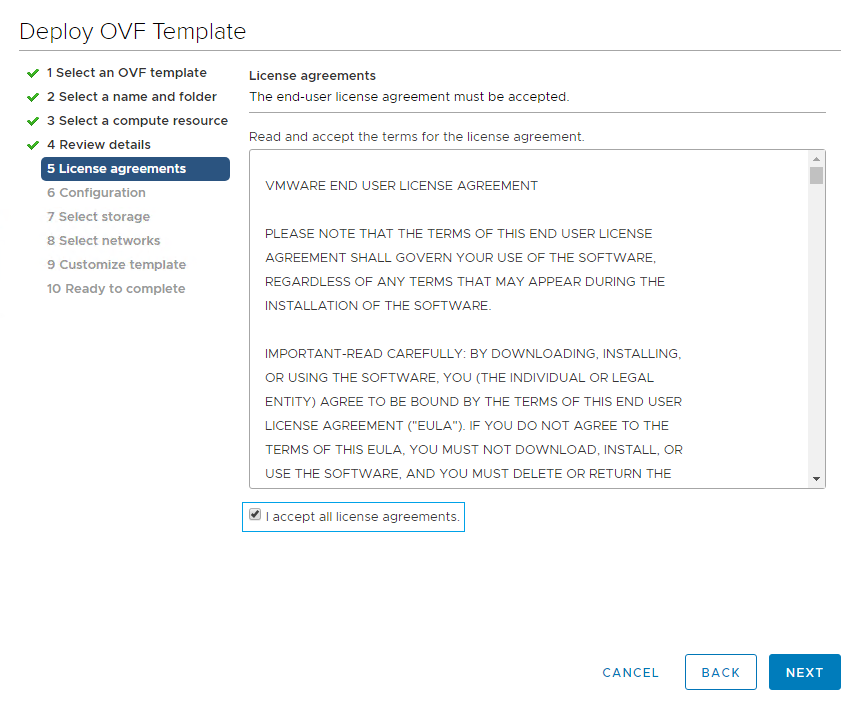
Accept the License Agreement and click Next
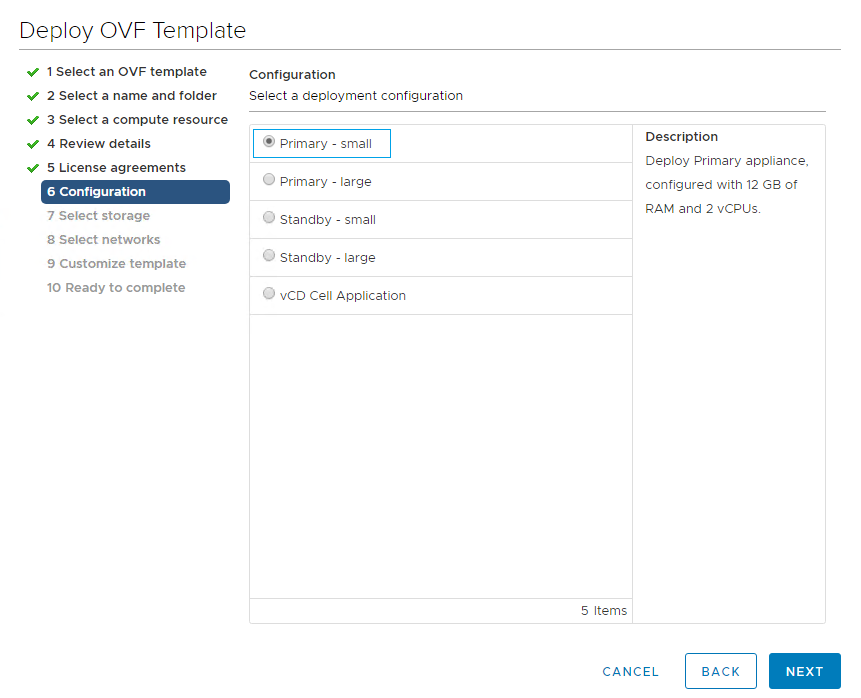
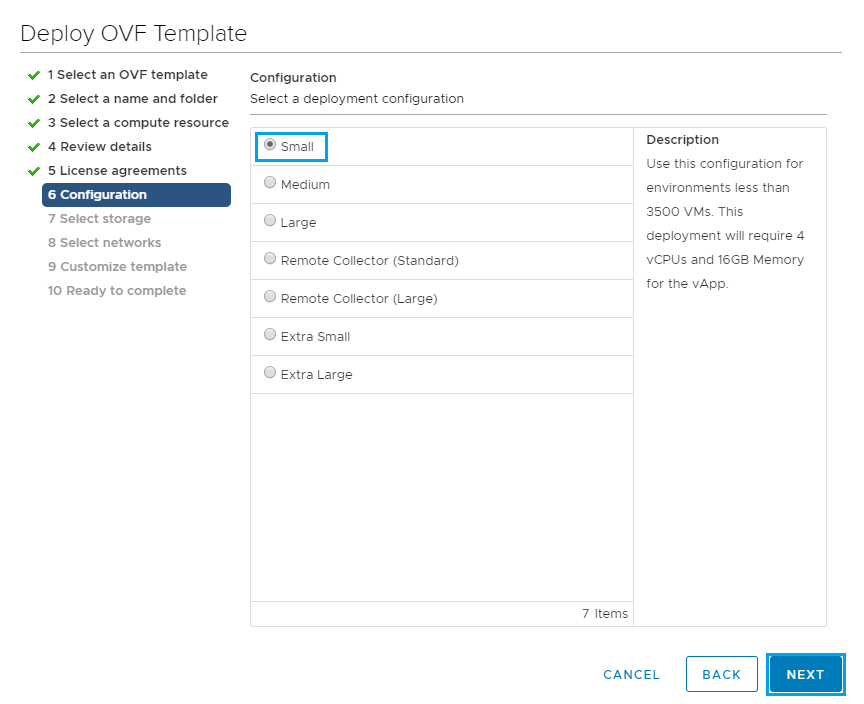
Select your configuration size, there are 5 options available. For this example I will be using Primary – small. Once you have made your selection click Next
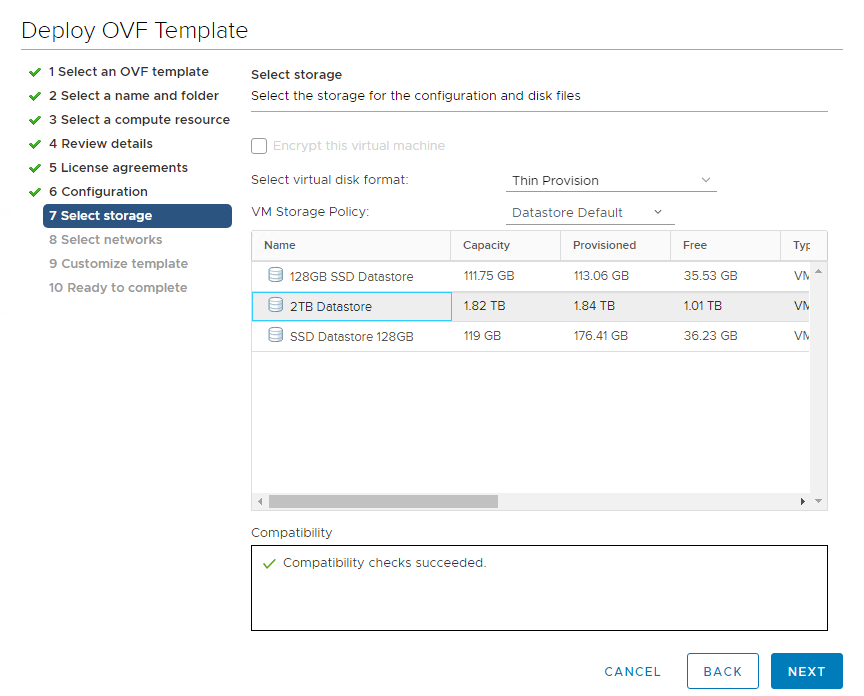
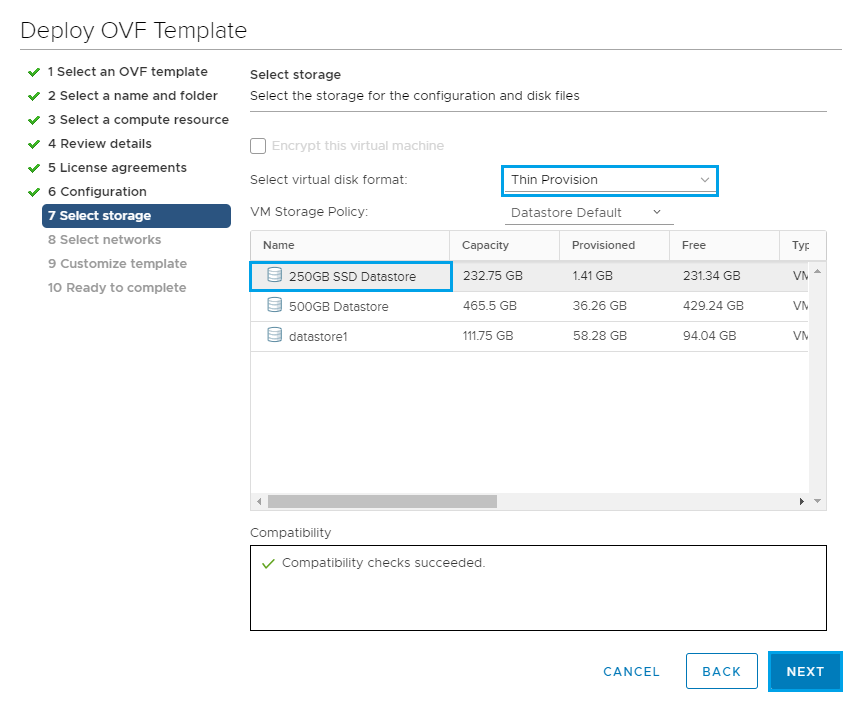
Select your disk format and storage, then click Next
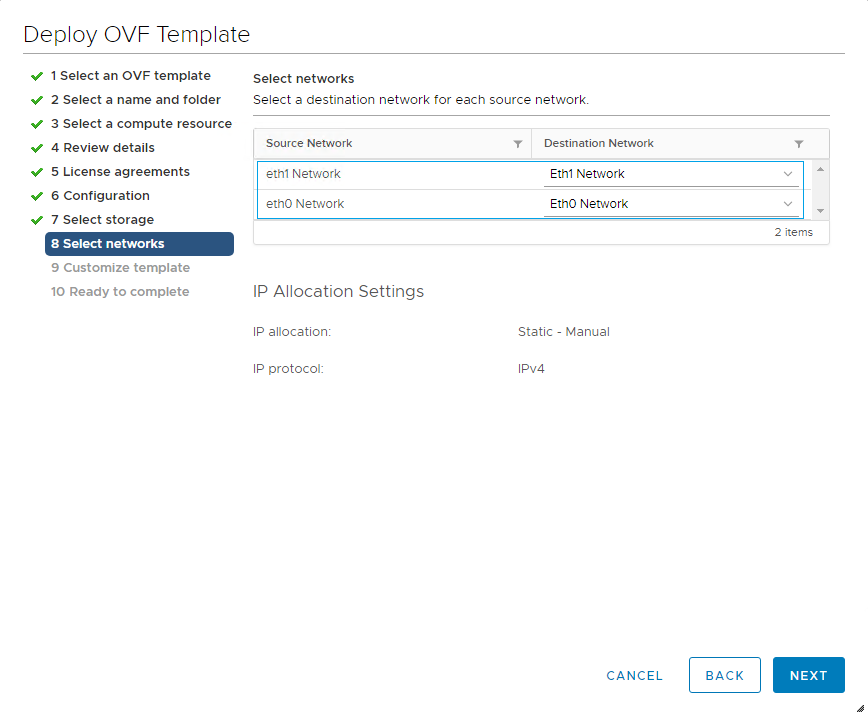
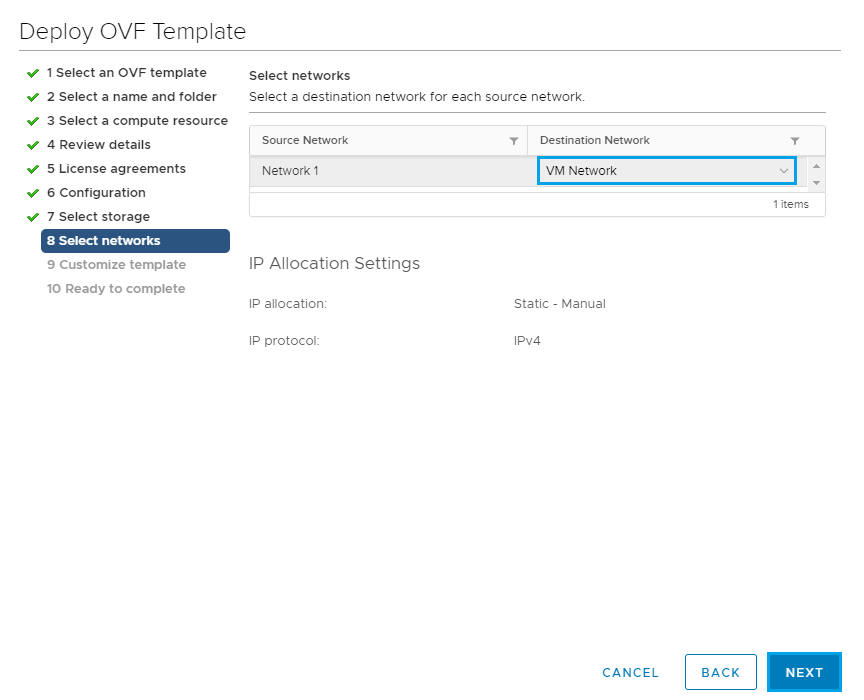
Select which networks you will be using for each adapter.
In production these should be placed on separate networks. The Eth0 Network is used for the HTTP traffic and the console proxy service on custom port 8443. Eth1 Network is used for vPostgreSQL, so having them on separate networks splits the traffic and helps to avoid duplicate entries in the route table.
For this example in my lab I have used two separate port groups to illustrate this.
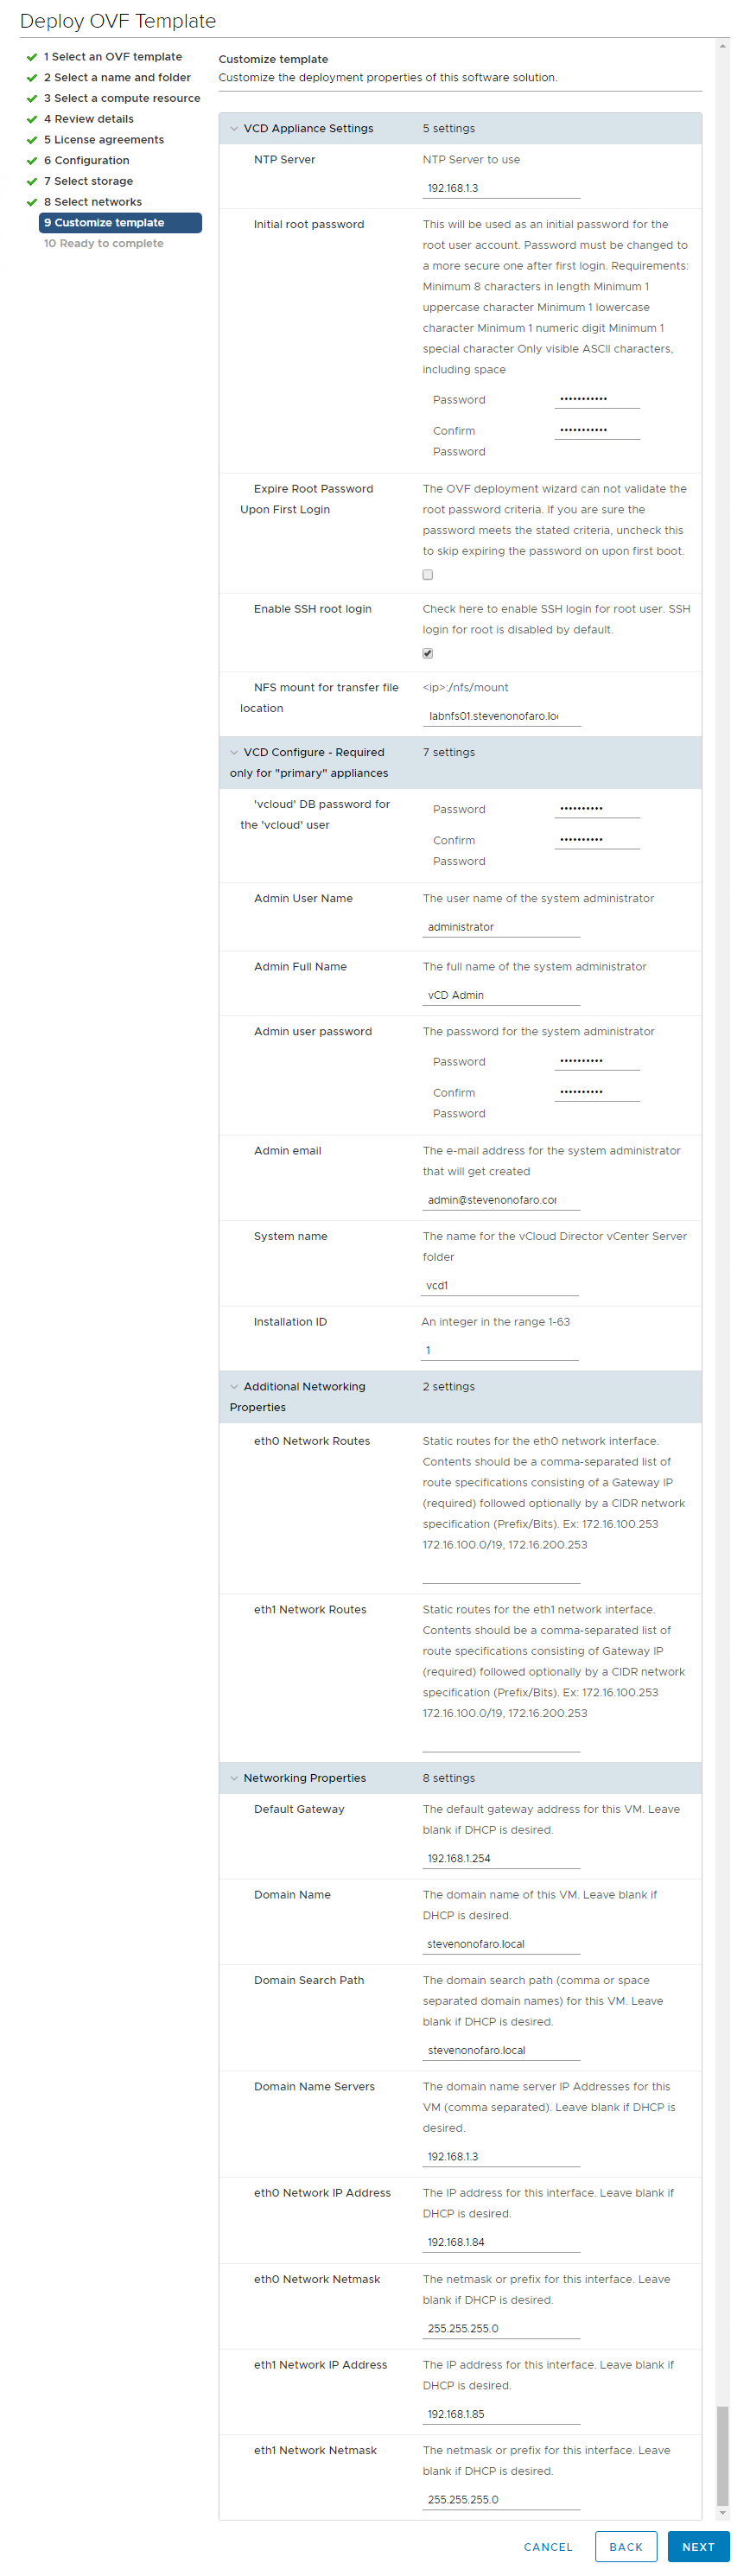
Next up is the Customize template section and you will have to scroll down and complete each of the options. I have put together an expanded view with all of the options I used during the deployment.
The entries below a pretty standard for an ova deployment but I just want to outline a few which can cause you a few issues if set incorrectly.
Expire Root Password Upon First Login – Untick this box then you can use the password you set instead of having to reset it when you first login.
Enable SSH Root Login – Enable this option to assist with testing once the appliance is deployed.
NFS Mount for Transfer File Location – The format for this needs to be set as the IP/DNS name of the server hosting the service and then the mount path. Earlier we presented an NFS share from a windows server so I have used labnfs.stevenonofaro.local:/vcloud
The “vcloud” part at the end is just the NFS share name. Another good option for this it so deploy Openfiler and then present the NFS share. I have tested with both and can confirm either one works fine.
Installation ID – If you are deploying the appliance at a new site and are looking to configure multisite later on update this entry from 1 to 2 for example.
Static Routes for Eth0 and Eth1 – Since this is in my lab and I have both on the same subnet, including the NFS share this can be left blank. In production this would need to be configured when trying to communicate with external services.
Domain Name – The entry says the domain name of this VM. For this just enter the domain name itself, so my labs domain is stevenonofaro.local. Make sure this one is correct otherwise services can fail to start and you will have issues connecting to the PostgreSQL DB.
Domain Search Path – Then again for this entry use the domain name in your lab/production environment. So I have used stevenonofaro.local here also.
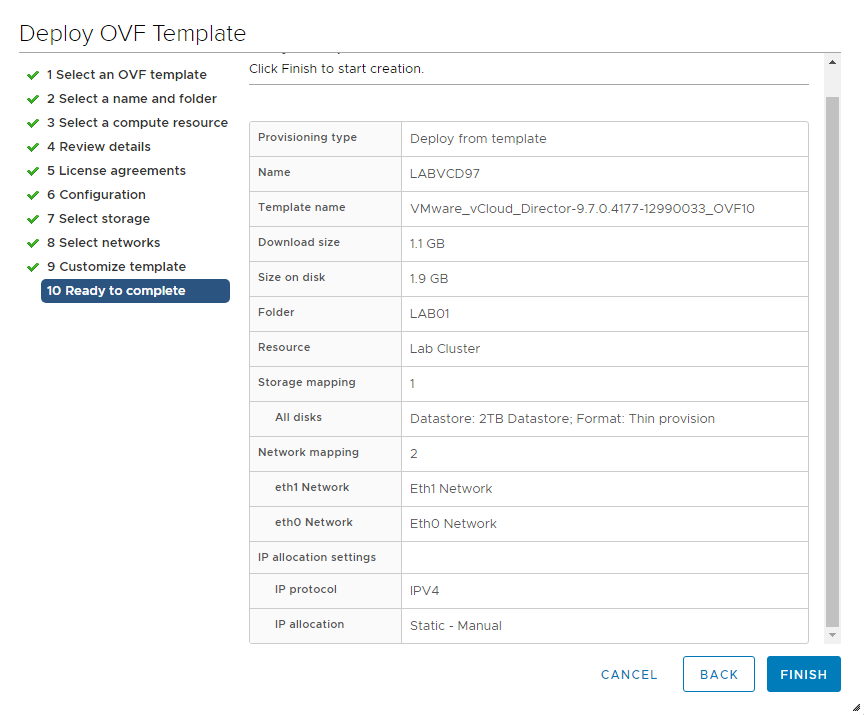
Once complete click Next to continue
Review the settings and click Finish
Next SSH into the newly deployed appliance with the password used during the deployment. If you did leave the expire password on first login box selected you would be prompted here to change it. If not you would just login as normal.
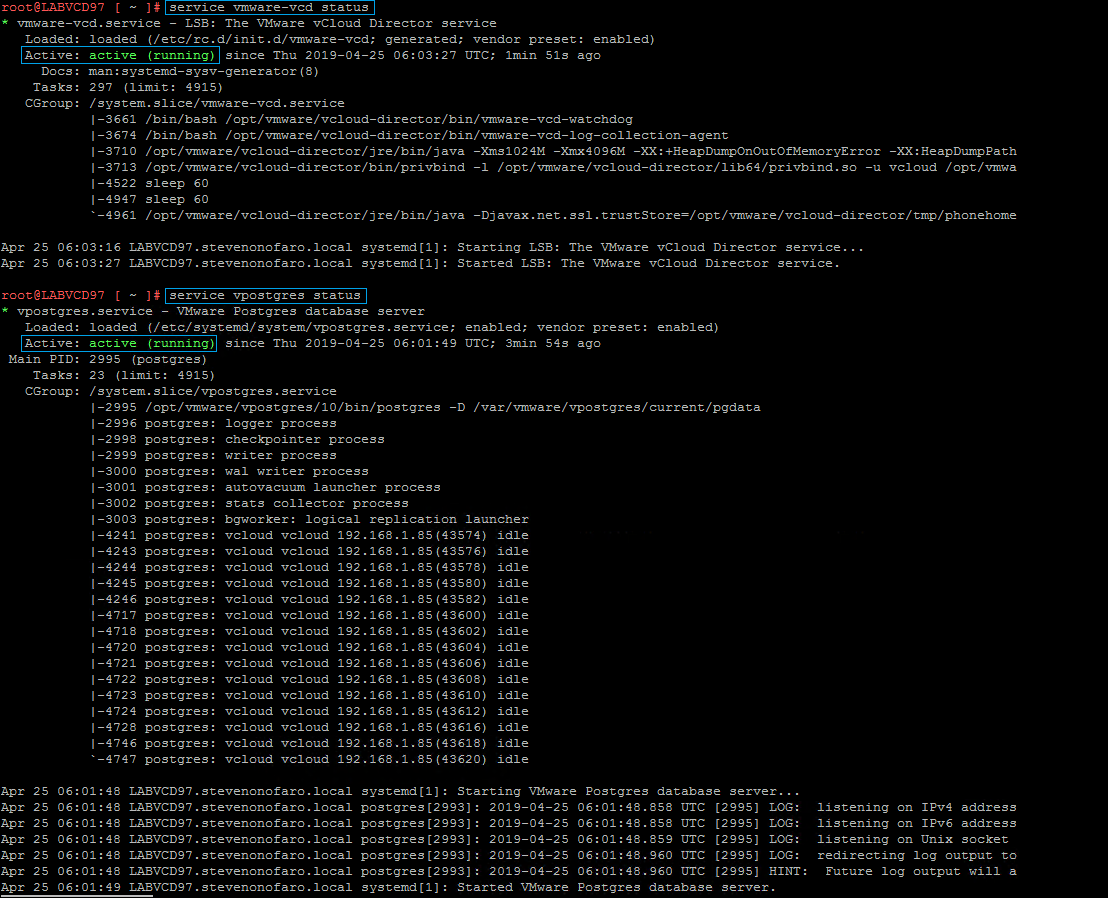
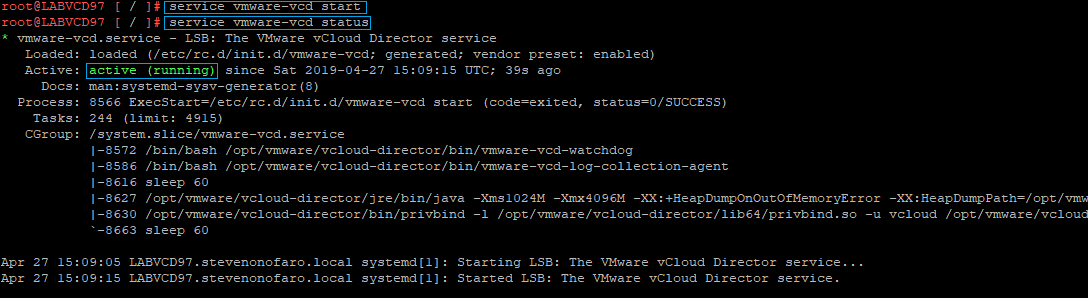
Now it’s time to check the services are running correctly. The two main services you want to check are the vCloud Services and the PostgreSQL Services.
Enter the following to check the vCloud Director Services – service vmware-vcd status
Then if that comes back as active (running) just like the image below then check the PostgreSQL Service.
Enter the following to check the PostgreSQL Services – service vpostgres status
You can then log into the management interface of the appliance on port 5480,
https://labvcd97.stevenonofaro.local:5480
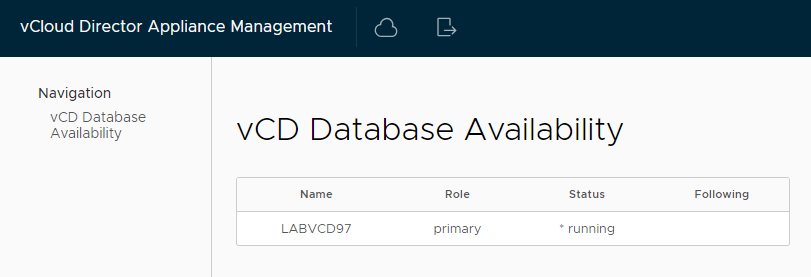
You should see the server Name LABVCD97 with the Role set to primary and a Status of running. If this is not the case then you can check the following log files to help you troubleshoot the issue.
/opt/vmware/var/log/firsboot
/opt/vmware/var/log/vcd/setupvcd.log
/opt/vmware/var/log/vami/vami-ovf.log
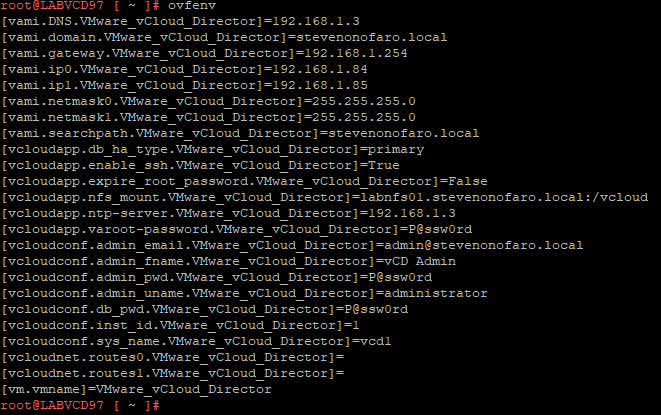
You can also run the command ovfenv to double check all of the entries used when you were configuring the appliance.
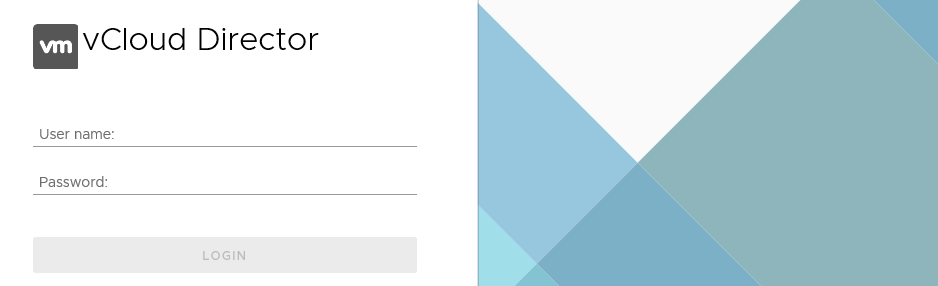
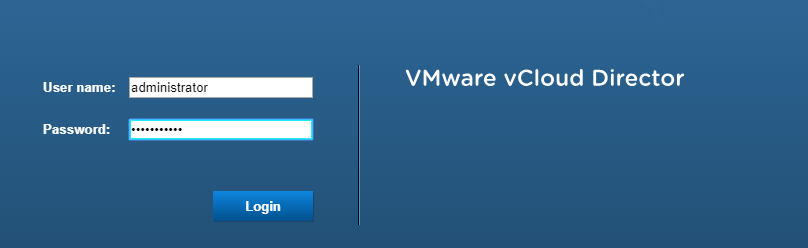
If all looks well you should be able to access the vCloud Director logon prompt using your dns name followed by /cloud
https://labvcd97.stevenonofaro.local/cloud
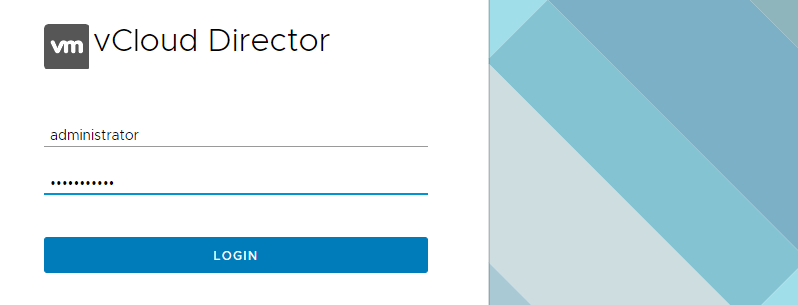
Or the HTML5 interface using https://labvcd97.stevenonofaro.local/provider
The third part is Migrating the existing SQL DB over to the embedded PostgreSQL database on the appliance
We need to stop the vCloud services on each of the cells (existing and new)
First on the new appliance,
service vmware-vcd stop

Then SSH to the original vCloud cell and stop the services also

Now we need to configure the external access to the embedded database running on the vCloud Appliance. This will allow the existing vCloud cell to connect to the appliance database.
SSH to the newly deployed appliance and browse to the following location,
cd /opt/vmware/appliance/etc/pg_hba.d/
Then create a new txt file here by entering vi external.txt

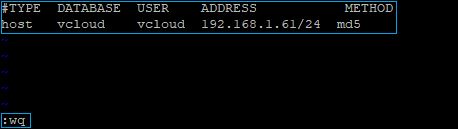
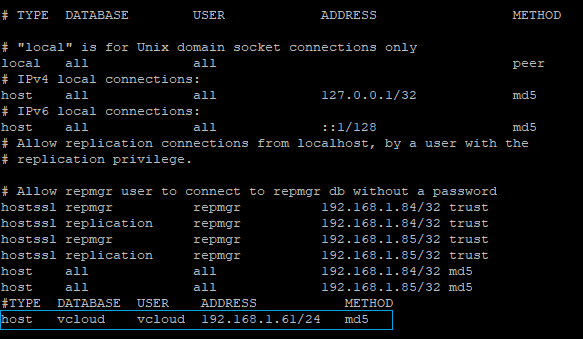
My original vCloud cell IP is 192.168.1.61 so enter the following txt to allow the cell access to the embedded database
#TYPE DATABASE USER ADDRESS METHOD
host vcloud vcloud 192.168.1.61/24 md5
When you are ready to save the file hit escape then type :wq and press enter
If you type ls and hit enter you will now see the newly created txt file in the directory

The entries added to this file are dynamically updated to the pg_hba.conf file which controls access to the database. Now if you want to check that your entry was actually added to the pg_hba.conf file then browse to the following location,
cd /var/vmware/vpostgres/10/pgdata
Then if you use the ls command you should see the pg_hba.conf file located within this directory. This file controls access to the PostgreSQL instance.

Type the following,
cat pg_hba.conf to view the file
You will see the new entry has been automatically added to the bottom line of the pg_hba.conf file
Now let’s migrate the database from the original vCloud Cell over to the New Appliance. Currently my original vCloud cell is running on CentOS 7 and the database is still on a SQL 2016 Server. I could migrate the DB to a PostgreSQL server first to make my life easier but I am keen to see if this will work.
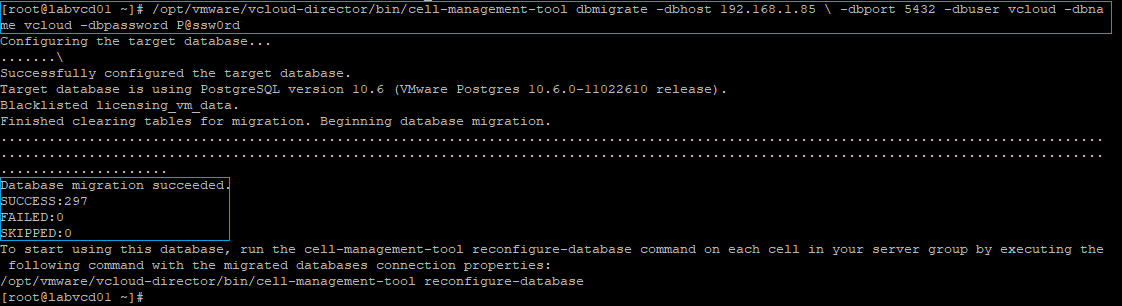
SSH to the original cell and run the following command
/opt/vmware/vcloud-director/bin/cell-management-tool dbmigrate -dbhost 192.168.1.85 \ -dbport 5432 -dbuser vcloud -dbname vcloud -dbpassword P@ssw0rd
The command is basically saying migrate the Source DB of this original cell to the PostgreSQL DB via the ETH1 interface (192.168.1.85) using the database information we entered when deploying the new appliance. If all goes well you should see the Database Migration Succeeded with a failed and skipped count of 0.
The fourth step is to copy the shared transfer service data and certificate files to the Appliance
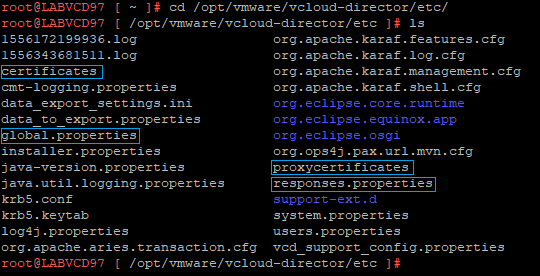
Now SSH to the newly deployed appliance and browse to cd /opt/vmware/vcloud-director/etc
We need to take a backup copy of the following files,
Certificates
Global.properties
Proxycertificates
Responses.properties
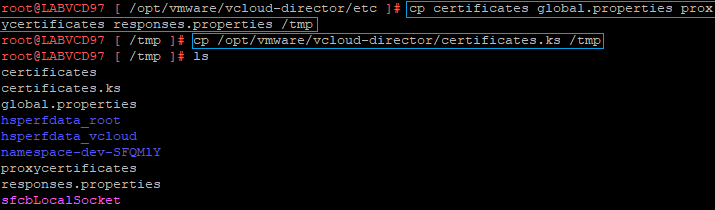
Enter the following command to backup each of the files to the /tmp directory,
cp certificates global.properties proxycertificates responses.properties /tmp
Then run the following command to backup the keystore file to the same /tmp location
cp /opt/vmware/vcloud-director/certificates.ks /tmp
Next we need to copy these same files over from the original vCloud instance
The following command can be used to copy the files from the original vCloud Director Cell to the newly deployed appliance. Just update the IP to reference your vCloud Cell and when prompted enter the password.
scp root@192.168.1.61:’/opt/vmware/vcloud-director/etc/certificates /opt/vmware/vcloud-director/etc/global.properties /opt/vmware/vcloud-director/etc/proxycertificates /opt/vmware/vcloud-director/etc/proxycertificates /opt/vmware/vcloud-director/etc/responses.properties’ /opt/vmware/vcloud-director/etc/
Then run the following command to copy the certificates.ks file from the original vCloud Cell,
scp root@192.168.1.61:/opt/vmware/vcloud-director/data/transfer/certificates.ks /opt/vmware/vcloud-director/

Then run the following command to reconfigure the vCloud Director Service. Make sure the keystore password is set to the password on the certificates.ks file from the original cell otherwise the command will fail.
/opt/vmware/vcloud-director/bin/configure –unattended-installation –database-type postgres –database-user vcloud –database-password P@ssw0rd –database-host 192.168.1.85 –database-port 5432 –database-name vcloud –database-ssl true –uuid –keystore /opt/vmware/vcloud-director/certificates.ks –keystore-password P@ssw0rd –primary-ip 192.168.1.84 –console-proxy-ip 192.168.1.84 –console-proxy-port-https 8443

Now it’s time to start the vCloud Director Service on the appliance,
service vmware-vcd start
You can then check the service by running service vmware-vcd status
Then open your web browser and login to the new vCloud Appliance,
https://labvcd97.stevenonofaro.local/cloud
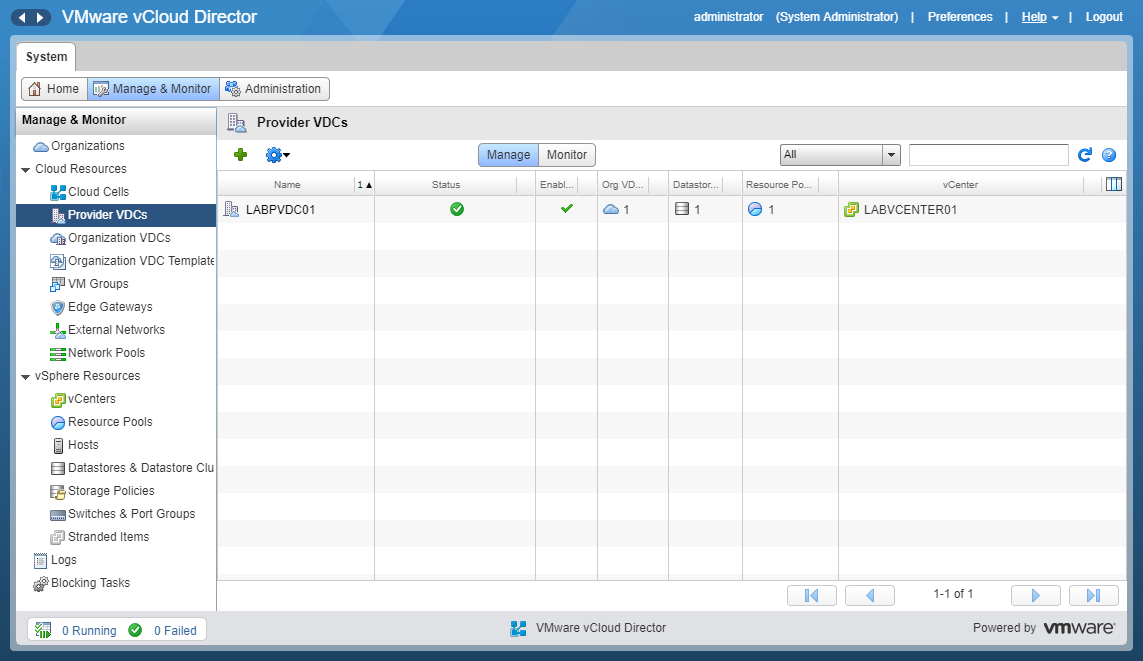
Check through each of the settings under the Manage & Monitor tab and you will see that everything is still available and has been moved across successfully.
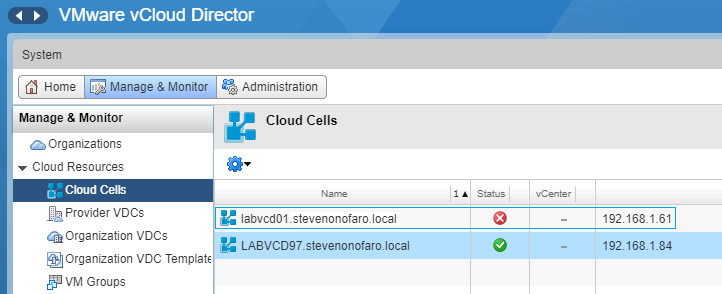
The last thing we need to do is remove the old cell. Under the Manage and Monitor tab click on Cloud Cells. Right click on the old Cell and click Delete.
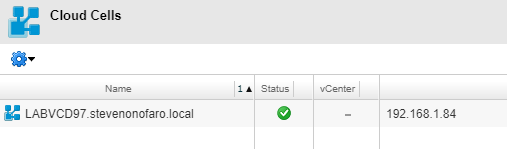
You will now just be left with New vCloud Director 9.7 Appliance
That’s it, you have successfully migrated from vCloud Director 9.5 with an external SQL Database over to the new vCloud Director 9.7 Appliance with embedded PostgreSQL!
As always use the subscribe box above for new post notifications and follow me on twitter @steveonofaro
-
Veeam N2WS Backup & Recovery 2.5
I have heard a lot of good things about N2WS Backup & Recovery for AWS and I thought it was about time I tested it out. N2WS leverages native snapshot technology to provide that extra layer of security within your AWS environment. This cloud native backup tool lets you create backup policies for your EC2 instances and utilizes block level and incremental EBS snapshots. There is also the ability to run a secondary copy to S3 job within the same policy. The copy to S3 option will not only will reduce storage costs but it will also provide you with additional cloud mobility options. Along with fast 1 click restore it also enables you to setup a DR copy of your instance backup to a different region.
N2WS also provides application consistent backups for MySQL, MongoDB, Oracle, PostgreSQL, SQL Server, Exchange, Active Directory, SharePoint and also supports VSS on Windows Systems. If you check on their website NASA even use it which is impressive if you ask me!
With all that said let’s get started!
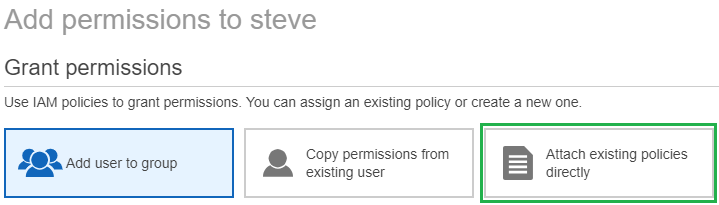
Log into your AWS Console and go to IAM, then click on the user account that we are going to modify and click Add Permissions
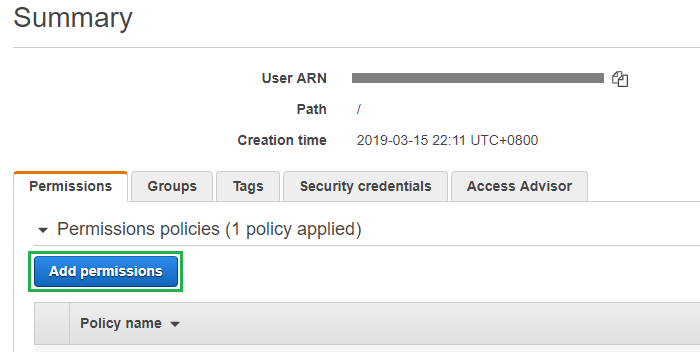
Then click on Attach existing policies directly

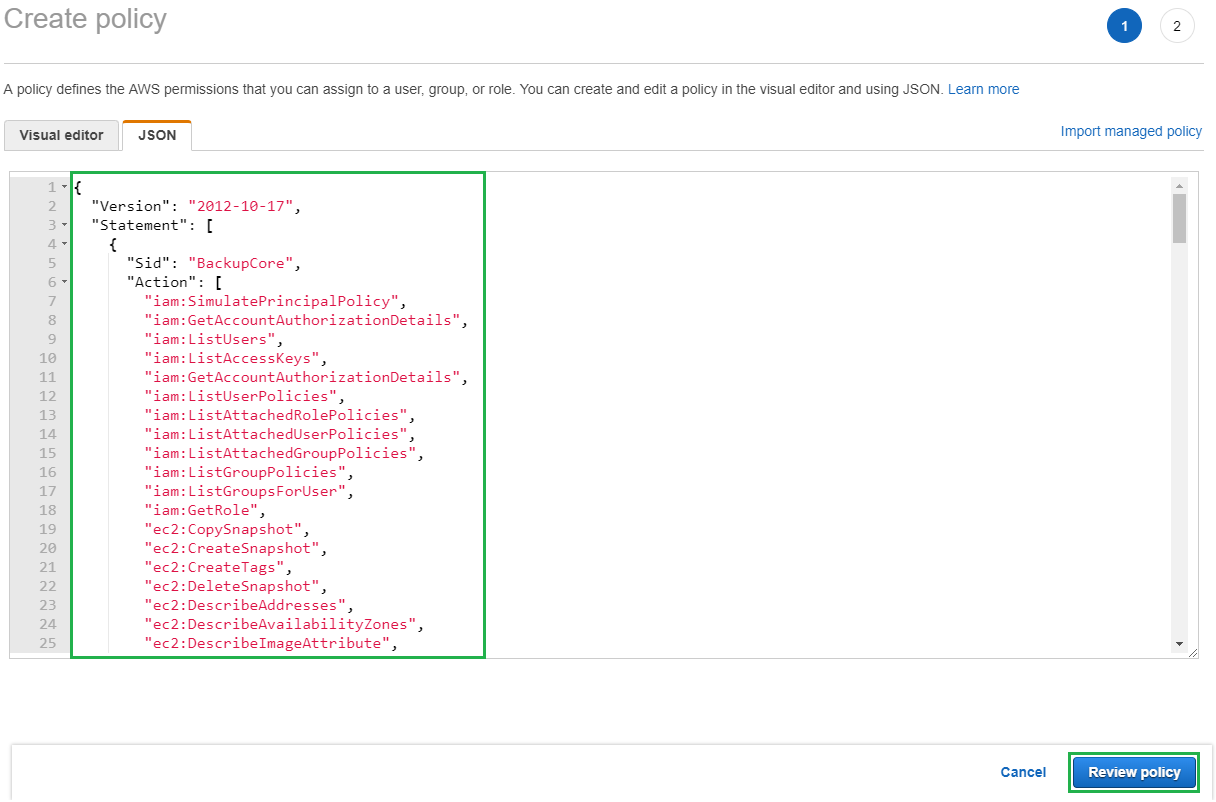
Then click on Create Policy

Then in the new window select the JSON tab and highlight and delete the entries located in there by default. Then paste in the JSON policy settings which are available for download from the N2WS support site.
Then click Review Policy
Then enter a Name and Description for the new policy and click Create Policy
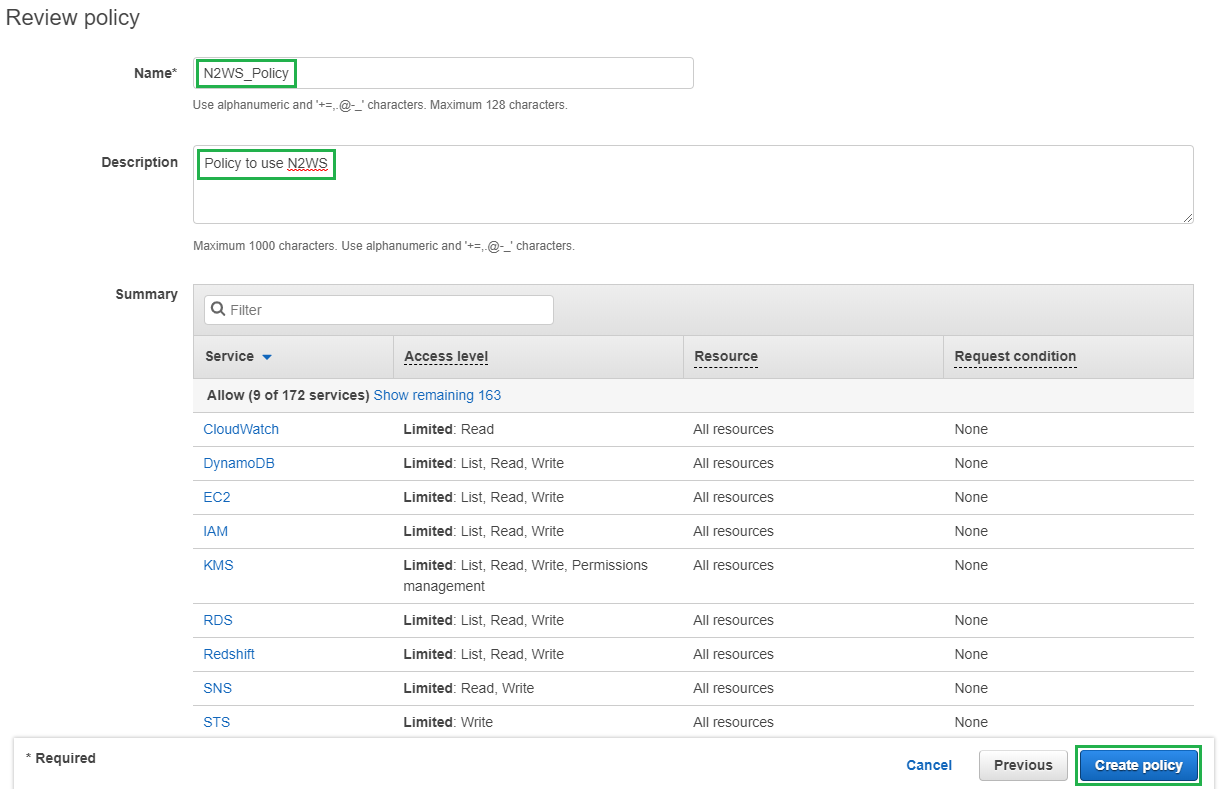
You should then see the following box appear

Now jump back over to your user settings page and click on the Add Permissions Tab

Then click Attach existing Policies directly
Then use the search box to find the policy we just created, select the tick box and click Review
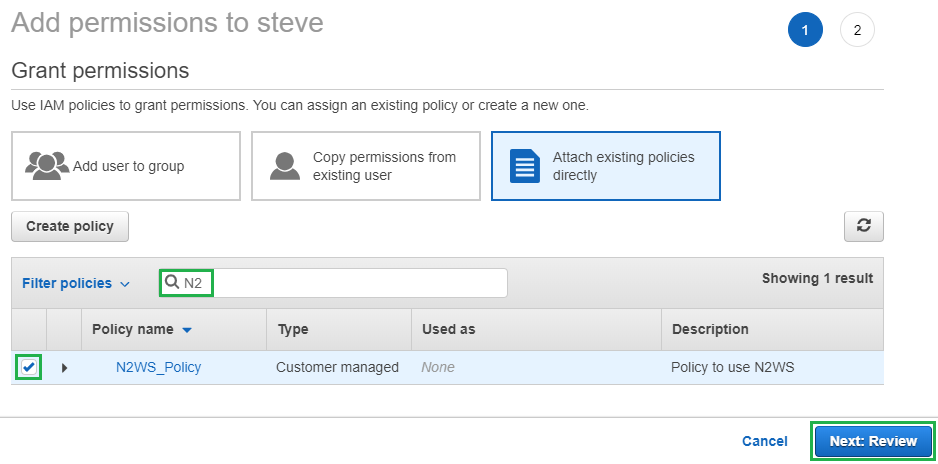
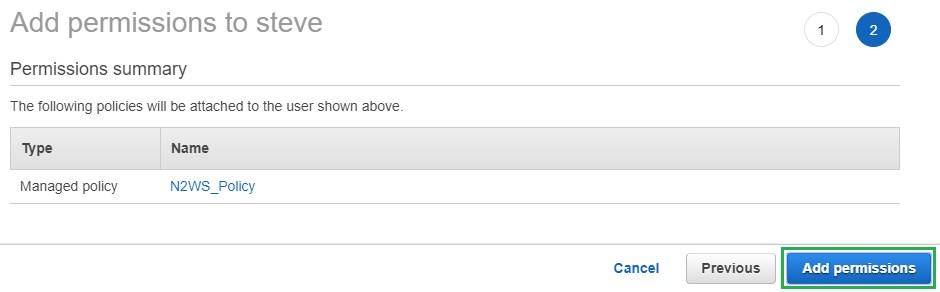
Then when prompted click Add Permissions
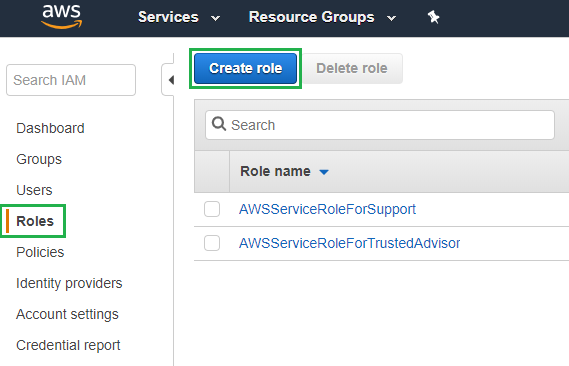
Next lets create a new Role. Select Roles from the left hand menu and then click on Create role
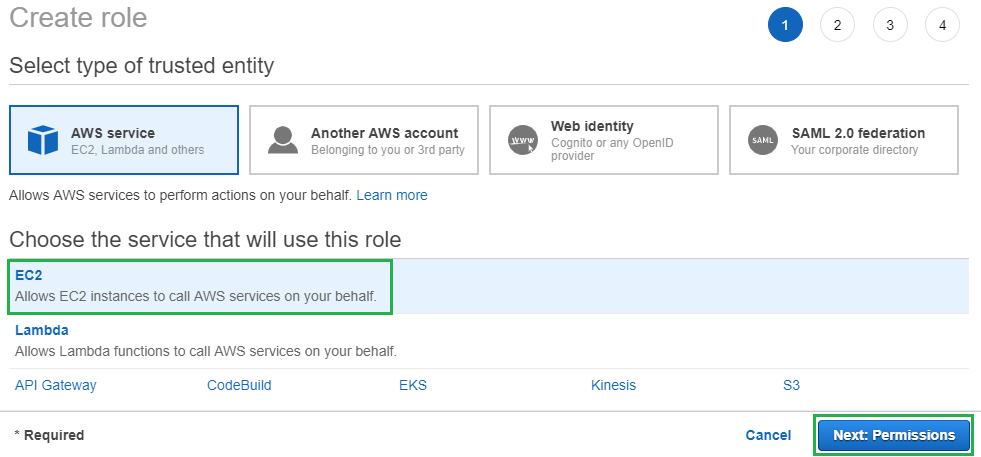
Click on EC2 and then click Next to move onto the permissions section
Use the search box to locate the policy we created earlier and then click on the tick box. Then click Next
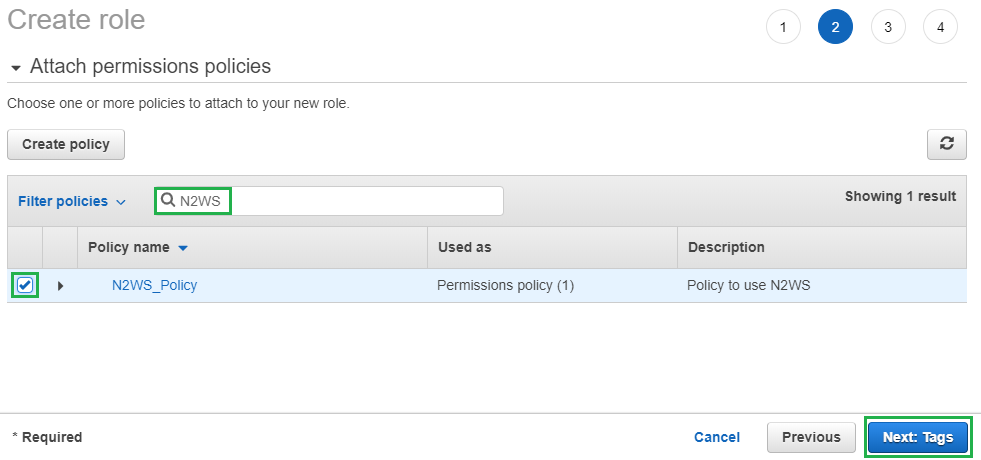
On the Add Tags screen just click Next
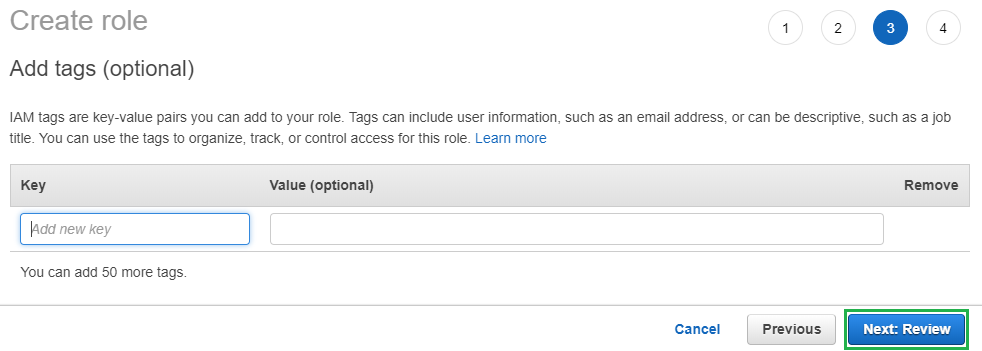
Give the new role a Name and click Create role
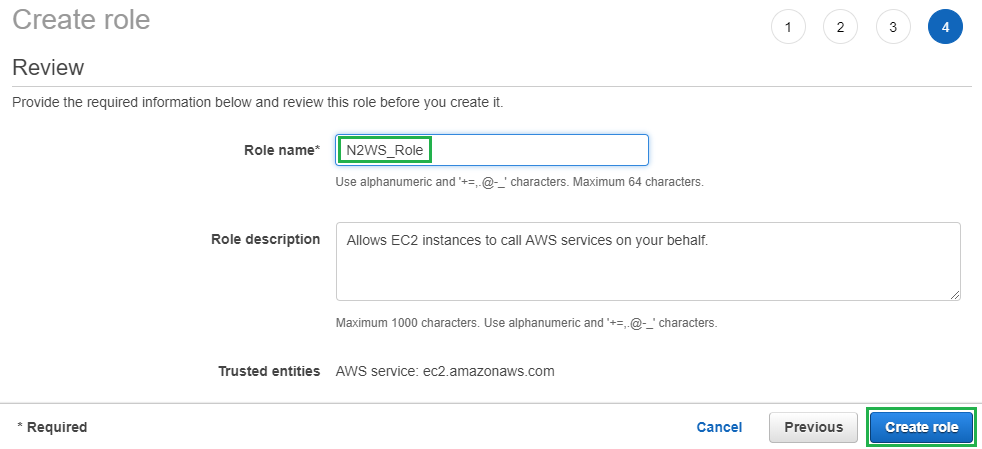
Then you should see the following box appear

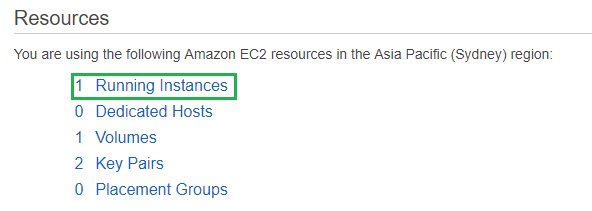
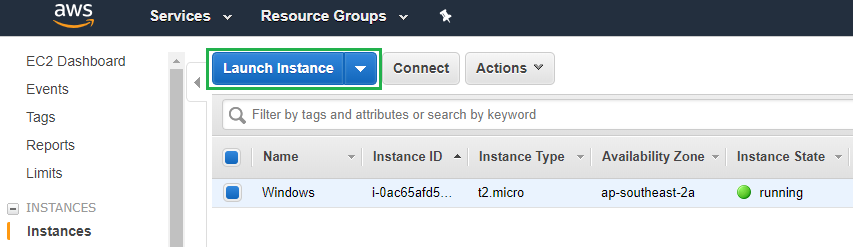
Next click Services and select EC2, then click on Running Instances
Then click on Launch Instance
Next click on AWS Marketplace in the left hand menu and then search for N2WS. For this example we will be using the Free Trial version but find the version that suits your use case and click Select
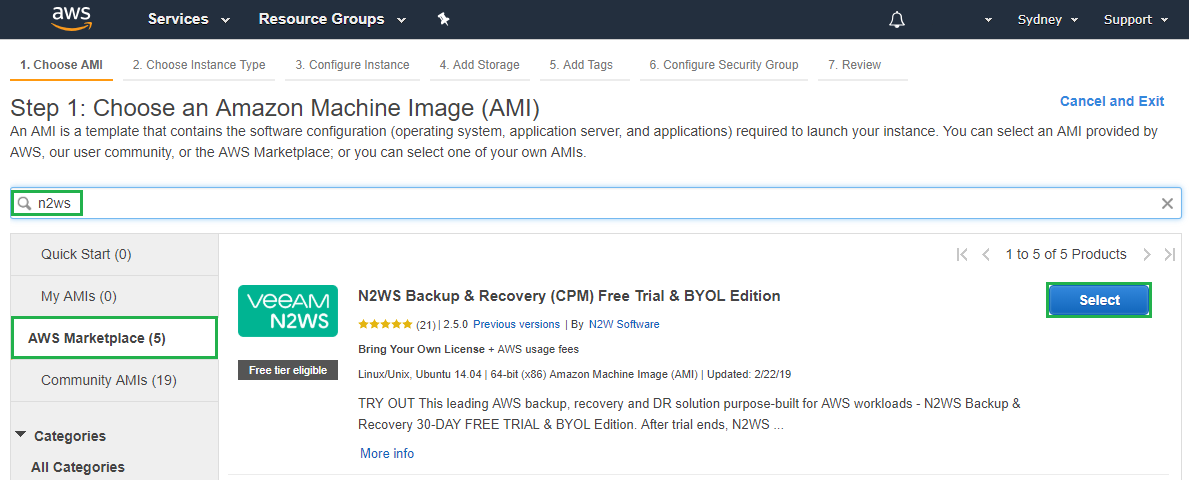
You will then be presented with the following screen, click Continue

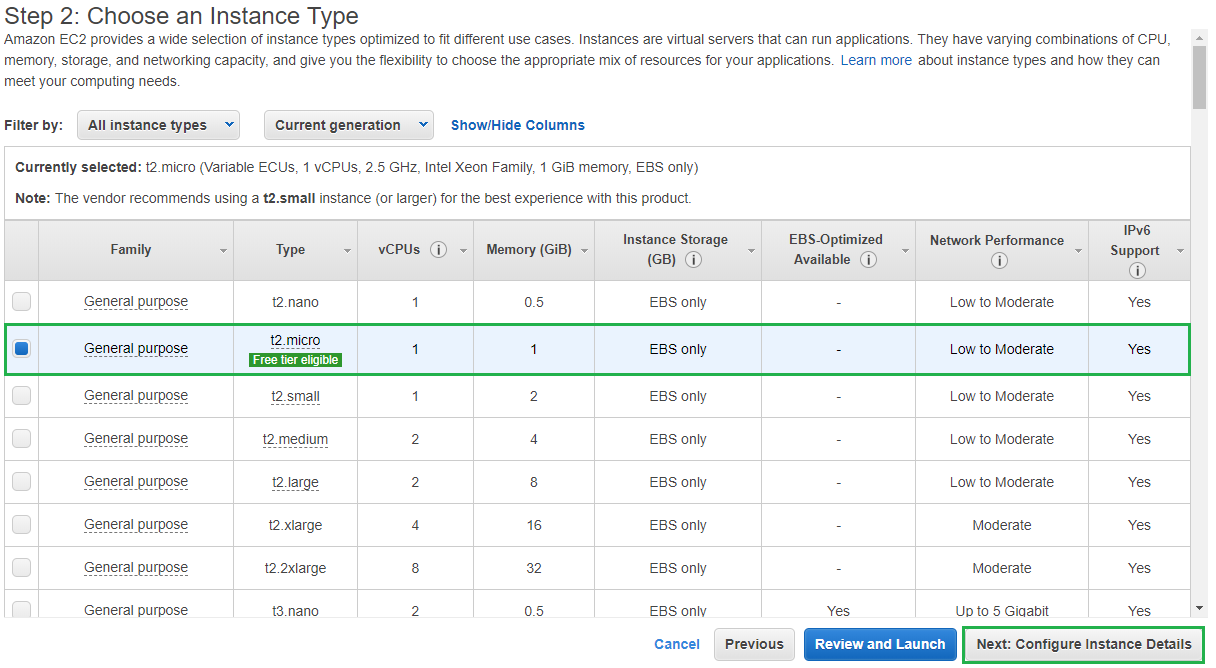
Now it’s time to select the Instance Type. For this trial run I am just going to use the t2.micro version which is part of the free tier. Select the Instance Type that suits your use case and click Next: Configure Instance Details
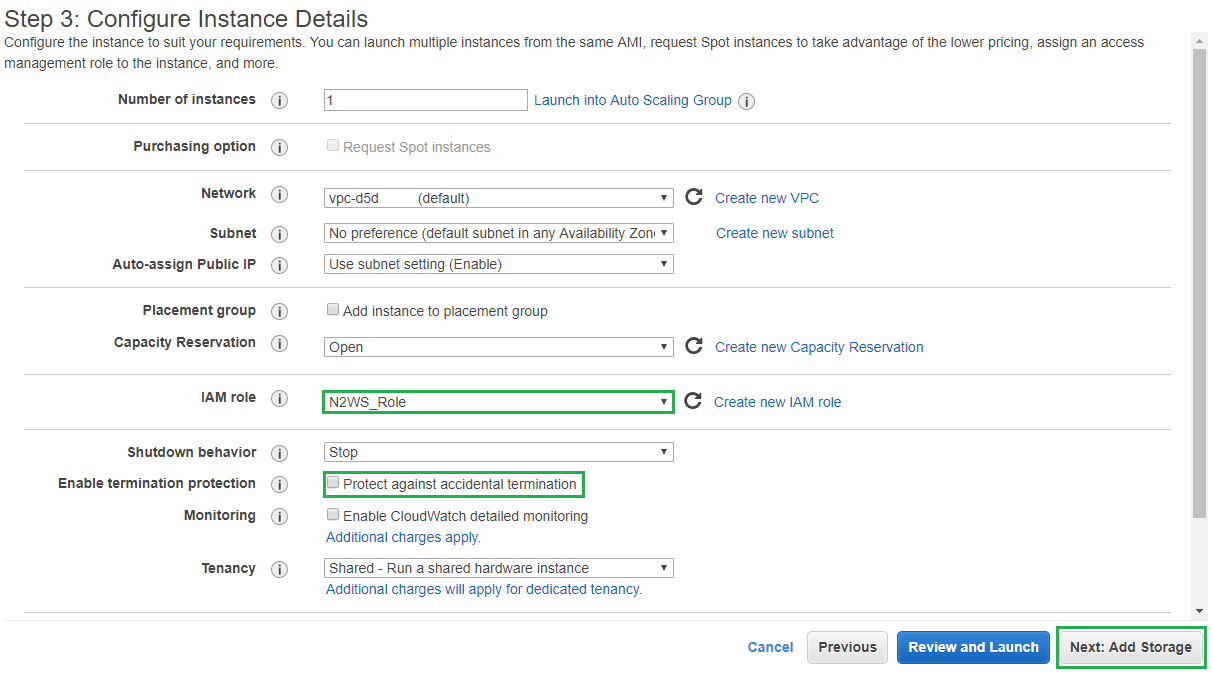
On the Configure Instance Details page select a VPC that is able to route to the internet and is able to contact each of the other AWS endpoints. For our example I am just using the default as this is part of my free tier account. Then for the IAM Role, select the N2WS_Role we created earlier. If this is in a production environment it’s also a good idea to select Protect against accidental termination.
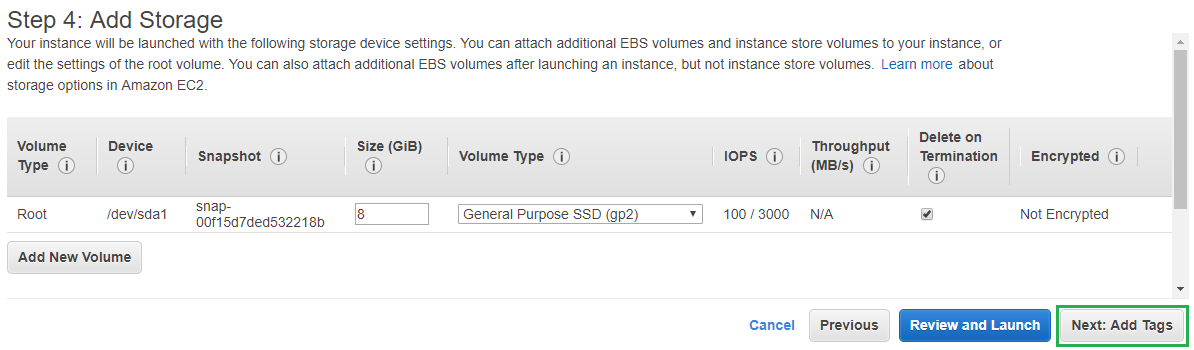
Then click Next: Add Storage
The default storage size that comes with our instance will be fine for this example so click Next: Add Tags
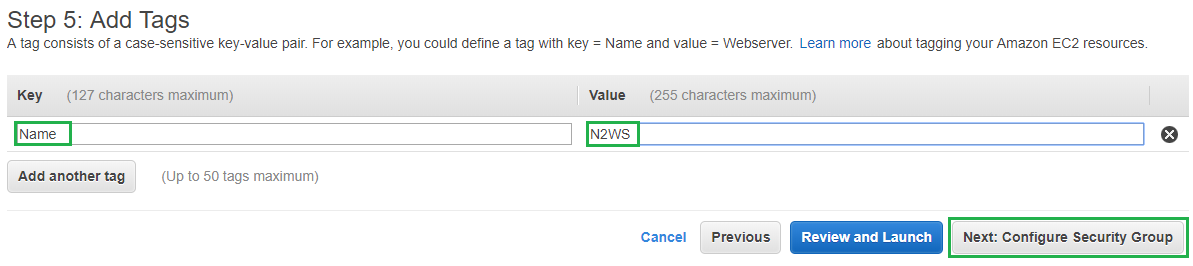
Click on Add Tag then set the Key to be Name and the Value to be N2WS, then click Next: Configure Security Group
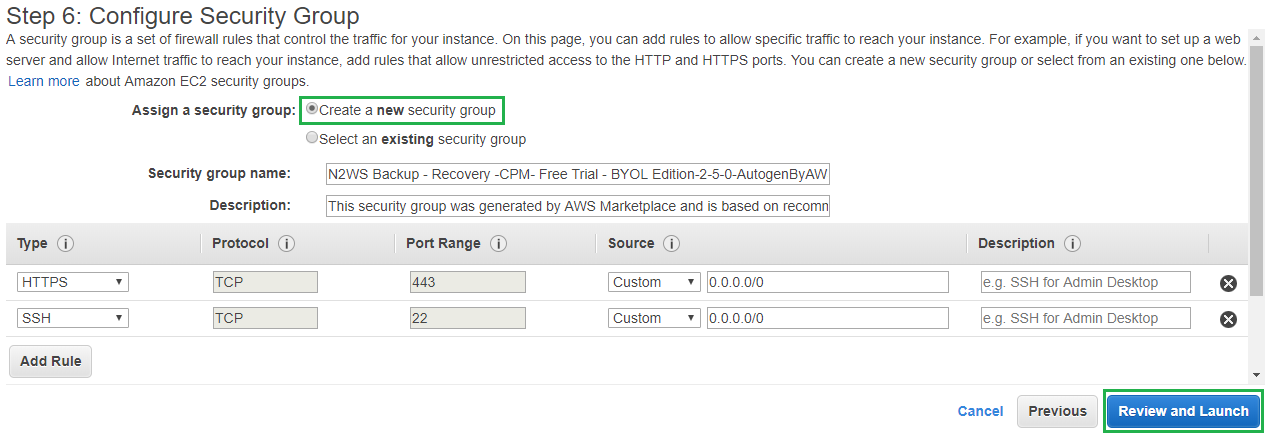
For the Security Group I am going to use the default settings and allow it to create a new security group. You can also lock down access to your instance from your static IP. Then click Review and Launch
Review your settings and click Launch
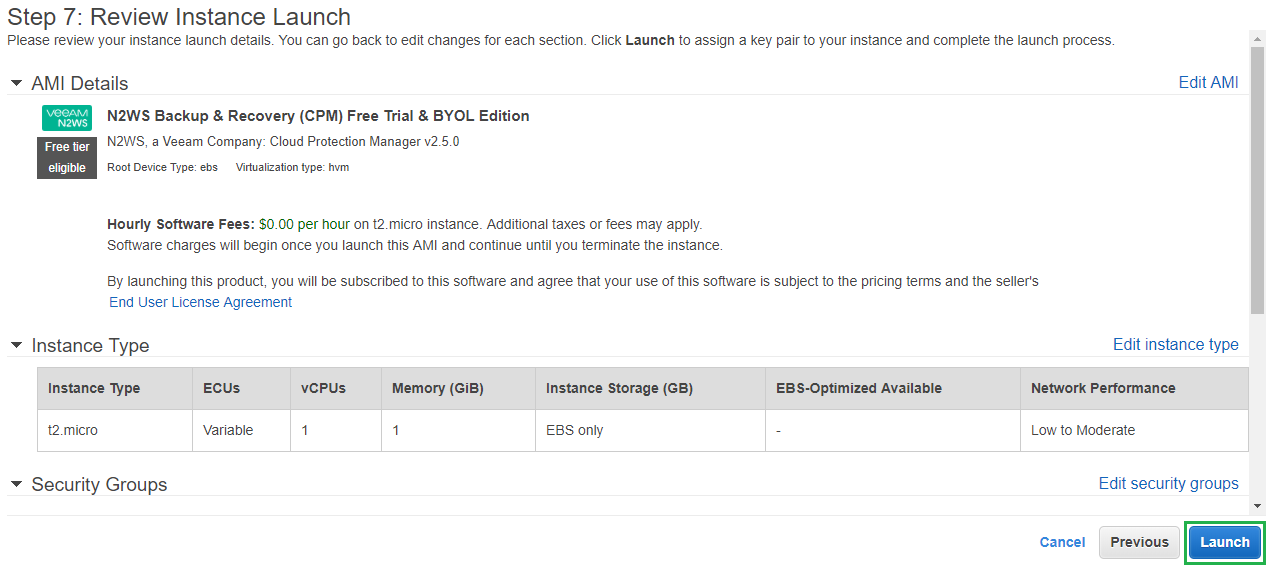
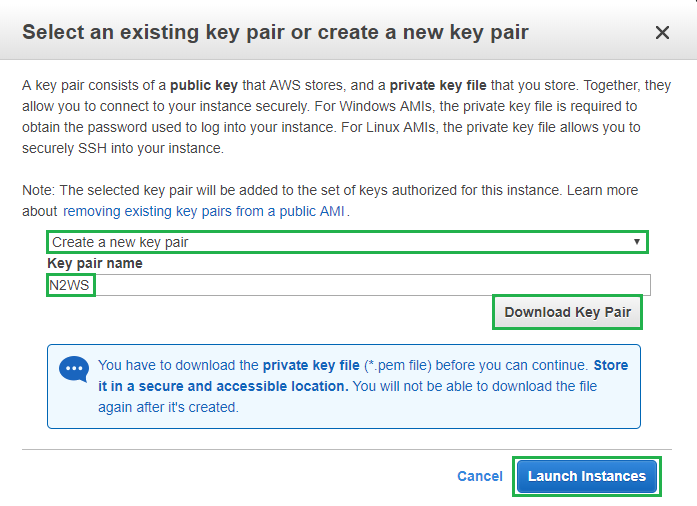
Then select Create a new key pair from the drop down menu and enter a name for the key pair. Then click Download Key Pair. Once complete click Launch Instances
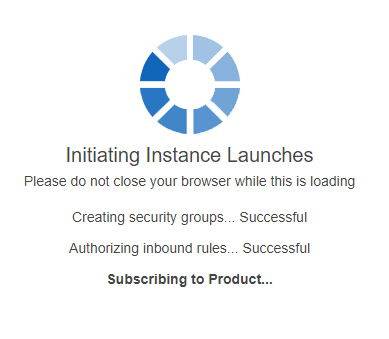
Your new N2WS instance will now be created
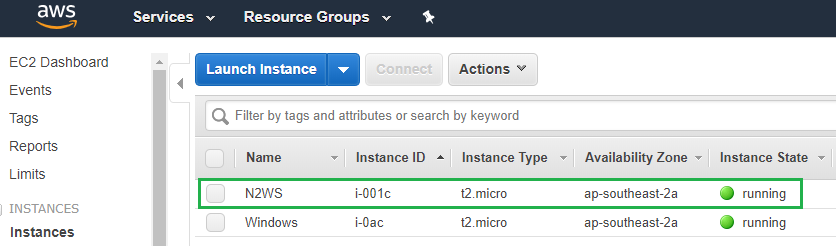
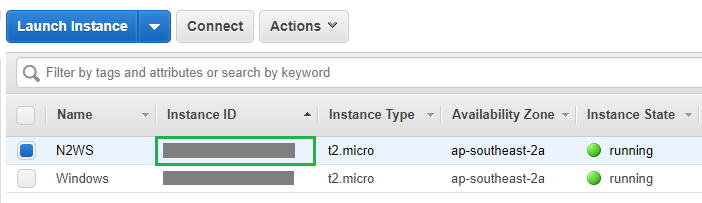
Now if we switch back over to our Running Instances in the EC2 section you will see the newly created N2WS instance there and the instance state should be running
Now it’s time for us to try and access our newly deployed N2WS instance. From the same screen copy the IPv4 Public IP Address and paste that into your browser https://PublicIPAddress

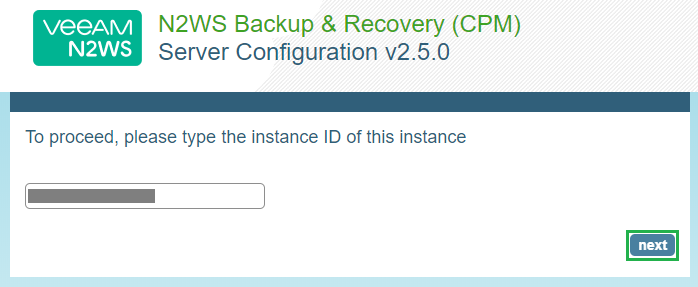
Accept the certificate error as we are currently only using a self-signed cert and then you should be presented with the following screen
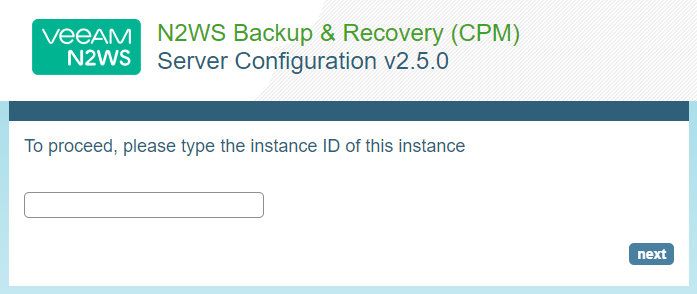
From the EC2 Running Instances page copy your Instance ID and paste it into the box provided on the N2WS screen
Then click Next
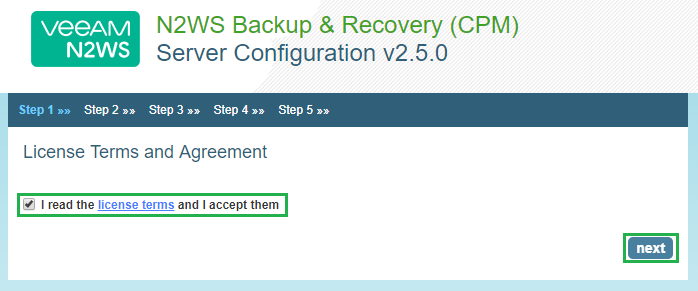
Accept the License Agreement and click Next
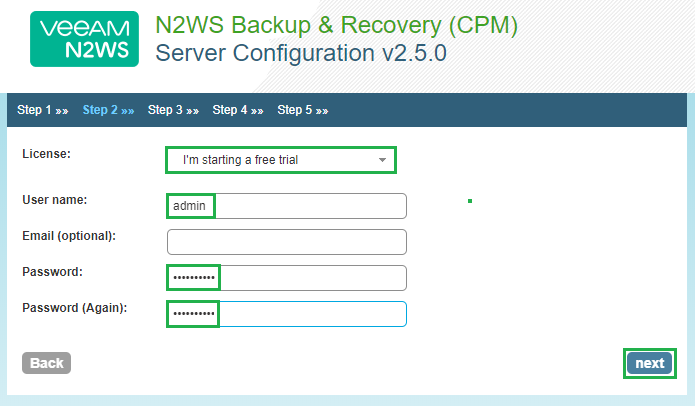
Then select I’m starting a free trial from the drop down box and then enter a username and password to get started with our free trial. Then click Next
Select the time zone and click Next
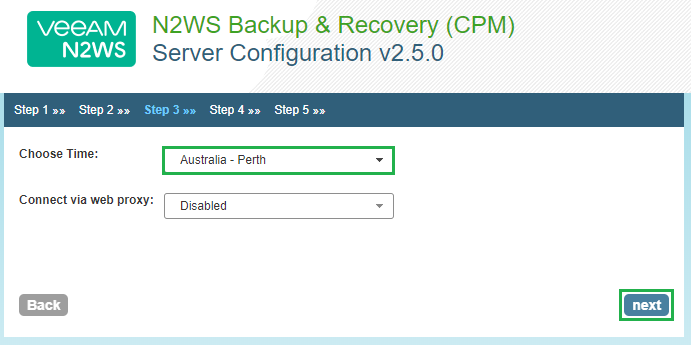
Select your usage report preference and click Next
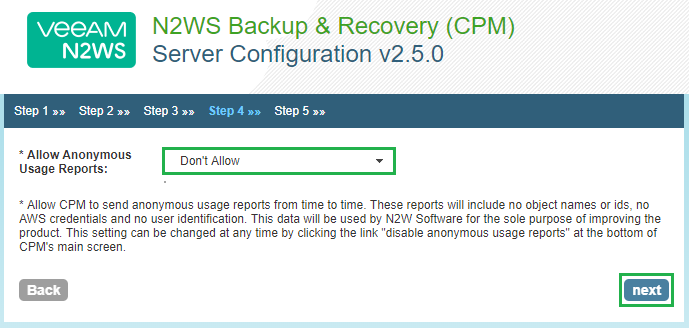
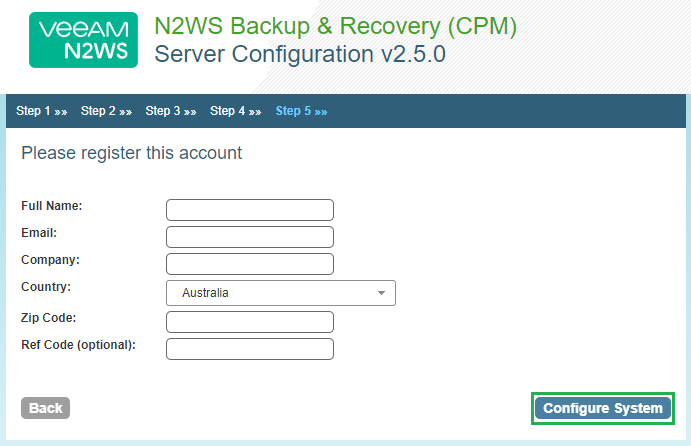
Fill out the fields below to register the system and once complete click Configure System
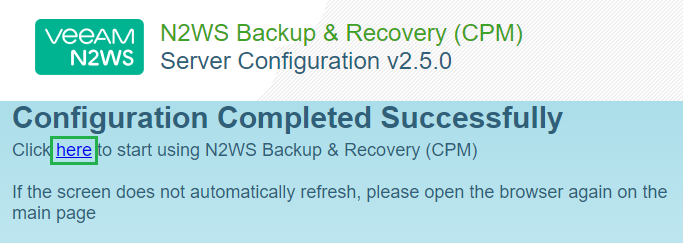
Then wait while N2WS aka Cloud Protection Manager is configured

Once complete you will see the following screen. Click on the link to get started
Enter the user account details from the admin user we created earlier and click Sign In
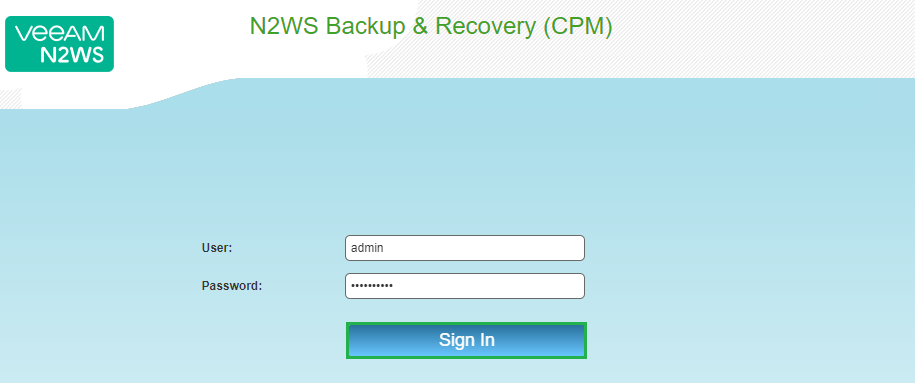
You will now be logged into the N2WS Console. Notice the text in the middle of the screen which will let you know how many days you have left of your free trial
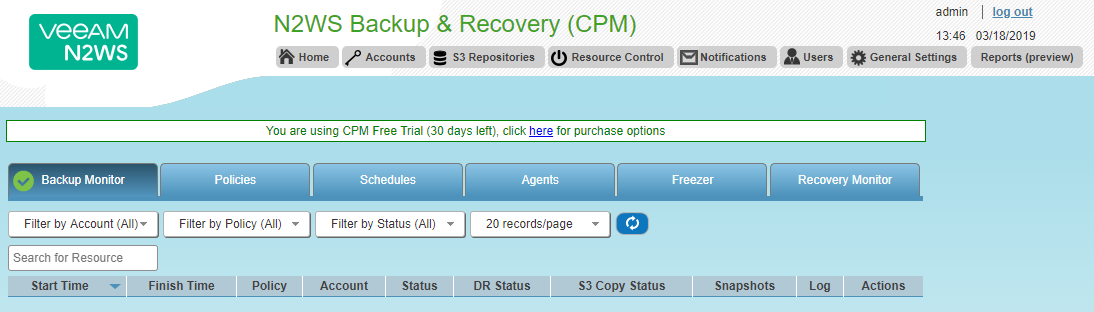
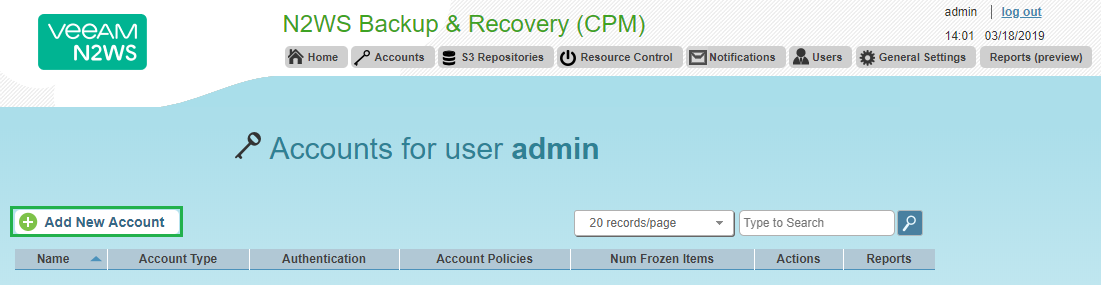
Next we need to create an account, click on the Accounts tab on the top menu

Then click Add New Account
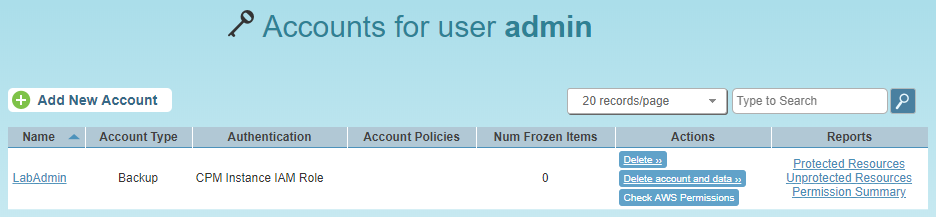
Enter a Name for the account and ensure that Authentication is set to CPM Instance IAM Role and click Add
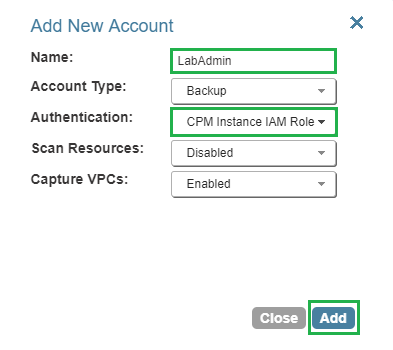
The newly created account will now be displayed. Click Home
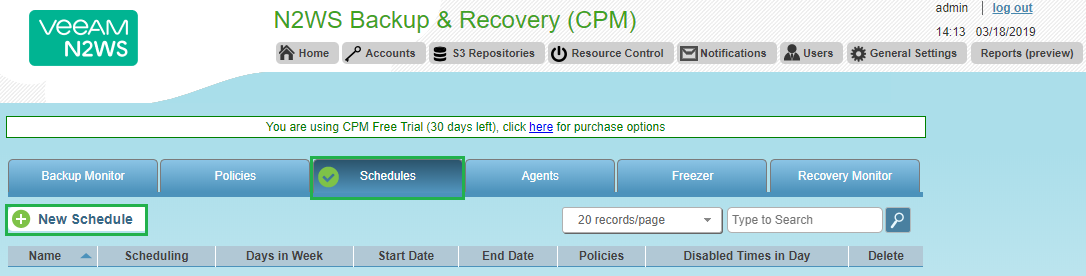
Next we need to create a Schedule. Click on the Schedules Tab and then click New Schedule
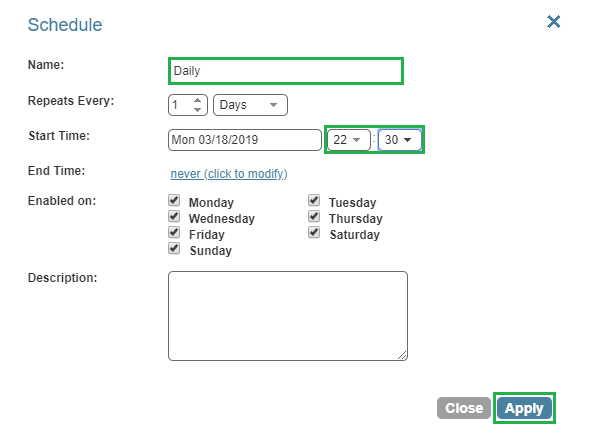
Enter a Name for the schedule and then select Repeats Every 1 Days and enter a Start Time. You can also enter an end time and select which days you would like this schedule to run. Once complete click Apply
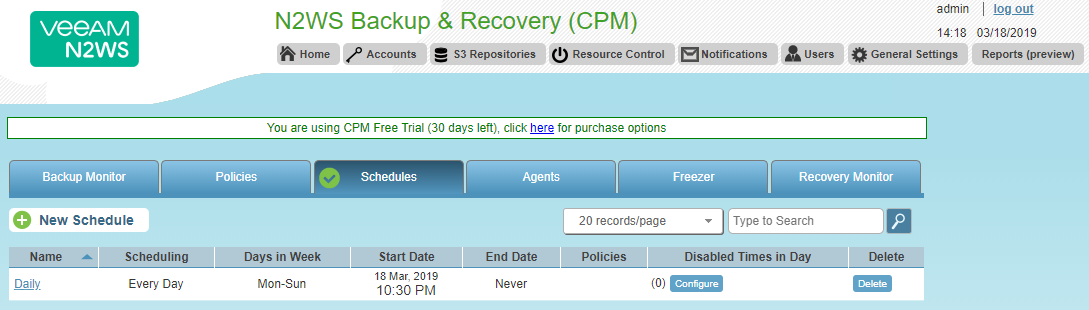
Then new Schedule will now be displayed
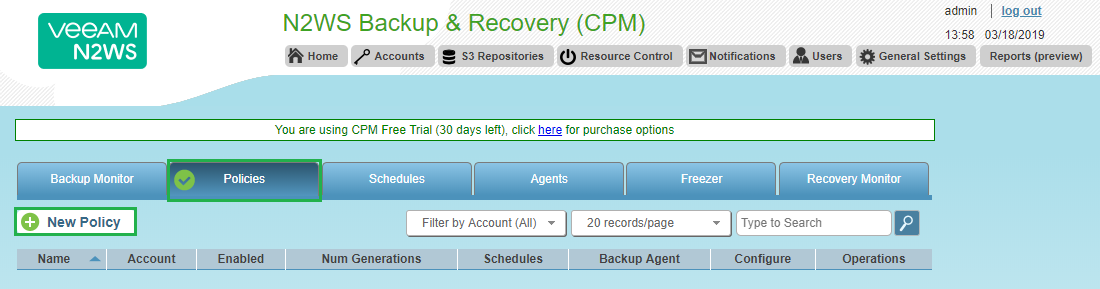
Now let’s create a policy to backup one of the EC2 Instances we have running at the moment. Select the Policies Tab and click on New Policy
Enter a Policy Name and select the account we just created. Then select how many Generations to Save and click Apply. I have reduced the number of Generations to save as this is running on my free tier account
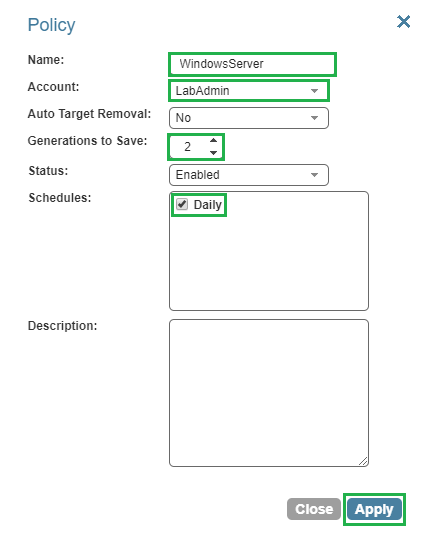
The policy will now be displayed
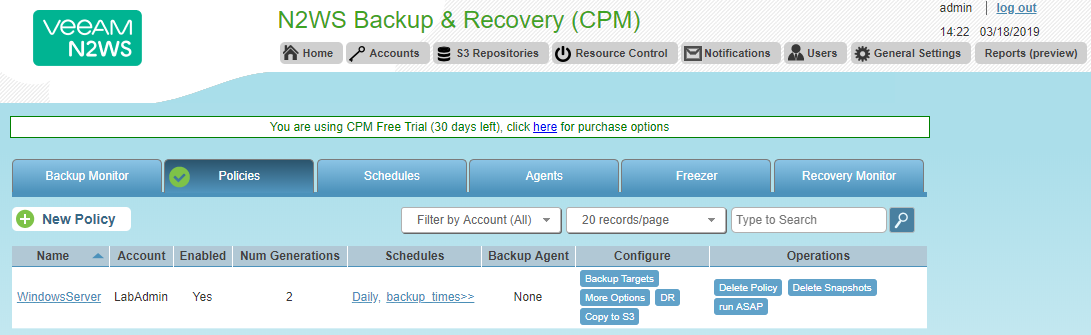
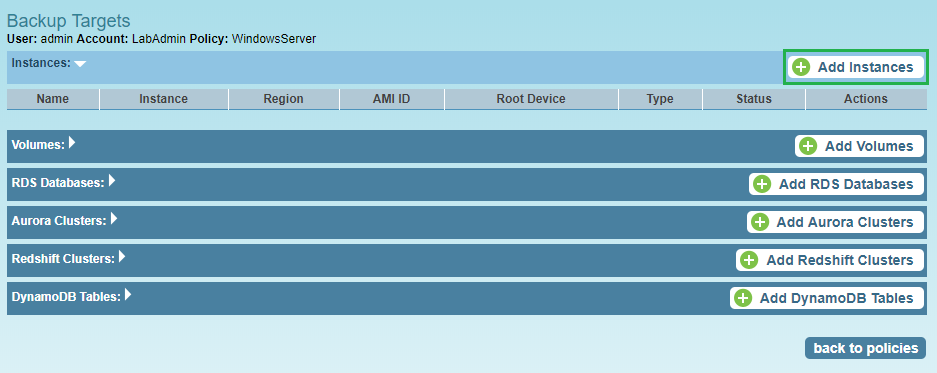
Now it’s time to select what we would like to backup with this Policy. From the same screen click on the Backup Targets button under the Configure column on the newly created policy
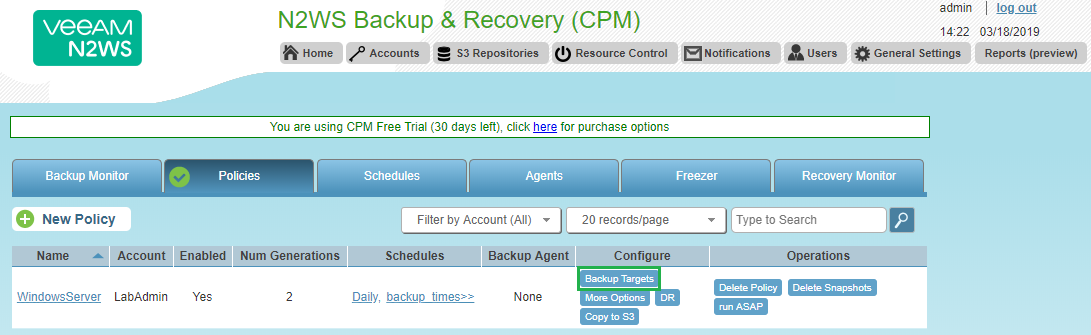
As you can see numerous options are available to you here for how you would target different areas within your AWS environment. For this example I am going to target one of my EC2 instances so click on Add Instances
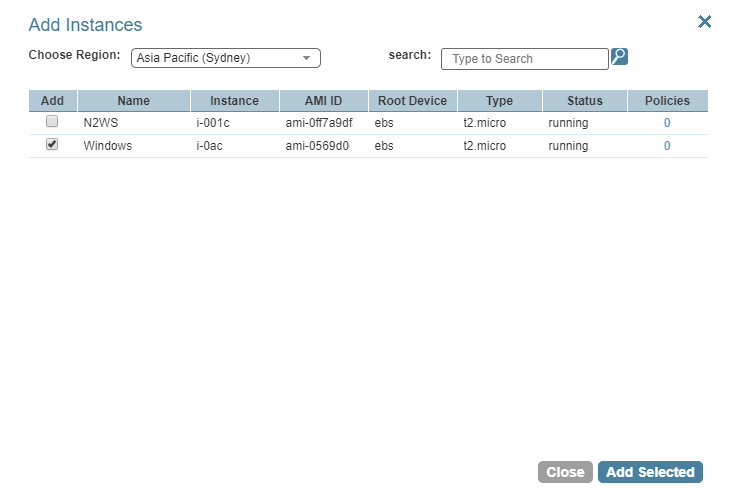
Select the Instance you would like to backup (you can switch between regions here also) and click Add Selected. Then click Close
Once your instance has been added click on Back to policies
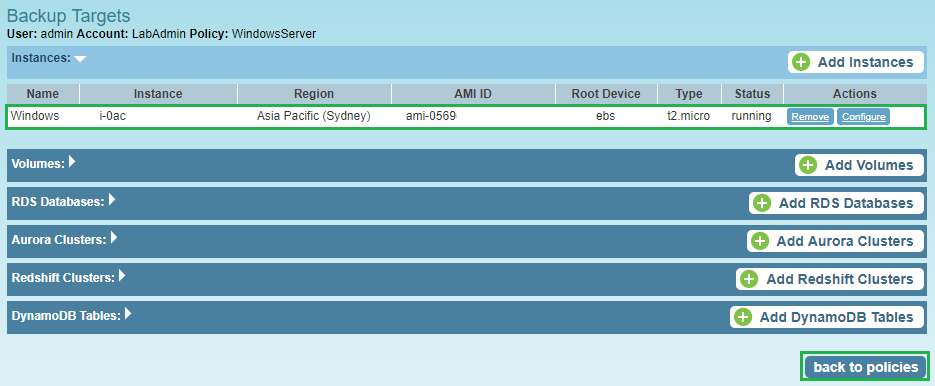
That’s it your instance has now been setup to use the newly created backup policy. You can also create a backup copy in another region by click on DR from the Configure column
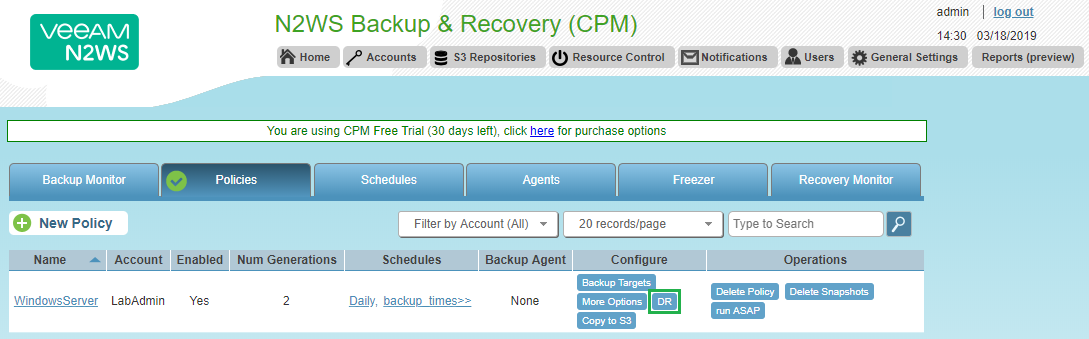
Configure the following options and select the region and click Apply
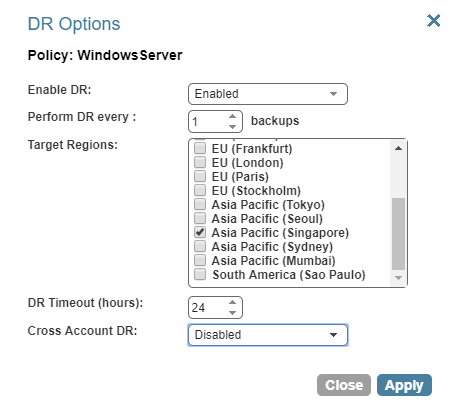
I am not going to enable this feature for this example so just an fyi. You can then kick off the backup by clicking on Run ASAP from the Operations column

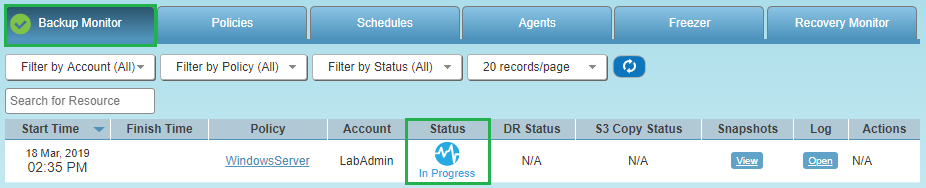
Then switch back over to the Backup Monitor and you will see the Status has changed to In Progress
There we go the backup was successful
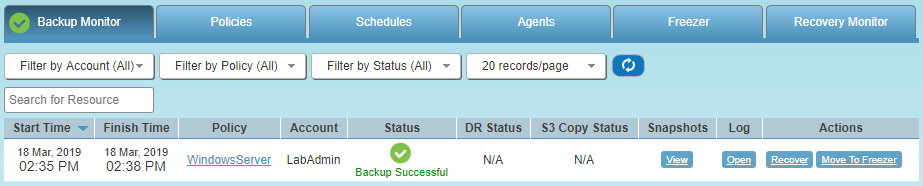
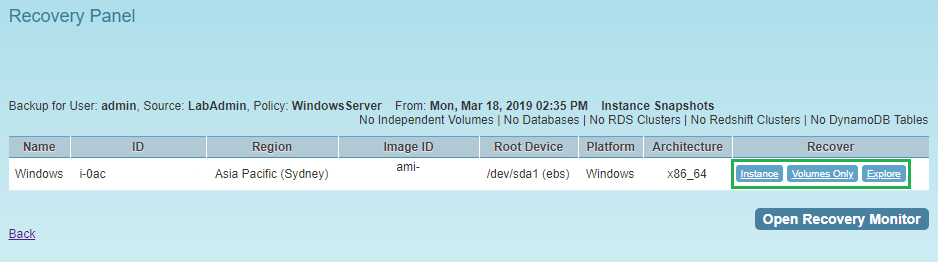
Then next thing I will test out is how to restore from backup. From the same Backup Monitor window click on Recover from the Actions column
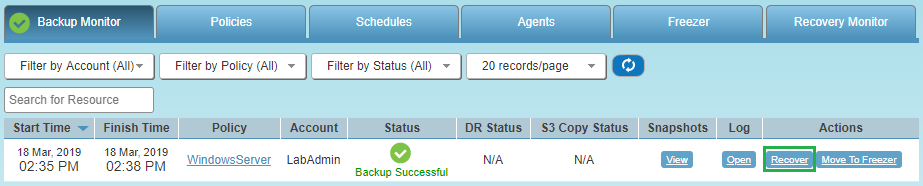
Then the Recovery Panel window will appear. From here you have the following options for recovery, Instance, Volumes Only or Explore. In this example I am going to recover the entire Instance
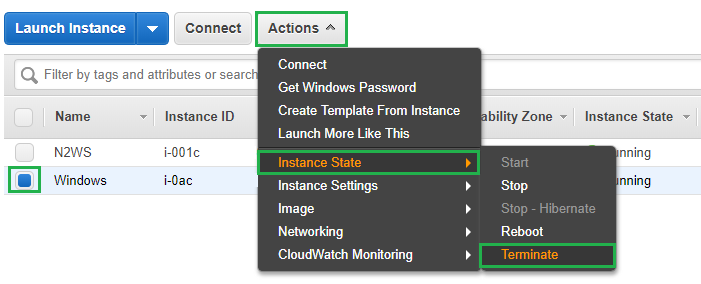
First I am going to switch back to my AWS console and remove the Instance we just took a backup of. If you are following along at home select the Instance, click Actions, Instance State and then Terminate. Then click on the Yes Terminate prompt
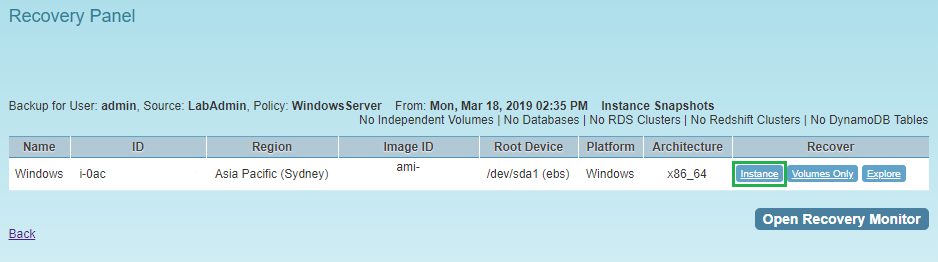
The Windows instance that I took a backup of has now been deleted. Let’s now switch back over to our N2WS console and in the Recovery Panel click on Instance in the Recover column
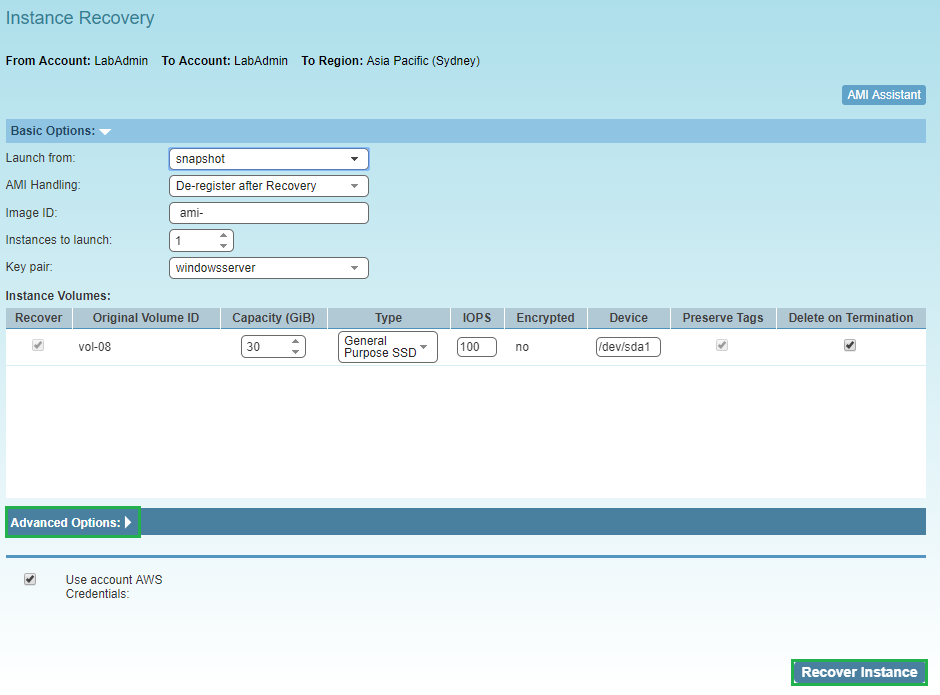
The Instance Recovery page will then launch, from here you can use the default entries to recovery the entire Instance. There is also an Advanced Options section which allows you to change any of the following settings for your recovered Instance
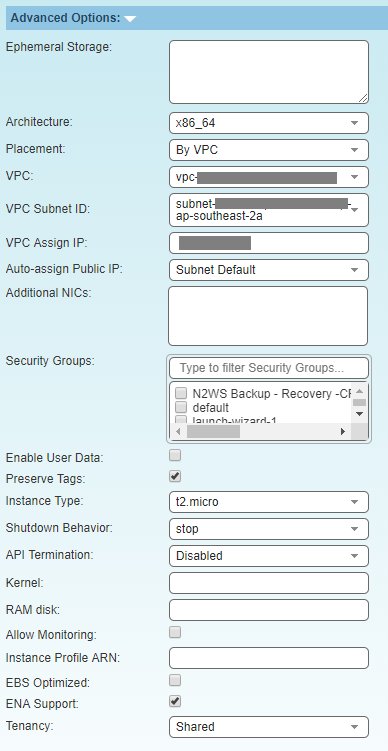
Once you have selected the options you would like, click Recover Instance
The recovery process has now started, click on Open Recovery Monitor to check the status
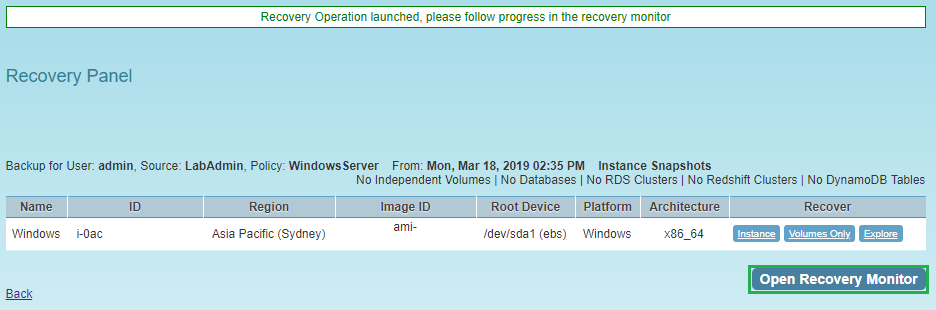
The EC2 Instance has been recovered successfully

Now let’s switch over to our AWS console to see if the Instance is there. As you can see below the old Instance that I terminated to simulate someone accidentally deleting is still present and will disappear on its own shortly. Then below it you can see the same Instance that I recovered from the N2WS backup and it is showing a new instance id
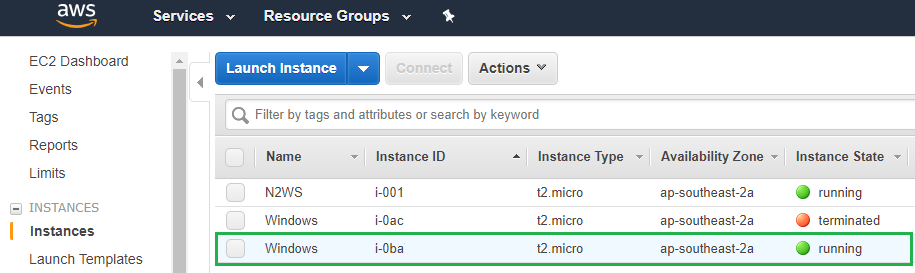
Now let’s connect to our restored EC2 Instance to show that it is actually available!
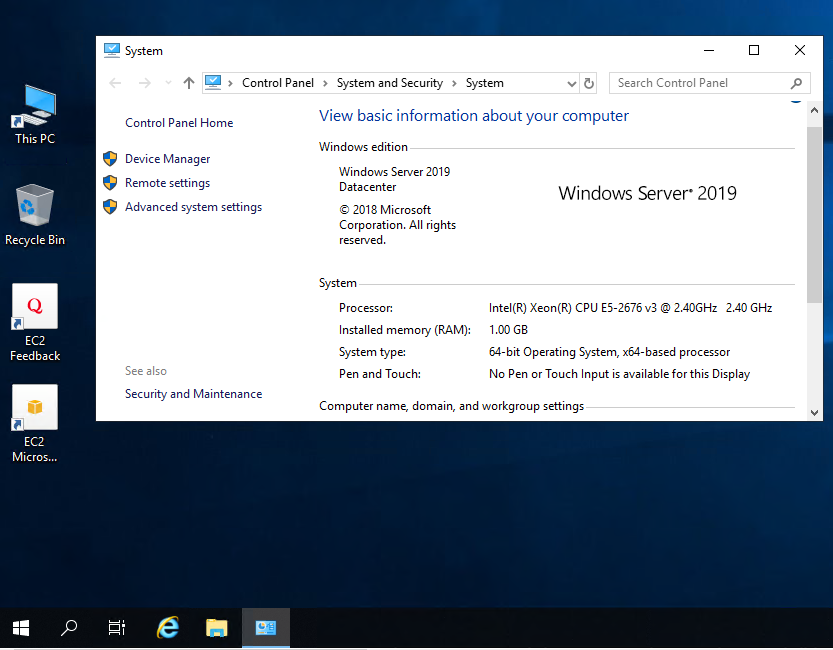
I hope this has helped you get started with N2WS Backup & Recovery 2.5 and stay tuned for a follow up post!
As always use the subscribe box above for new post notifications and follow me on twitter @steveonofaro
-
VeeamOn 2019 in Miami – May 20-22

VeeamOn 2019 is being held in Miami Florida on May 20-22 and promises to jam packed with content with the recent release of Veeam Backup & Replication 9.5 Update 4. This is going to be one event you don’t want to miss out on attending!
There are some really great breakout sessions on offer this year, along with Training, Certifications, Hands-On Labs and as always the ability to network with IT peers from around the world. You will also find some of the 2019 Veeam Vanguards wandering around so make sure you say hi if you see them!
This year’s venue is the Fontainebleau Miami Beach and it looks amazing. I am from Perth and we have one amazing coastline and I cannot argue with this view! The Fontainebleau is a short 15 minute drive from the airport so if you jump in an Uber that will be about $20-$25 which is really good.
How are you going to concentrate you ask? Well thats simple just book yourself on one of the three courses available prior to the event to get in the zone!

There are three additional days prior to the conference dedicated to Veeam Certified Engineer classroom training. The 3 courses available have to be bundled with the conference pass to take advantage of the discounted rates. In Australia only the VMCE course is available and you will be paying a lot more than this to attend.

The following courses are on offer in the days prior to the big event,
Veeam Certified Engineer Training (VMCE) – 3-day class instructor-led class offered Saturday through Monday, May 18 – 20
VMCE-Advanced Design & Optimization (ADO) – 2-day instructor-led class, offered Sunday and Monday, May 19 – 20
Veeam Orchestration: Disaster Recovery Design & Validation – 2-day instructor-led class, offered Sunday and Monday, May 19 – 20
The following will also be provided with each course,
Digital Courseware
Hands-on lab access during class and for 180 days post-class (VMCE & Veeam Orchestration only)
Complimentary Practice Exam access
One Exam Voucher code, valid for the relative exam delivered at any Pearson VUE test center (VMCE & ADO only)
To register or find more information about the courses on offer please use the following link
The Dream Team will be presenting at the event so make sure you get to the keynotes and as many of the sessions as you can. It’s going to be a busy couple of days and I know they have some great content prepared!

To find out more about the team check out the following link
Here is list of just some of the sessions available at the event. Also check the website as this list will likely be updated as we get closer to May.
- Migrating File Servers to Office 365
- Microsoft Azure – Total Data Protection and Availability
- Application Performance testing for DR scenarios
- Nutanix Availability End to End with Veeam
- Secrets to Design an Availability Infrastructure for 25.000 VMs
- Customer Support 101 – Help Us to Help You
- Business Continuity – When people, process and products come together to save the business
- How I stopped worrying and loved the tape media
- 10 ways Veeam Availability Orchestrator will improve your BCDR strategy
- The Case for Backing up Office 365 Data
- Architecture, Installation and Design for Veeam Backup for Microsoft Office 365
- Automate Yourself Out of a Backup Job – Advanced PowerShell & API Usage
- IT’S MORE THAN JUST BACKUP: Next Generation Data Protection Using ExaGrid and Veeam
- Your cloud, your way –Microsoft Azure Stack & Veeam
- TOP SECRET: Session related to announcement
- Journey to the center of the cloud and back again!
- Get your data to the cloud – Microsoft Data Box & Veeam
- The State of the Backup Market & Veeam 2019 Predictions
- Journey to Better Backup & Intelligent Data Management for the Multi-Cloud Data Center
- Understanding the Availability Gap
- Healthcare: What you need to know in 2019
- Cumulonimbus – Cloud Tier Deep Dive & Best Practices
- Your navigational guide to Veeam Availability for AWS, N2WS Backup & Recovery and the External repository
- Tips and Tricks from R&D
- Veeam Capacity Tier & Veeam Cloud Mobility Under the Microscope
- Veeam ONE 9.5 U4 Part 2: Reporter, Heatmaps and Custom Reports
- Veeam Instance Licensing: What you need to know
- The Dark Side of the Synthetic Backup
- VeeamON EXCLUSIVE: Sneak Peek at 2019 Releases from Veeam
- Veeam Agent for Microsoft Windows: Tips, Tricks and What NOT to do
- Veeam Backup for Microsoft Office 365 v3: in depth
- Veeam ONE 9.5 U4 Part 1: Monitor, Veeam Intelligent Diagnostics and Business View
- Veeam Availability Console Usage Scenarios
- Veeam Availability Console Deployment Best Practices
- Protect your AWS data with #1 AWS Backup & Recovery
- Let’s manage agents
- Veeam Explores: Tips and Tricks to Deep Dive
- Top 7 Worst Practices when Using Veeam Backup & Replication
- Veeam Storage Integration Deep Dive
- Activate Your Data with Veeam DataLabs
- MFA in O365: a headache or a golden ticket?
Keep a look out for the mobile app which should be available towards the end of April
To view the full Agenda check out the following link
Also do not miss the Veeam oceanfront pool party at the iconic Fontainebleau, featuring Flo Rida!

That’s it from me so make sure you take your boss out for coffee tomorrow after memorizing this information and explain why sending you to this conference will be of great benefit to your company!
Also promising to sit your VMCE Certification will help! Good luck and I hope to see you there.
@steveonofaro

-
vRealize Operations Tenant App 2.1 for vCloud Director – Part 2
In a previous post I went through the base installation of vRealize Operations Manager 7 and also a deployment of RabbitMQ on a separate CentOS 7 VM. Now it’s time to install the Management Pack and the vRealize Tenant App for vCloud Director.
To begin the first thing we need to do it download the vRealize Operations Management Pack for vCloud Director.
You can find the link to the marketplace here
Select the big green Login to Try button on the right to login and download it.

Login to your vRealize Operations Manager and click on the Administration on the top menu. Then under Solutions click the + button to add a new solution.

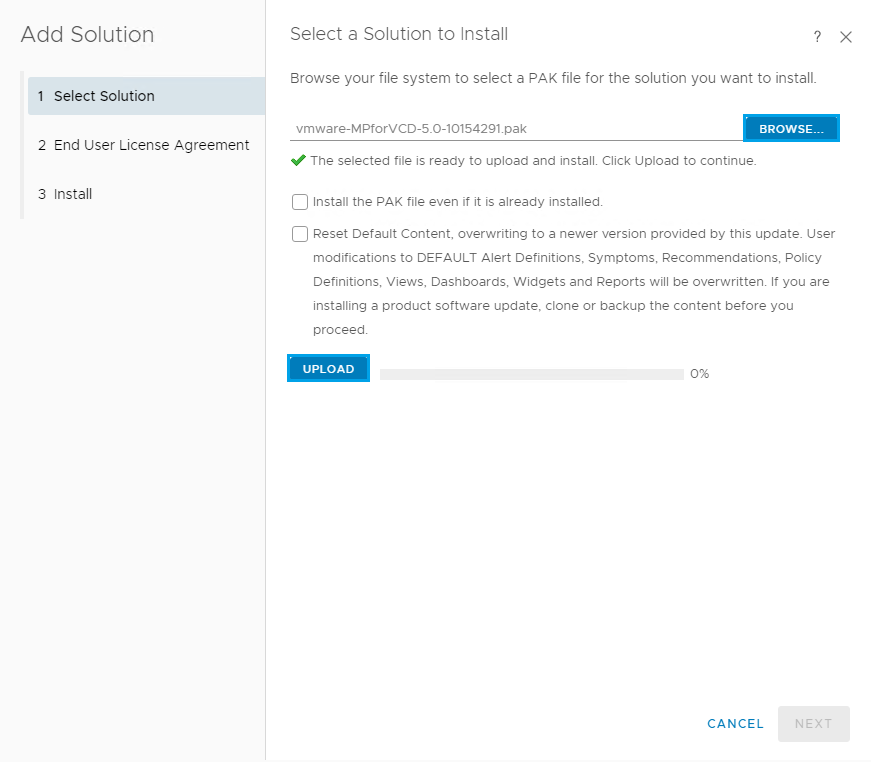
Click Browse and select the Management PAK file you just downloaded and then click the Upload button.
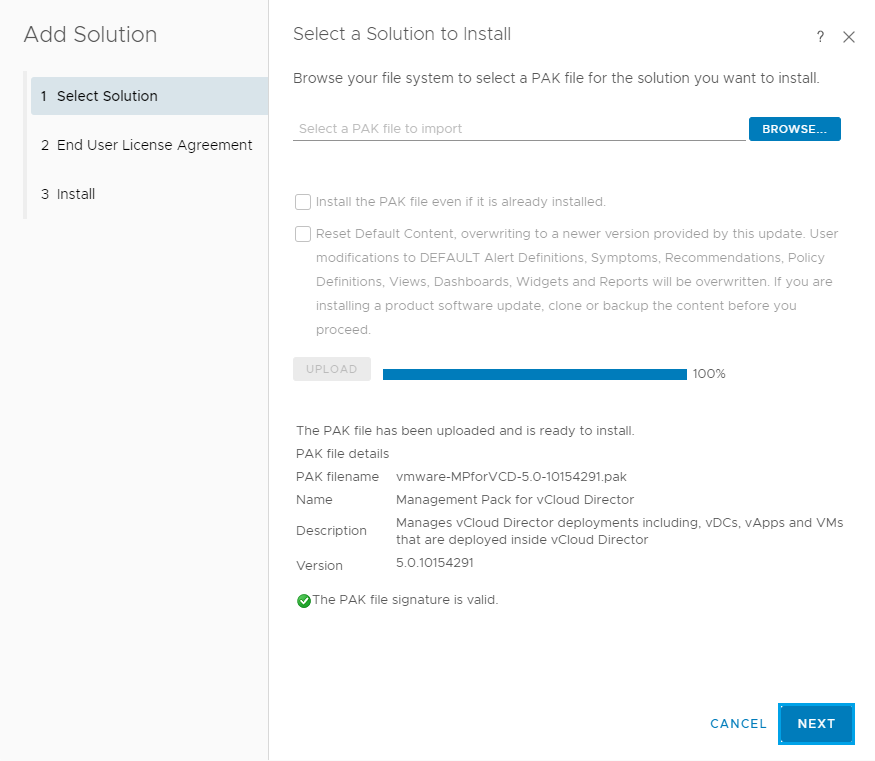
Once the file has uploaded you should see the following screen. Click Next
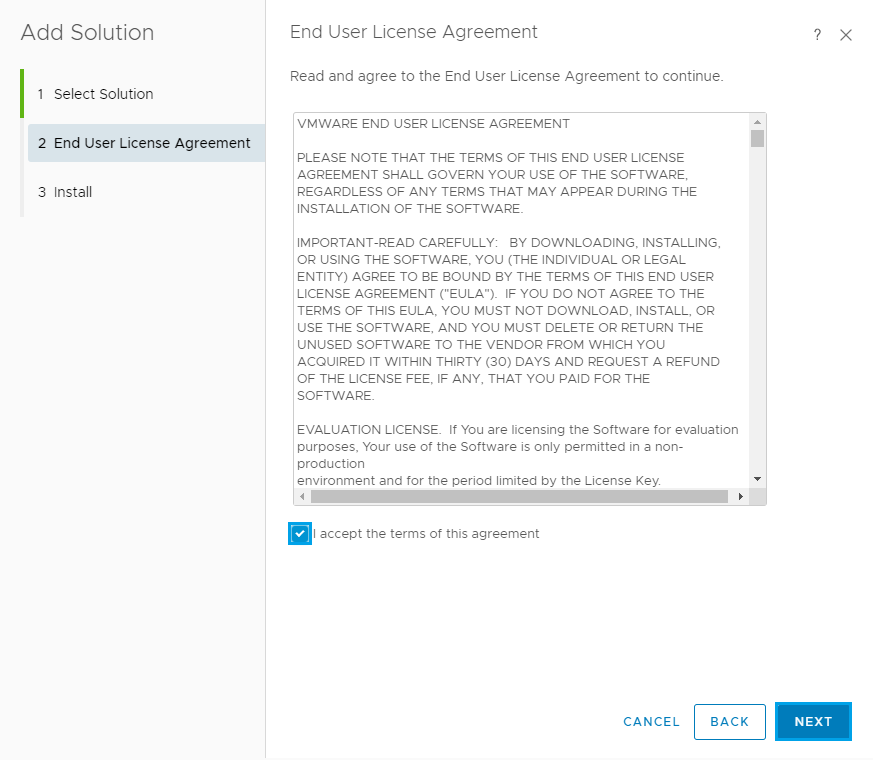
Accept the License Agreement and click Next
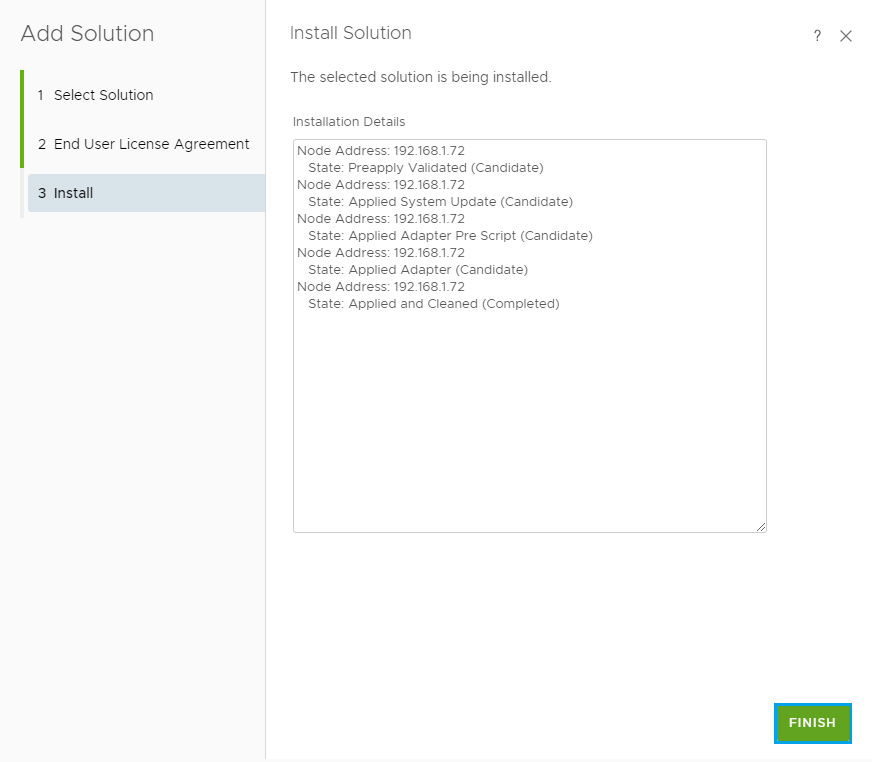
The installation will now start. Once complete click Finish
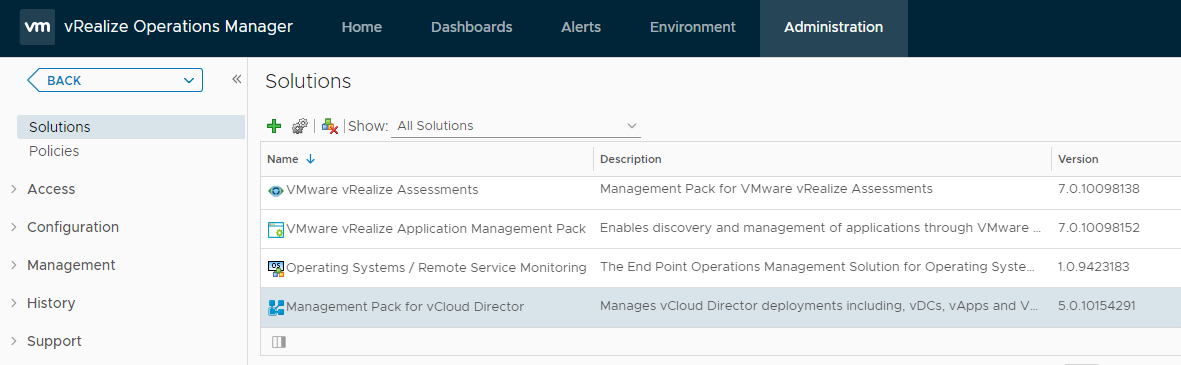
Now if you scroll down on the solutions list you should see Management Pack for vCloud Director
Before we connect to vCloud Director we need to make sure the certificate has been updated and the Public Addresses section has been filled out. To do this log back into the vCloud Director Portal (https://vclouddirectorurl/cloud) and go to Administration then Public Addresses. Update the certificate chain for the API, Tenant Portal and Web Console.
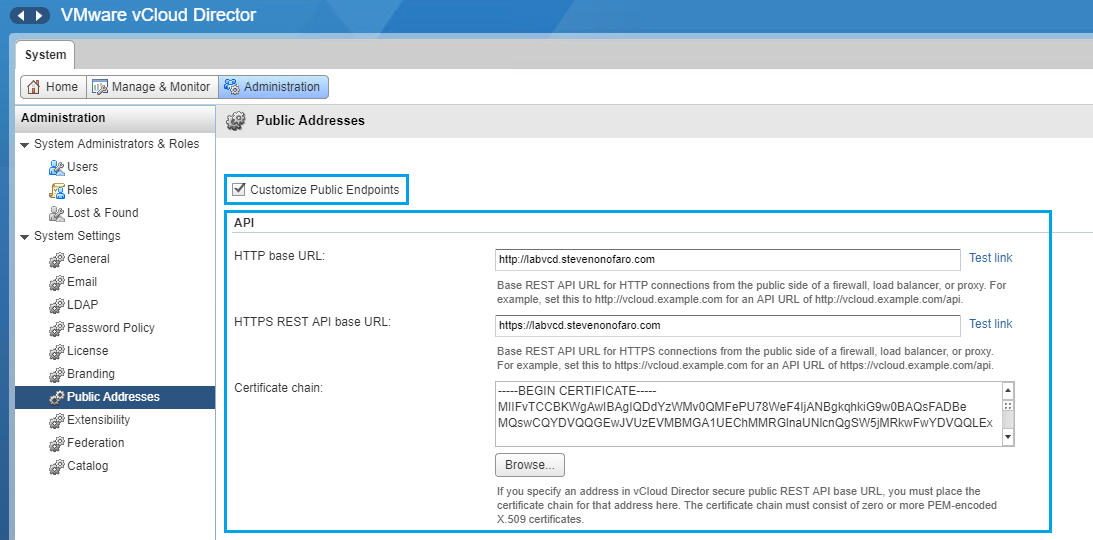
The easiest way is to convert your existing certificate to a pem file, open with wordpad and remove the private key. Then paste the remaining chain into the 3 locations listed above.
Now back over to vRealize,
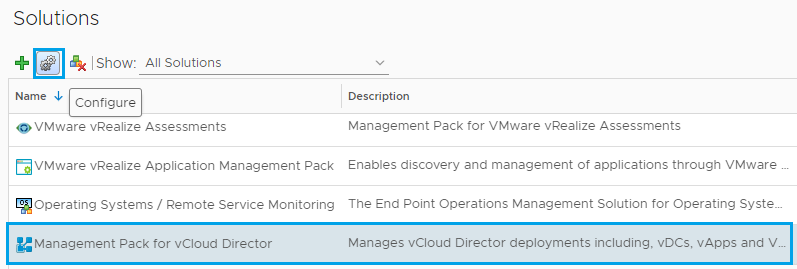
Click on the Management Pack for vCloud Director and then click on the Configure icon
Next point the Instance Settings to your vCloud Director deployment. If you have a multi-cell environment setup you can enter the load balanced address here.
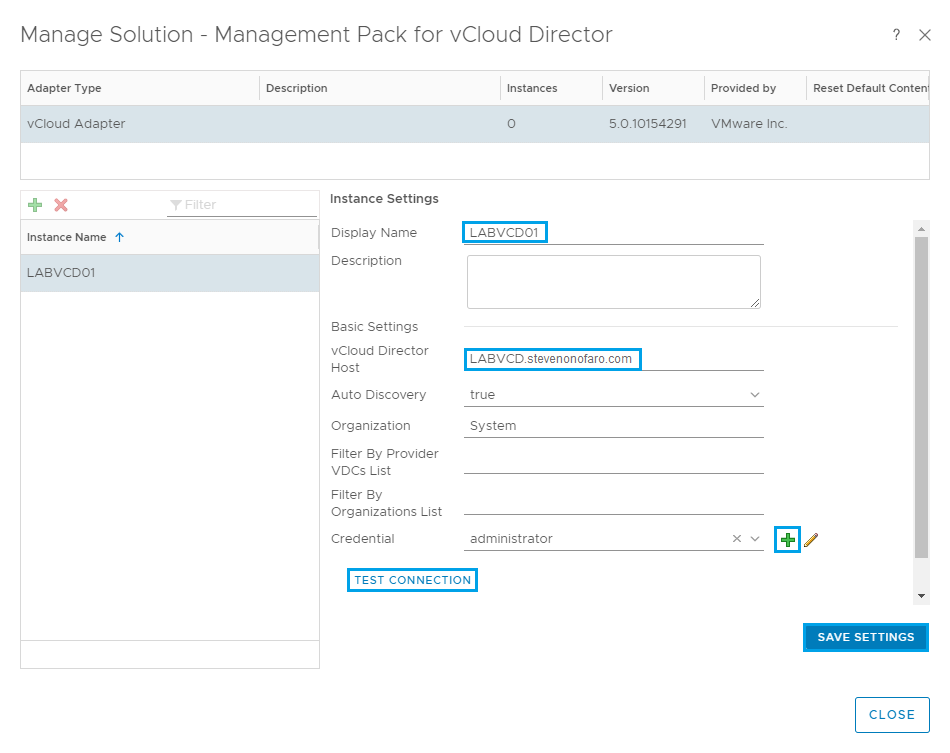
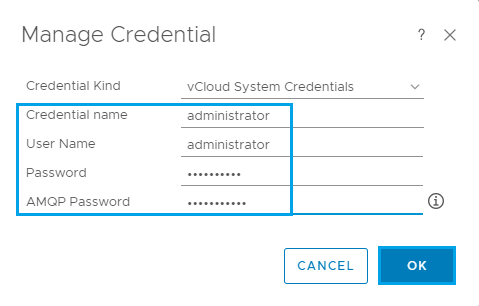
Click the + to add in your user credentials for vCloud Director and also enter the password for AMQP server we created in the previous post. Then click OK
Once that is complete click Test Connection and accept the certificate prompt
Then click on Save Settings and then OK once the Adapter Instance has saved.

Then click Close to complete.
You may have to refresh your screen before the Management Pack for vCloud Adapter status changes to a green tick and shows Data Receiving.

Now it’s time to download and deploy the vRealize Tenant App for vCloud Director. For this installation I have downloaded the following version from the Marketplace via the following link
From the Resources tab you can scroll down and select the version you would like to use.

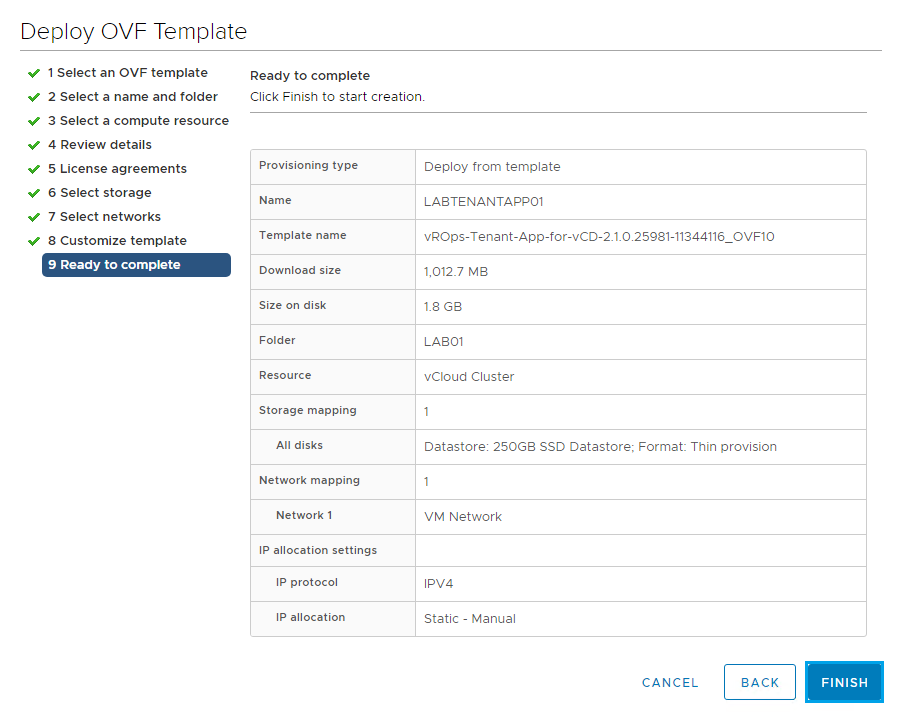
vROps-Tenant-App-for-vCD-2.1.0.25981-11344116_OVF10
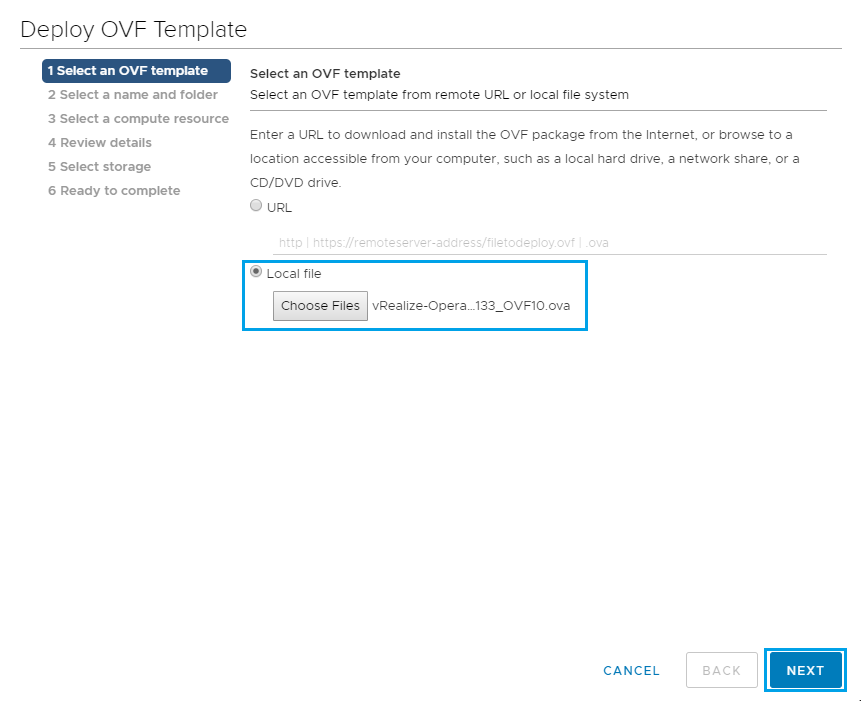
From vCenter select Deploy OVF Template and browse to the location of the downloaded file. Click Next

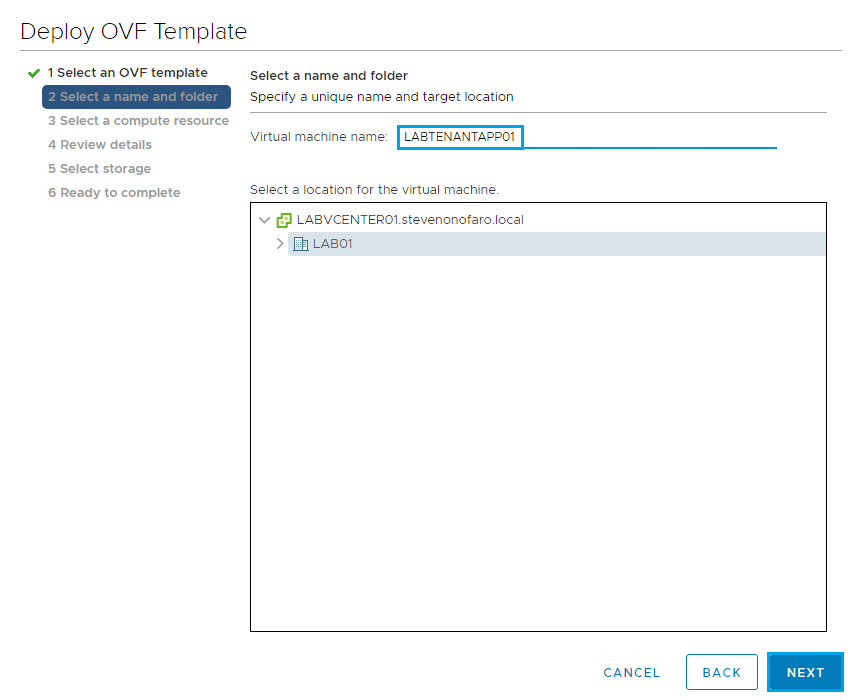
Enter a name for the VM and click Next
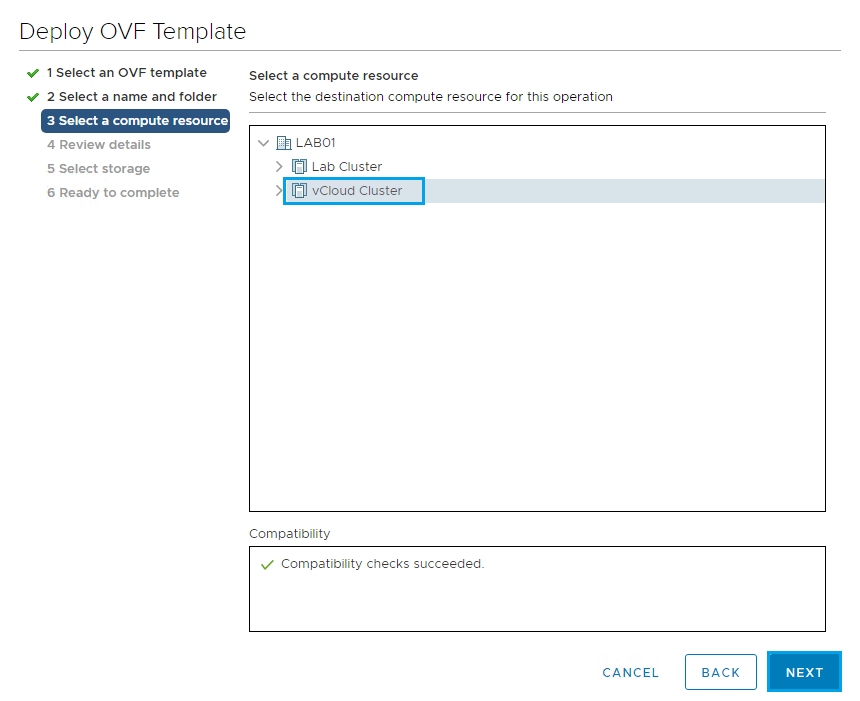
Select a Cluster to deploy the Tenant App on and click Next
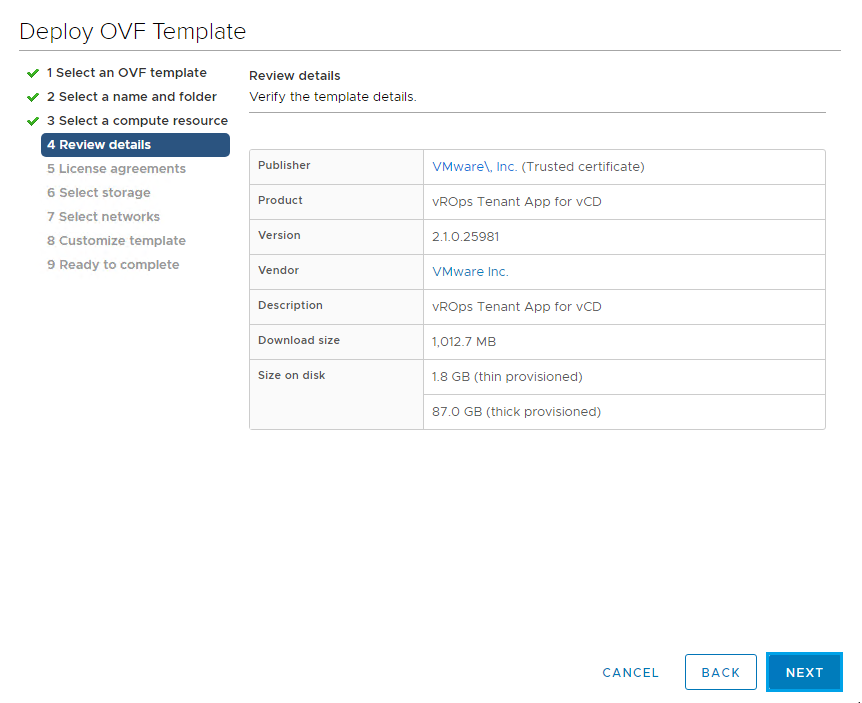
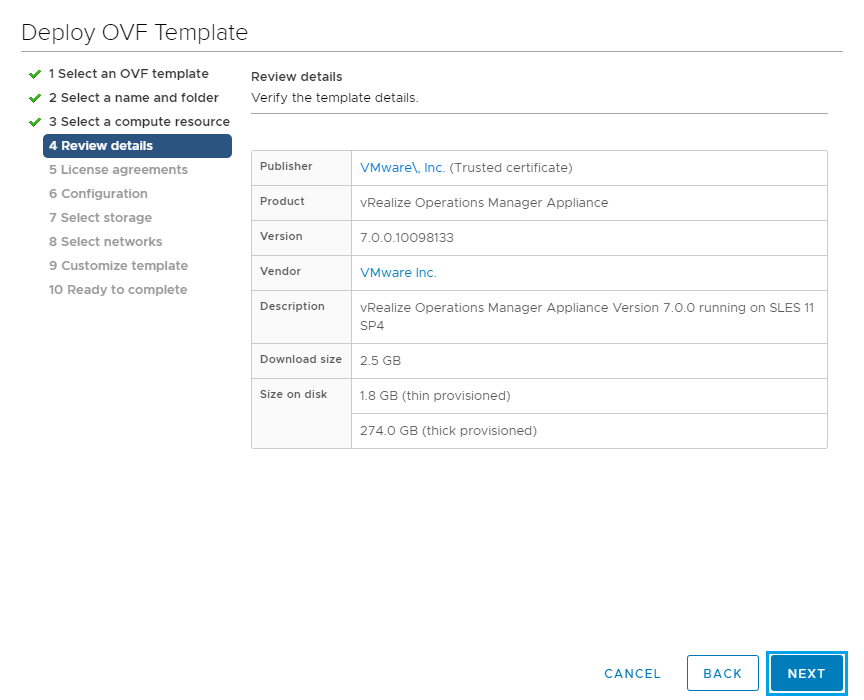
Review the details and click Next
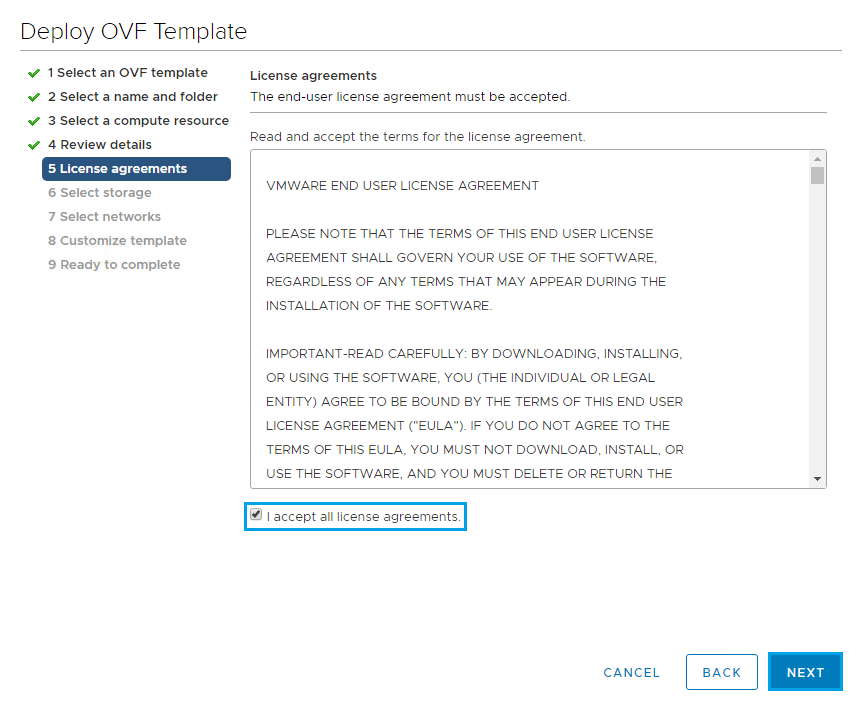
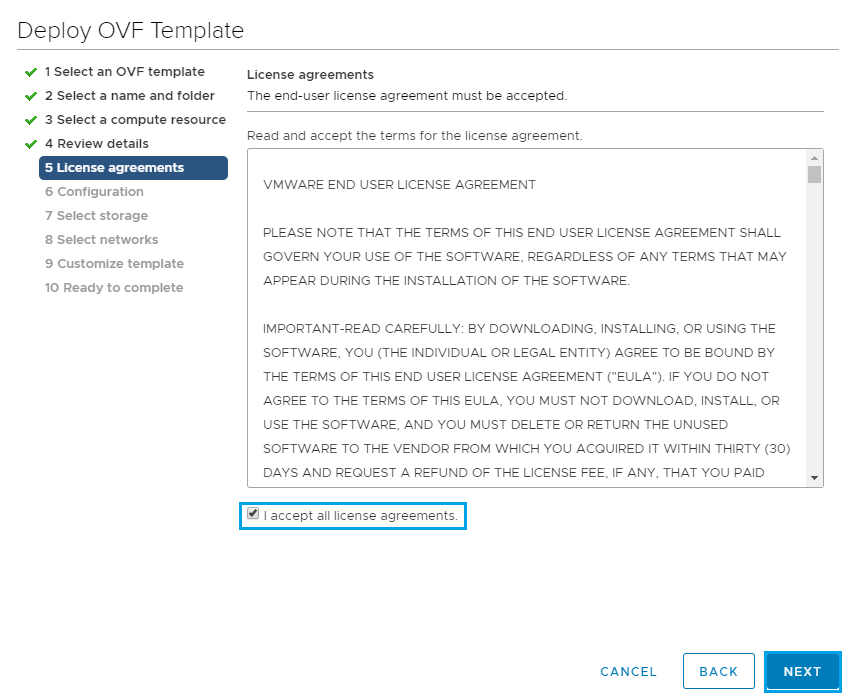
Accept the License Agreement and click Next
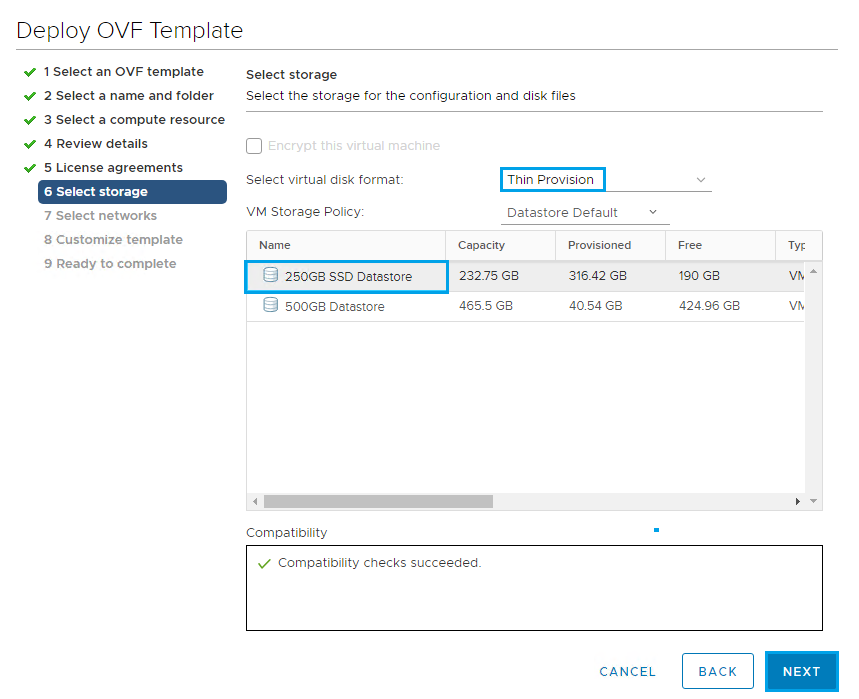
Select the Datastore and click Next
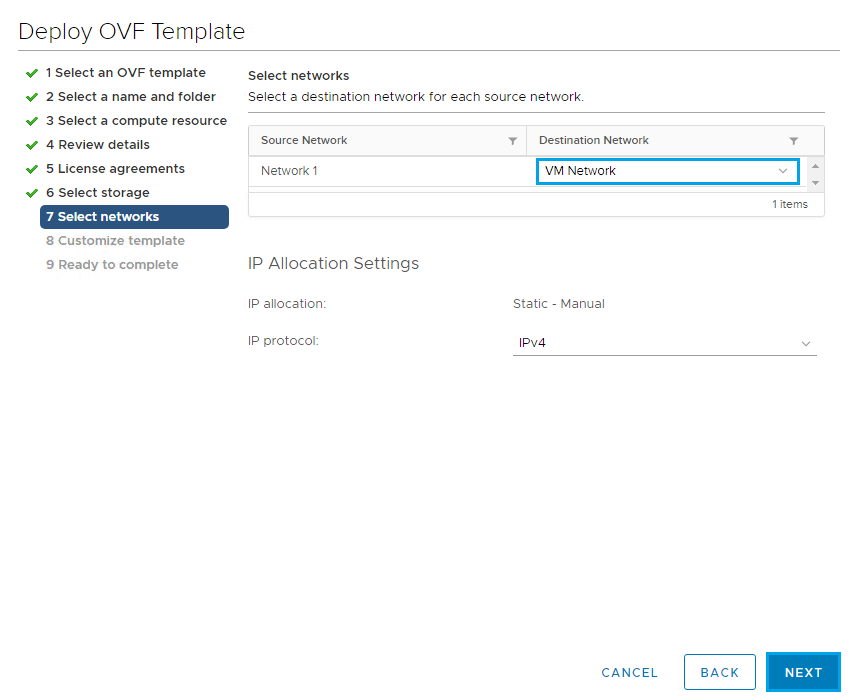
Select the Network you would like to use and the default protocol which should be IPv4 and click Next
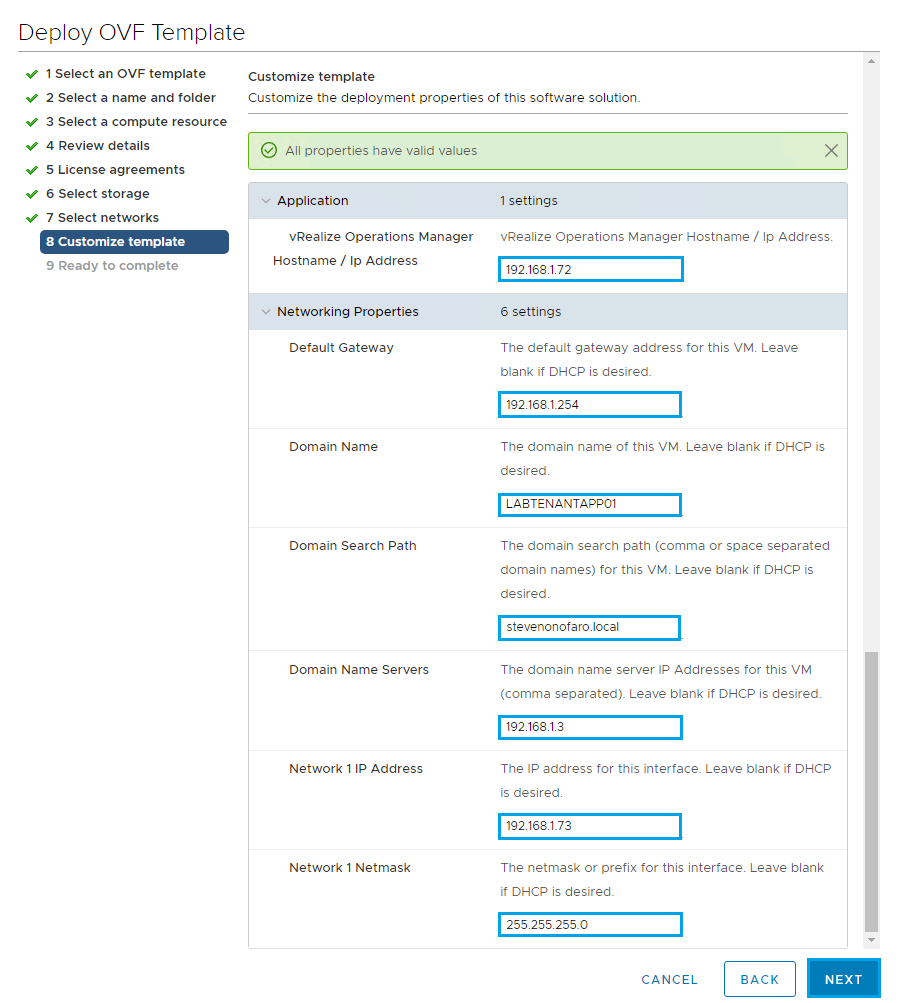
Complete the Customize Template section updating each of the required fields. This will reference vCloud Director and also the RabbitMQ installation. Once complete click Next
Review the settings and click Finish
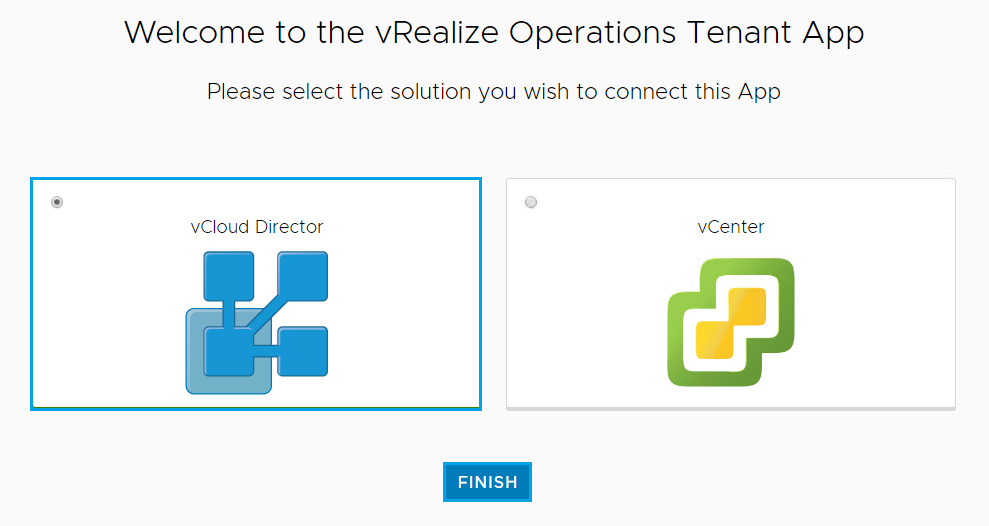
Once the VM is ready, power it up and log into the web interface using the Hostname or IP address http://LABTENANTAPP01
Click on vCloud Director and click Finish
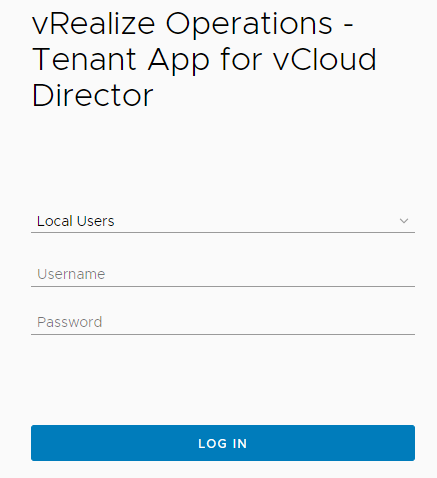
Now login using your vRealize Operations Manager credentials
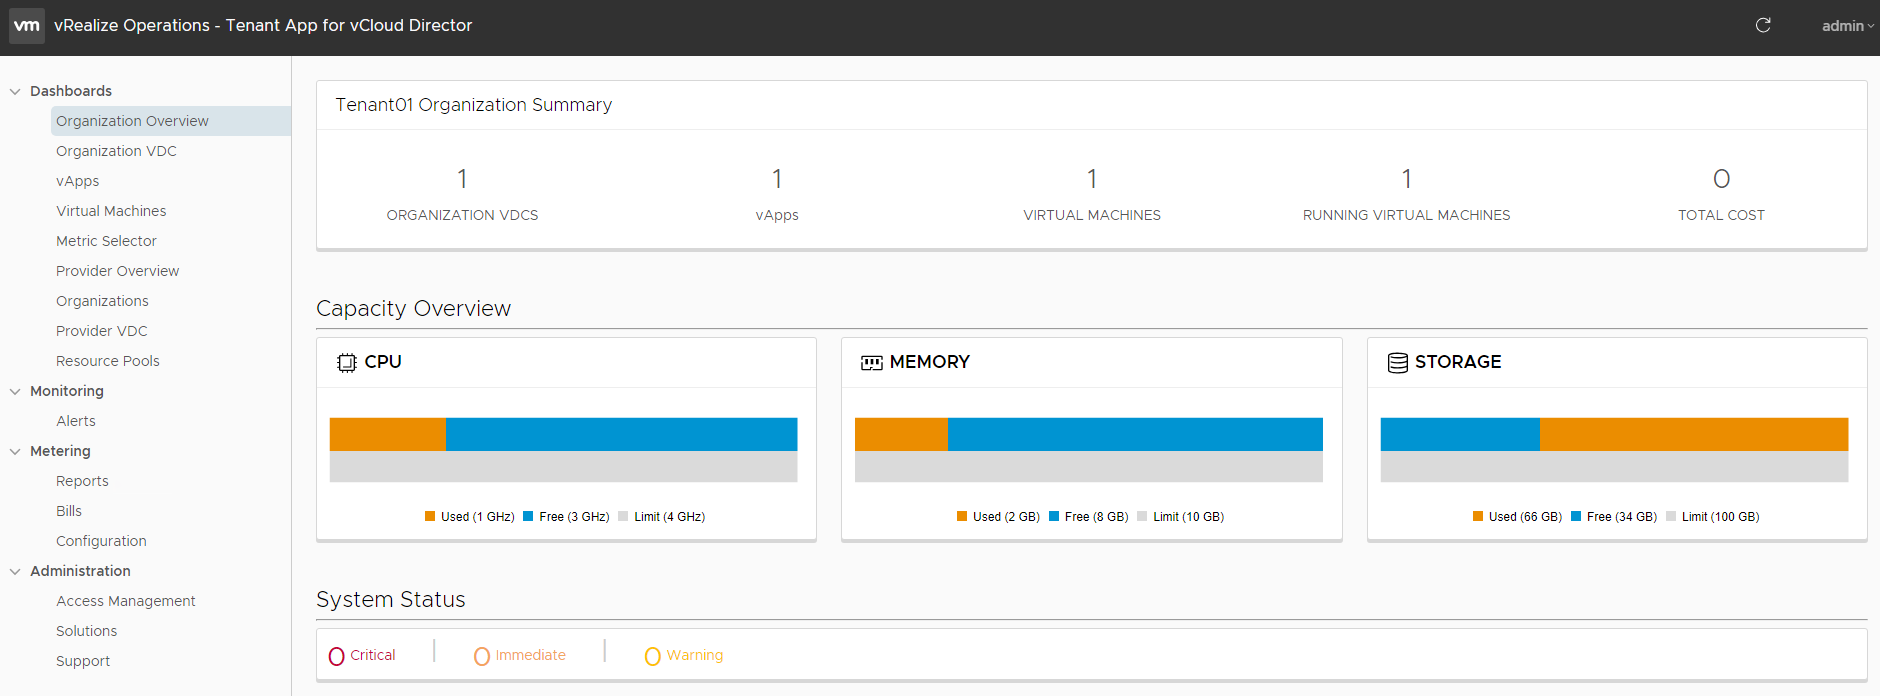
Once logged in you will see the vRealize Tenant App Dashboard
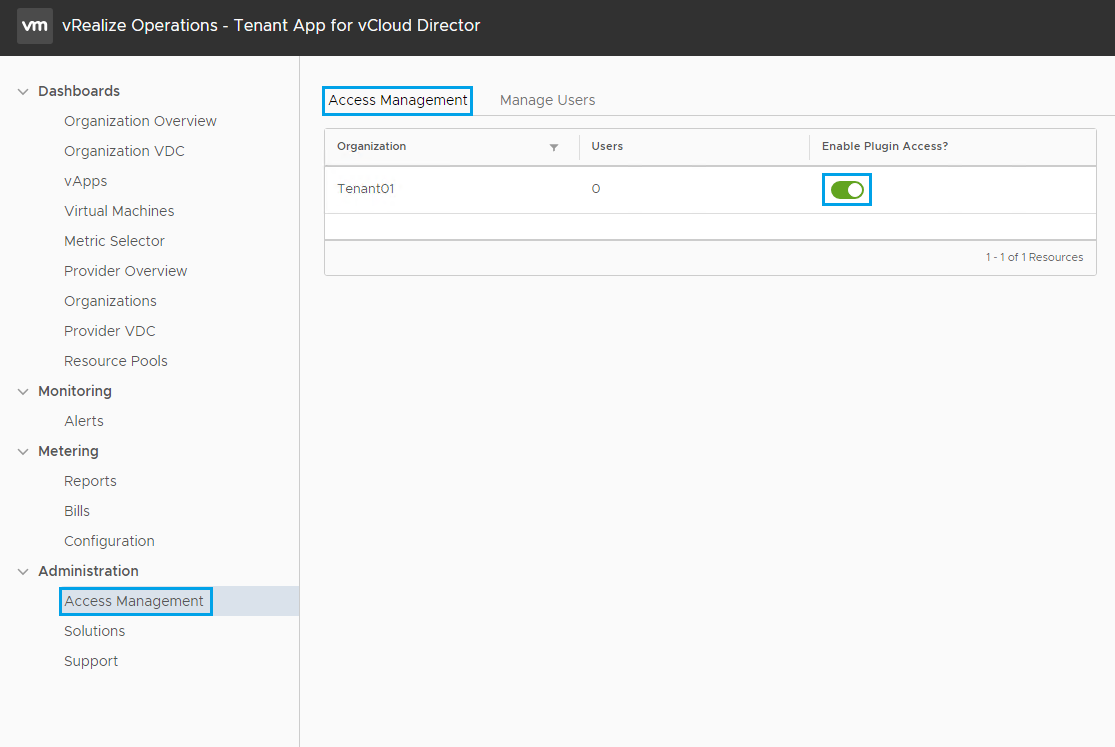
From the Tenant App expand Administration and then select Access Management. Your current vCloud Director Tenants will be listed here.
Click on Enable Plugin Access for the Tenant you would like to enable the plugin for.
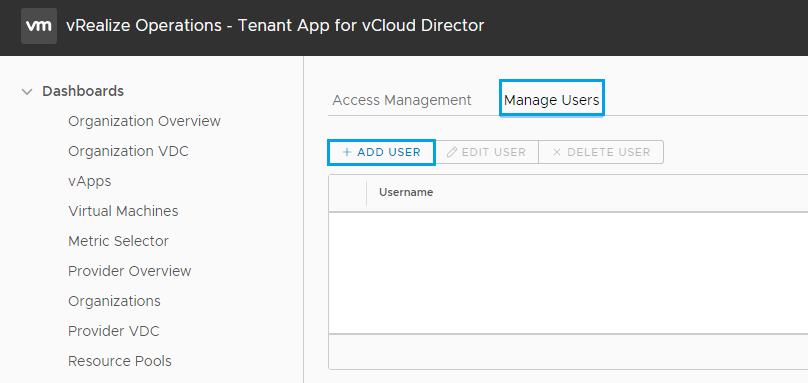
Next select the Manage Users tab and the click on Add User
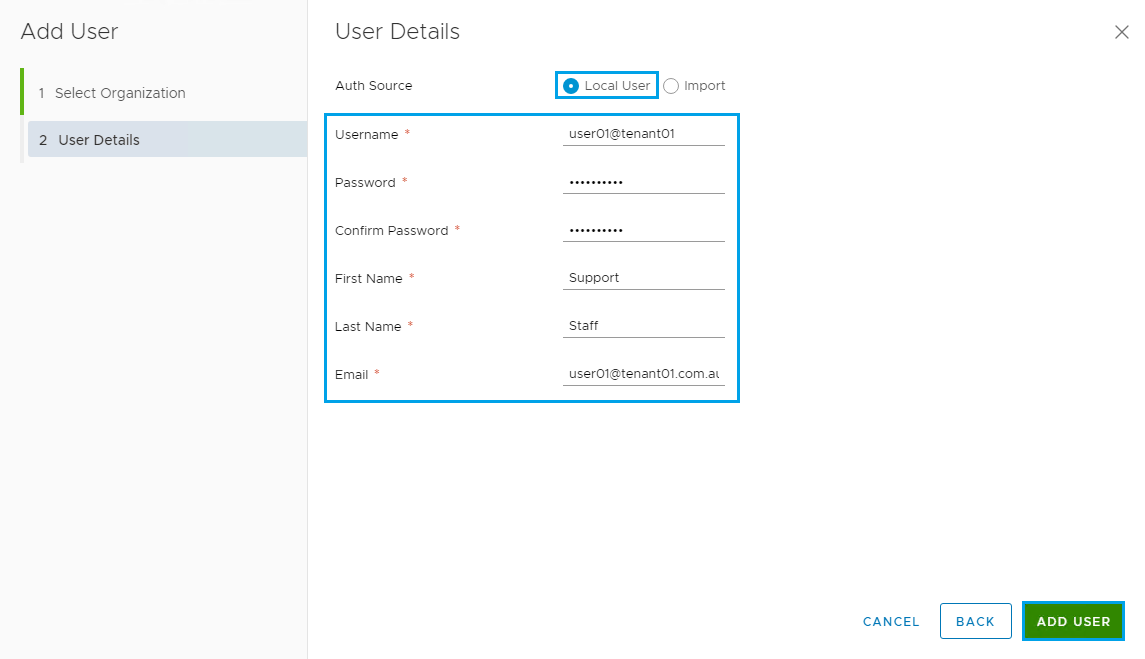
Select the Tenant and click Next

Then select Local User and enter the user details from vCloud Director and click Add User
Then select Administration and click on Support, then click on Configure with VCD Tenant UI
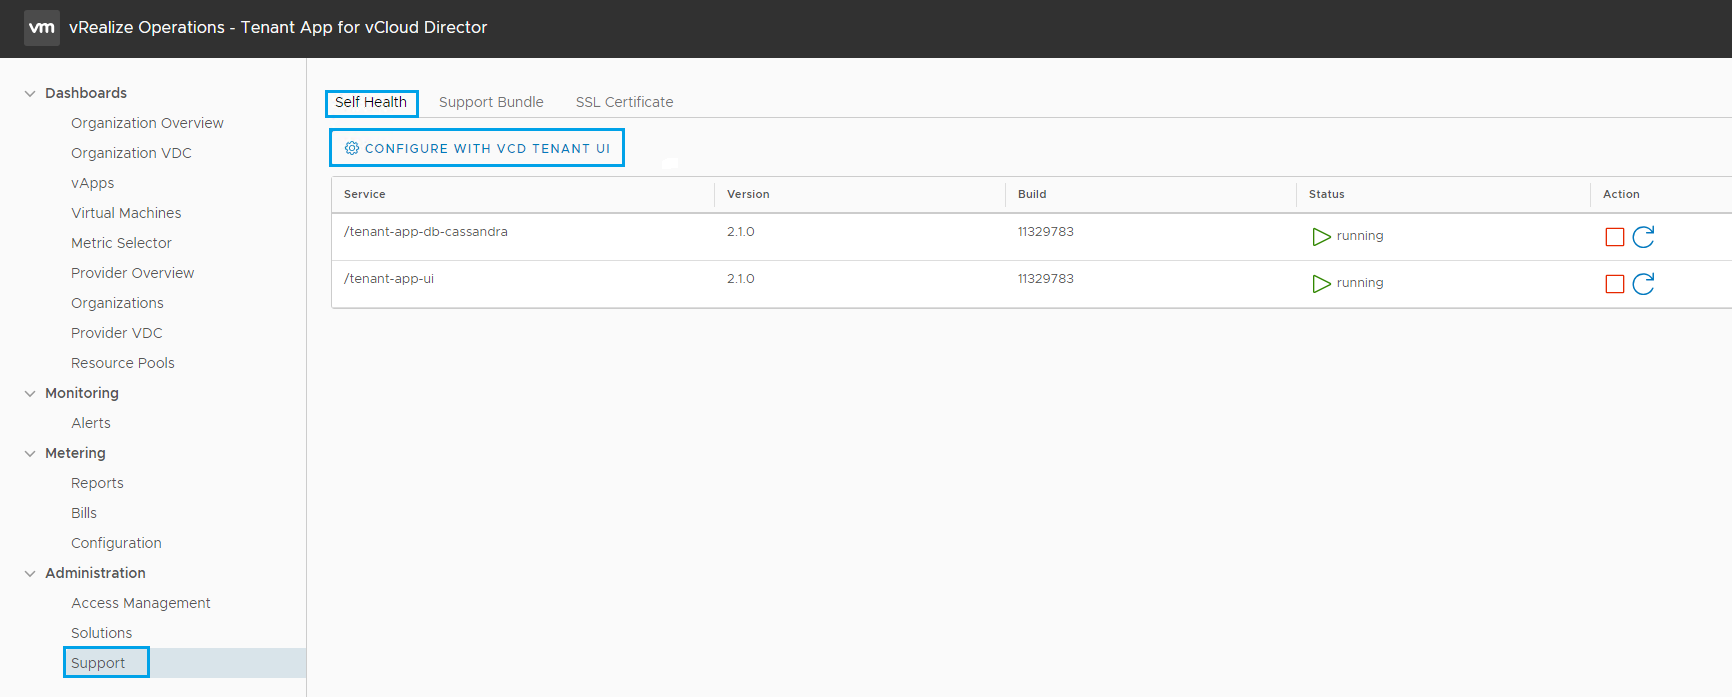
Enter the vCloud Director and RabbitMQ connection details, then click Start
If you have multiple cells enter your load balanced address in the vCloud Director host section.
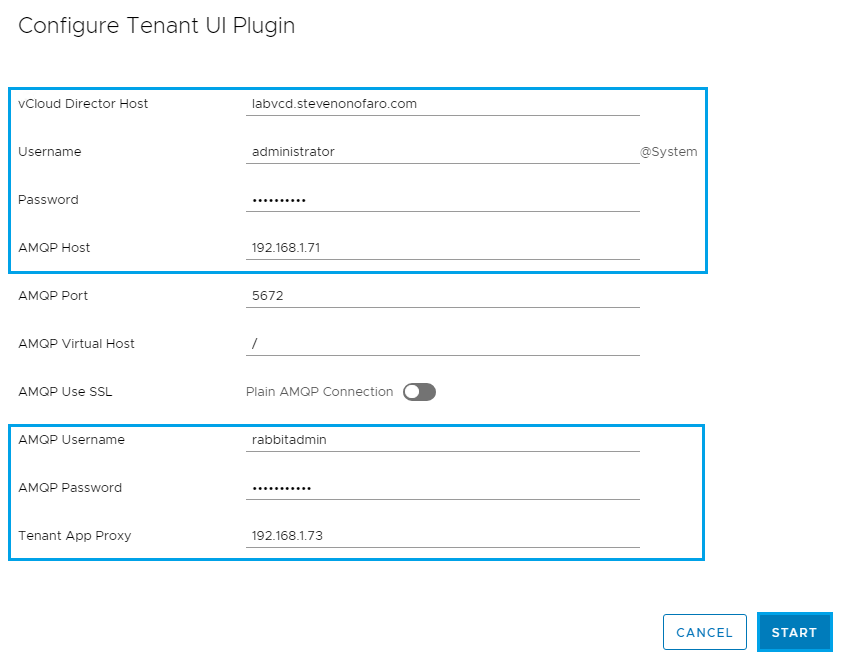
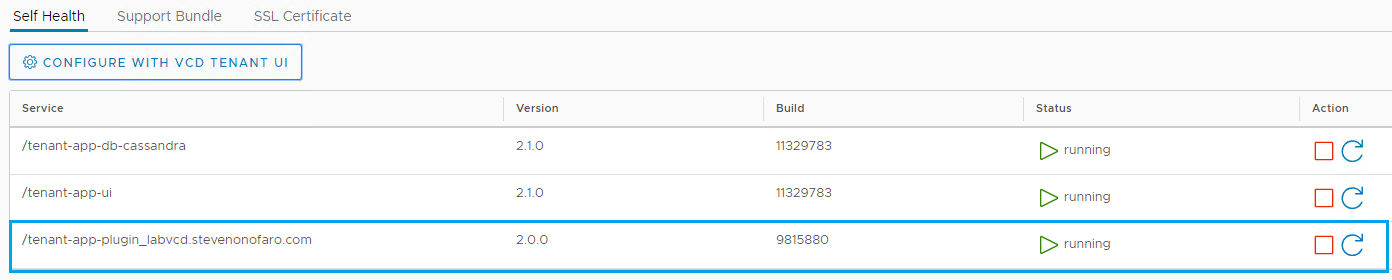
You will now see the Tenant App listed below and the status should be Running
Before you register the plugin you need to make sure that you have replaced the certificates in use on vCloud Director. Also you need to have updated the public addresses section under then Administration in VCD.
I have mentioned this earlier in the article so if you have issues with the next part please check your Public Addresses in vCloud, specifically the API section.
Now it’s time to register the plugin with vCloud Director
Login to the vSphere Web Client and open up a console session to the Tenant App VM
Login as root and password vmware – defaults
Browse to cd /opt/vmware/plugin
Then run the following python publish.py -H labvcd.stevenonofaro.com -u administrator@system -p ‘password’
Change ‘password’ for your own secure password. You need to keep the brackets in place.

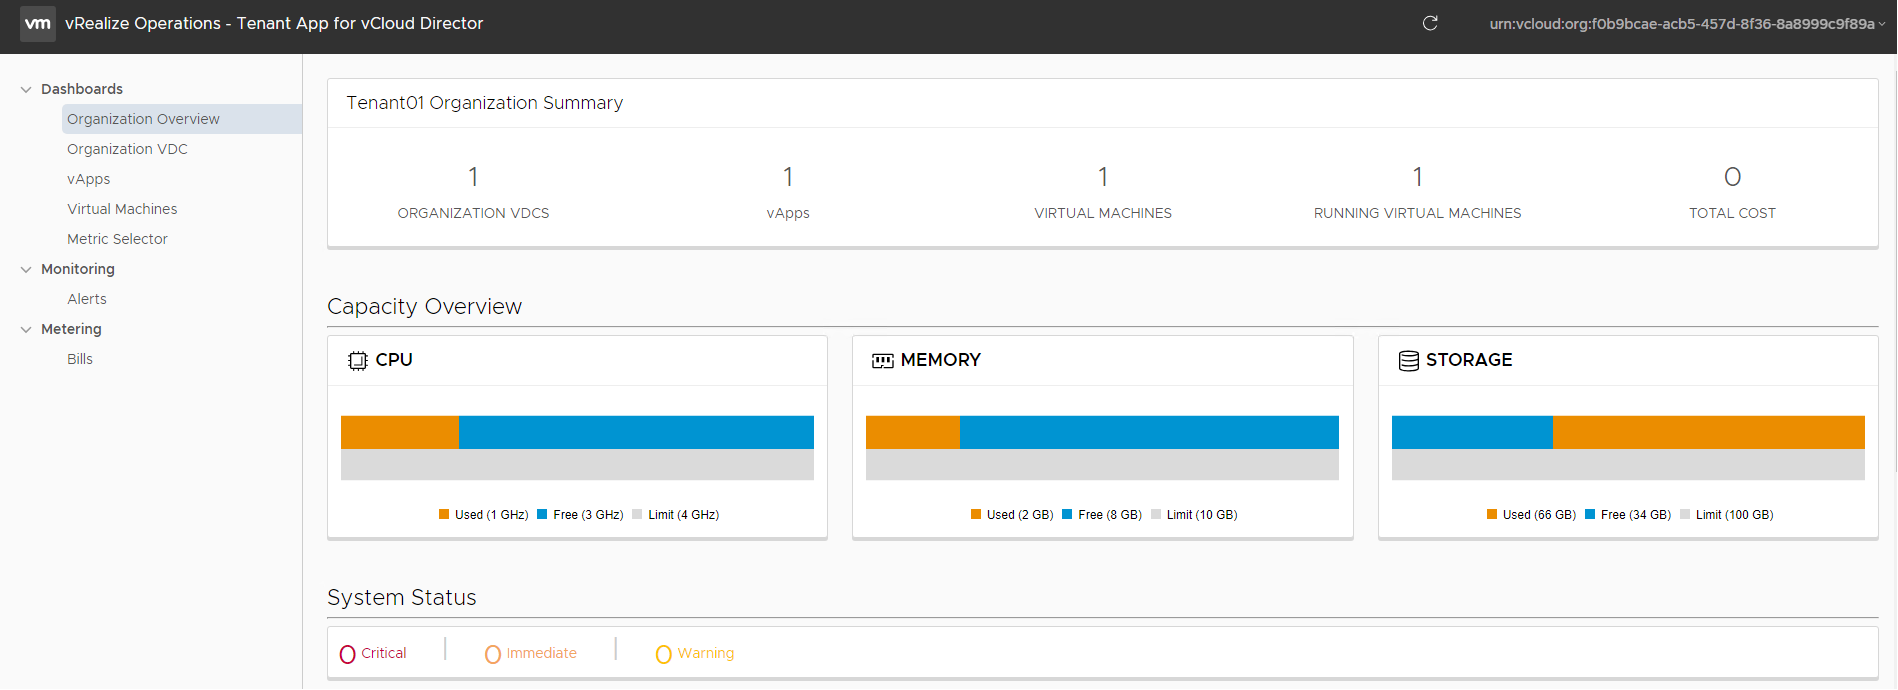
Now let’s login as the Tenant via their URL https://labvcd.stevenonofaro.com/tenant/tenant01 and check if the plugin is available from the vCloud Director Portal
The Operations Manager page for the Tenant will now be displayed. I only have one Linux VM running in the Org at the moment so there isn’t a lot to see yet. If this is your production environment then your dashboard will display more information.
Now let’s run through creating a basic Pricing Policy and assigning it to a Tenant so that they can receive reports from the Tenant App within vCloud Director.
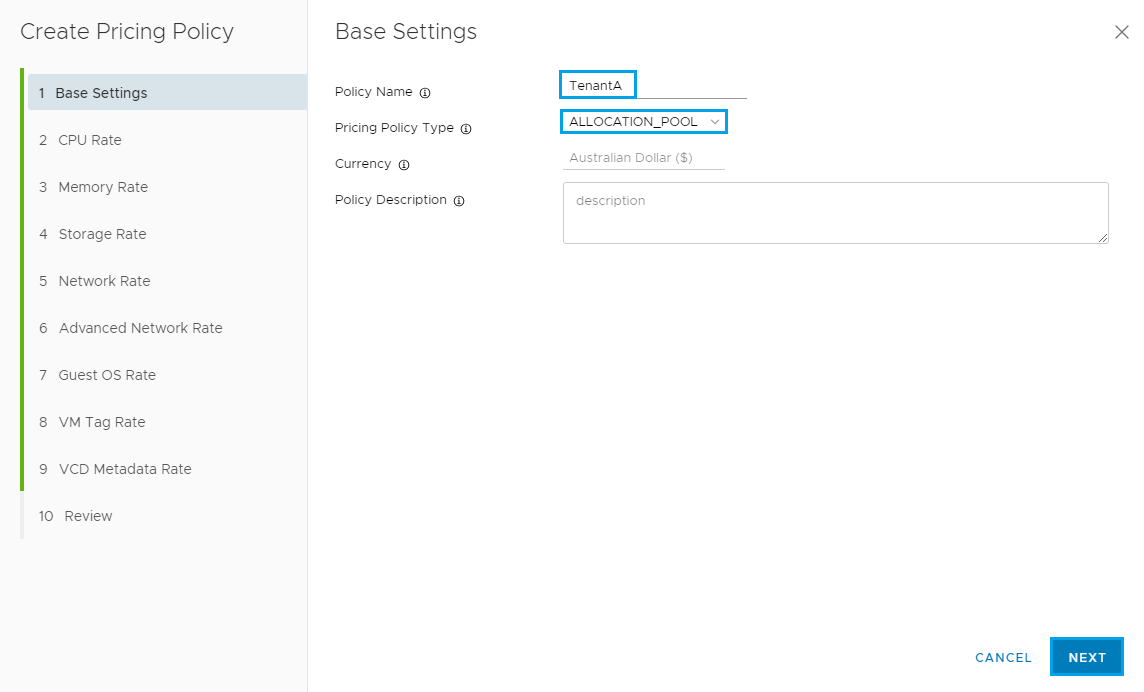
Login into the vCloud Tenant App and expand Metering and select Configuration. Click on Pricing Policies and click Add.
This will be a basic policy setup, if you work for a service provider or cross bill between your internal departments this will look very familiar to you. I will highlight the entries I have modified.
Enter a Policy Name and select the Policy Type. Notice the Currency is already set as we did this earlier. Update the description and click Next
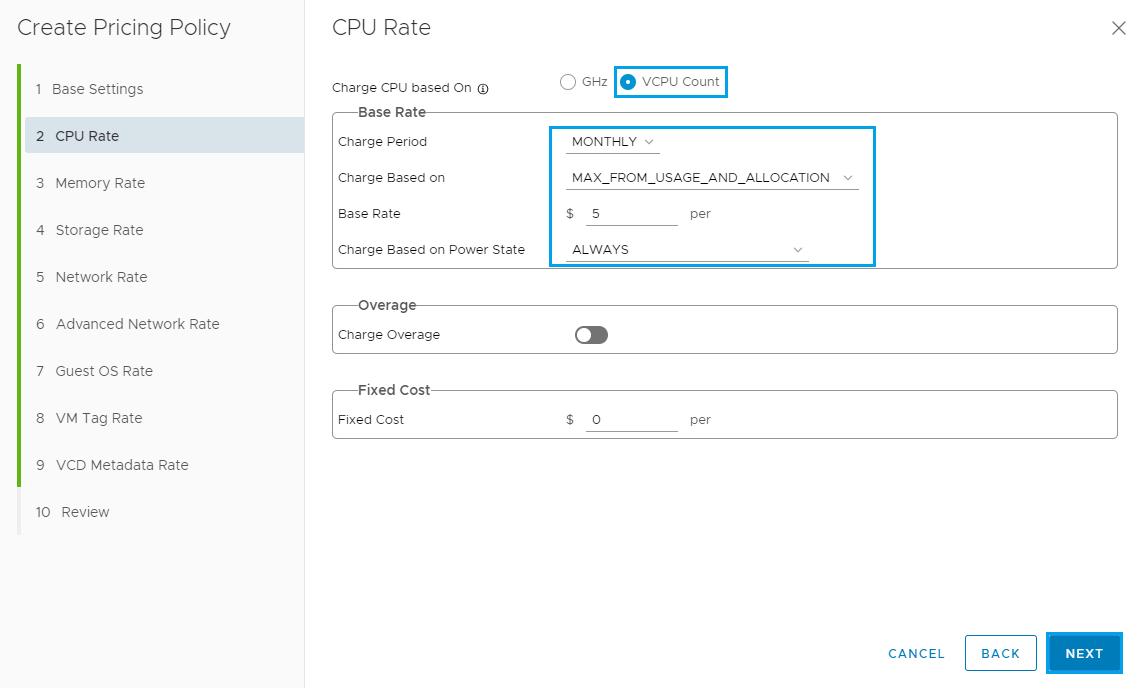
The next section is used to setup the CPU Rate, adjust settings based on how you would like to charge and then click Next.
The next section is used to setup the Memory Rate, adjust settings based on how you would like to charge and then click Next

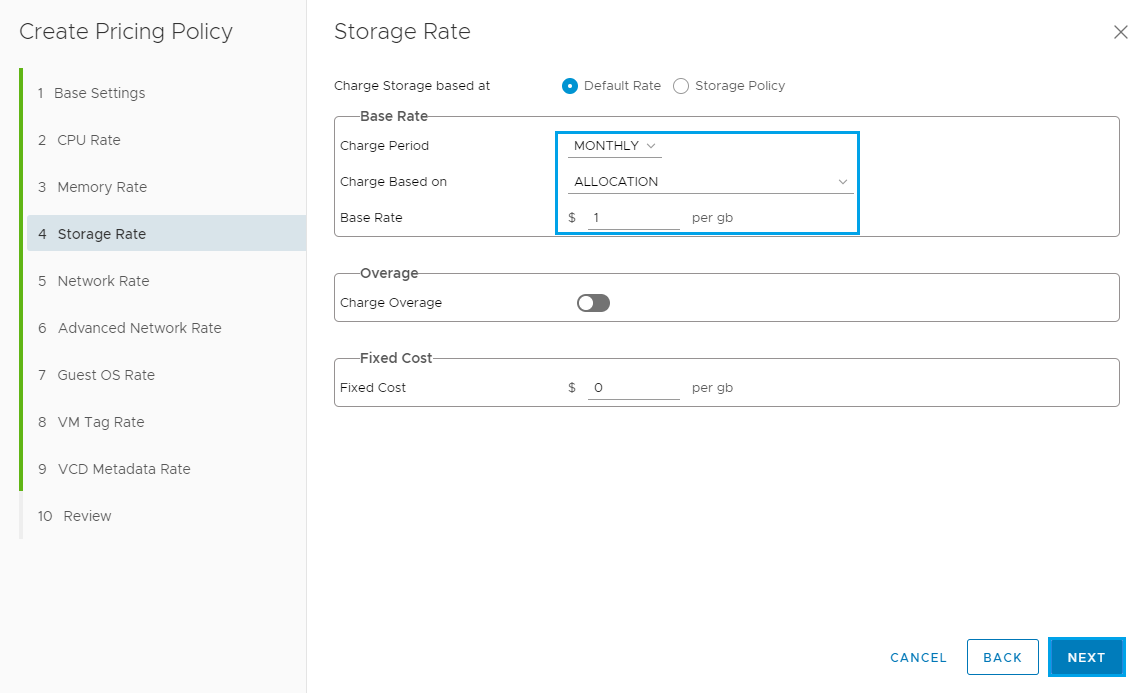
The next section is used to setup the Storage Rate, adjust settings based on how you would like to charge and then click Next
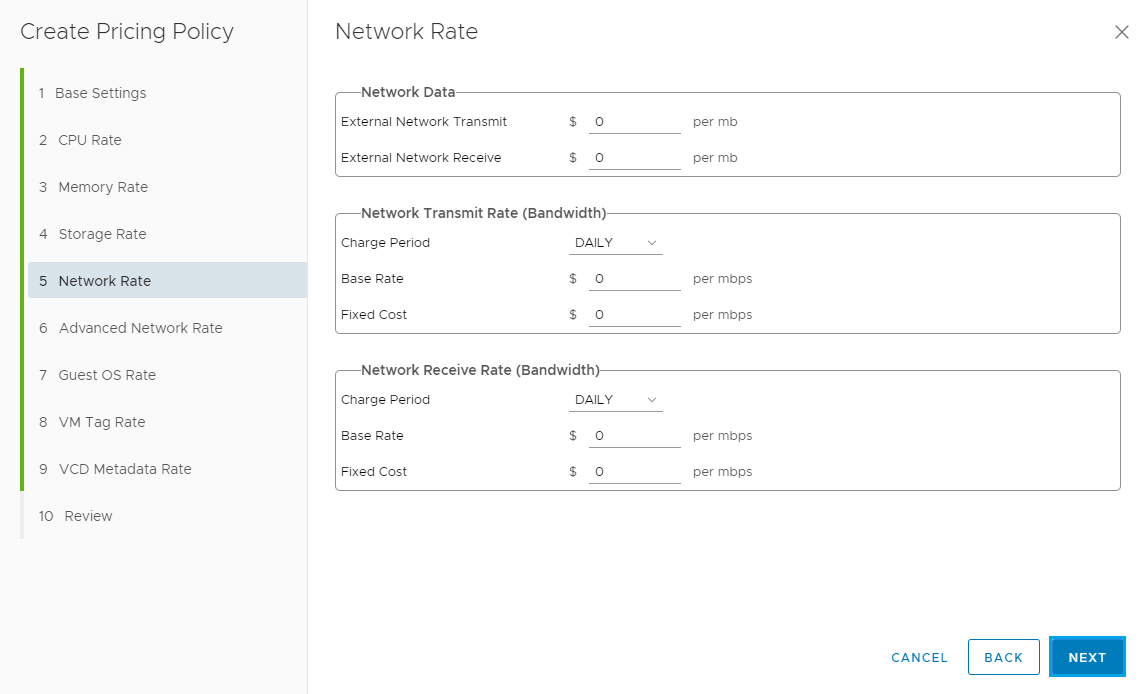
The next section is used to setup the Network Rate, adjust settings based on how you would like to charge and then click Next
The next section is used to setup the Advanced Network Rate, adjust settings based on how you would like to charge and then click Next

The next section is used to setup the Guest OS Rate, add in a Base Rate for the Guest OS and then click Next

The next section is used to setup the VM Tag Rate, adjust settings based on how you would like to charge and then click Next

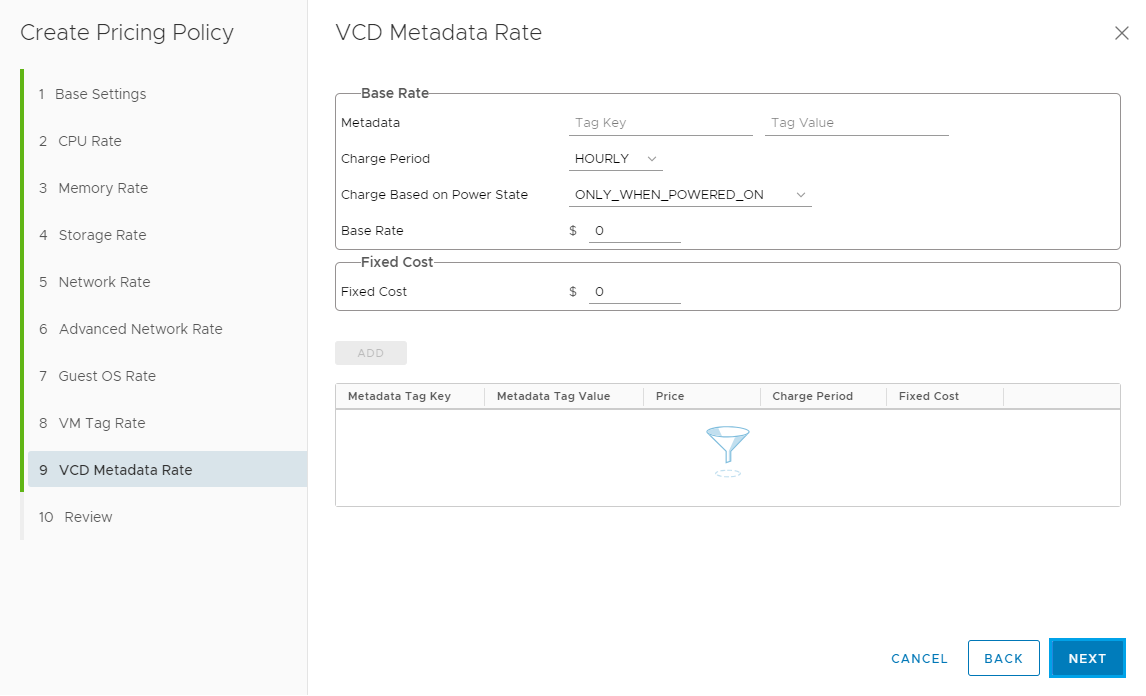
The next section is used to setup the VCD Metadata Rate, adjust settings based on how you would like to charge and then click Next
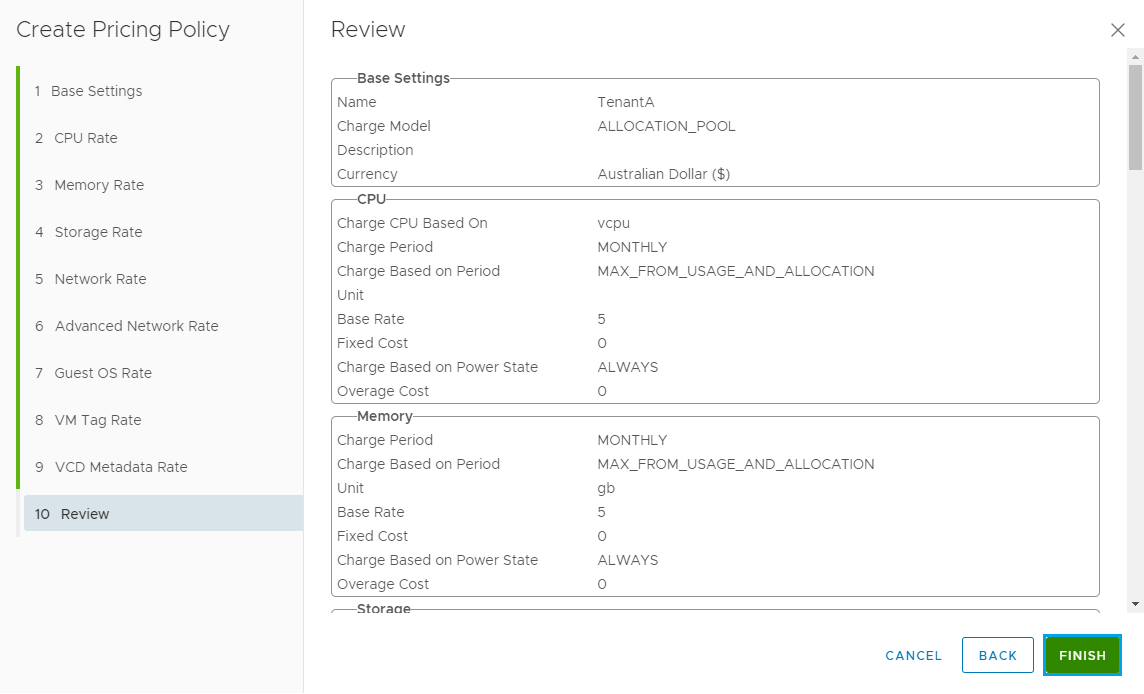
Review the Policy and click Finish
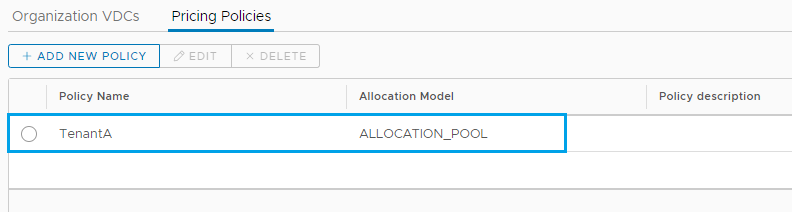
The new policy will now be listed below
Click on the Organization VDCs tab and the click Assign
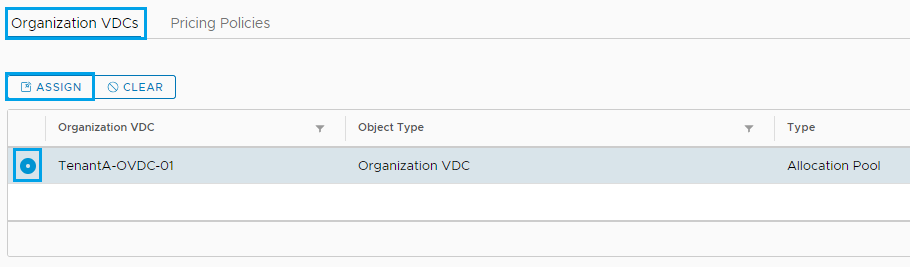
Then select the policy to assign to the Tenant and click Assign

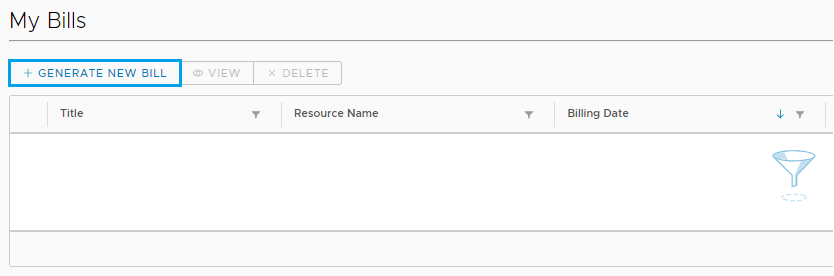
Then under Metering you can click on Bills and then select Generate New Bill to test
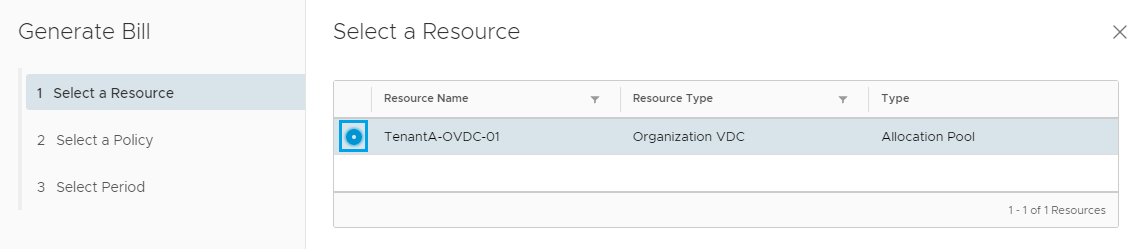
Select the Tenant OVDC and click Next
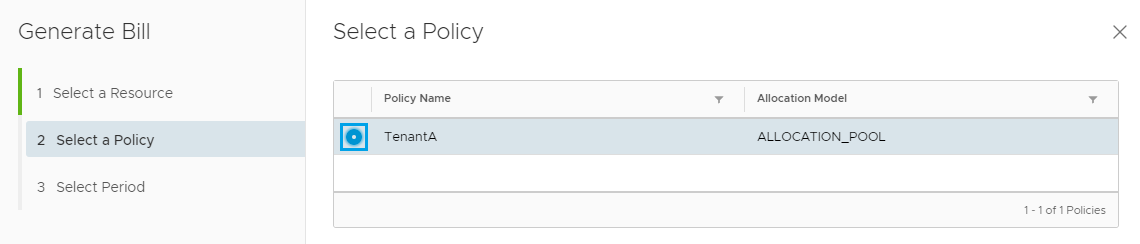
Select the Policy and click Next
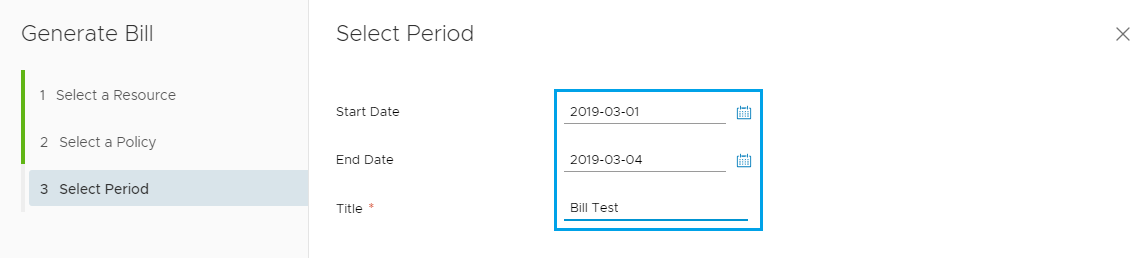
Select the start and end date for the report and enter a Title and click Finish
The Test Bill is now displayed under the My Bills section. I have only had the one VM running for a short period of time so nothing to bill at this stage.

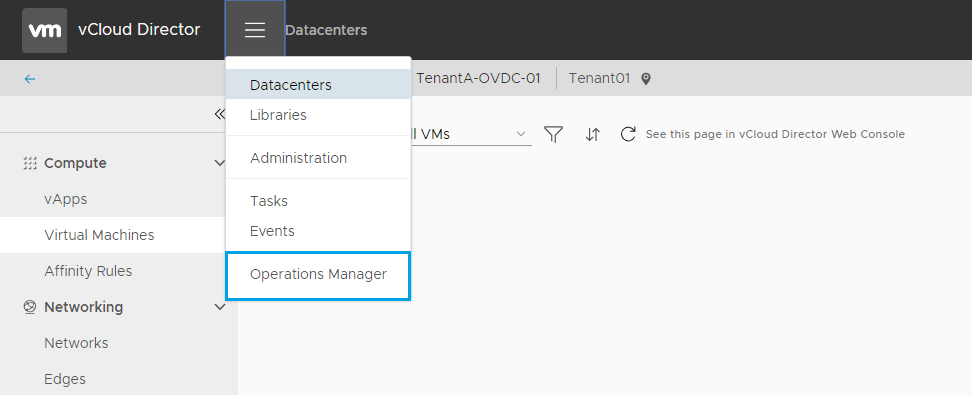
Now let’s see how this would look for the Tenant. Login to VCD as the Tenant (user account we added earlier) and click on Operations Manager from the drop down menu
Under Metering select Bills
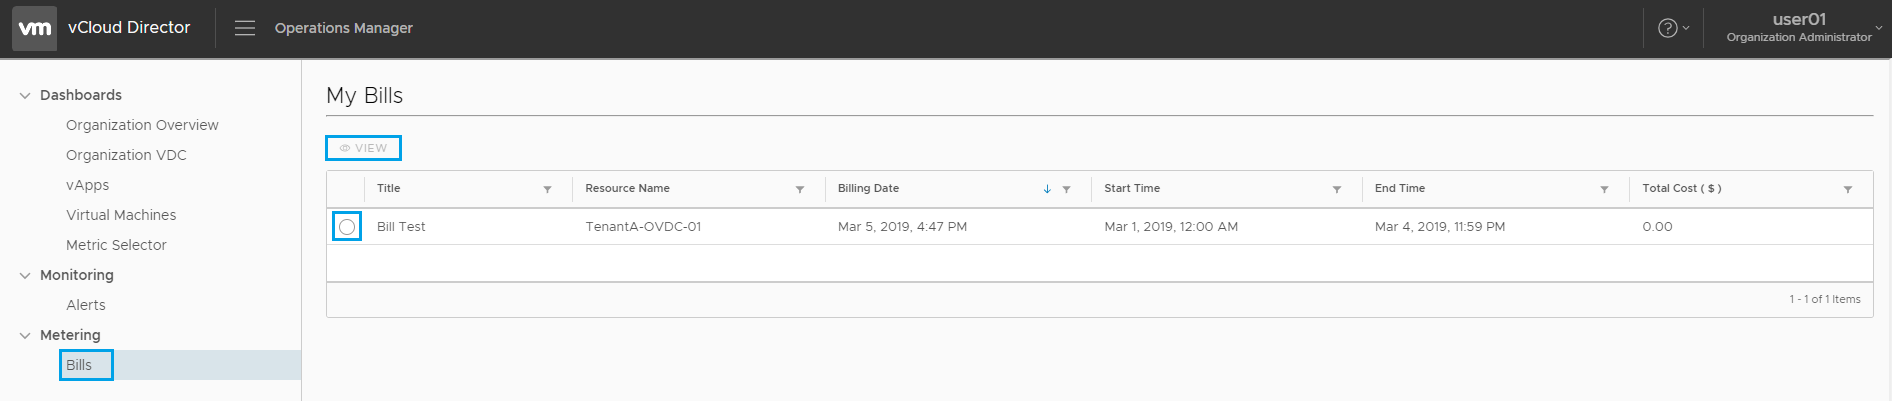
Then the user can select the bill and click View to get a breakdown of the costs
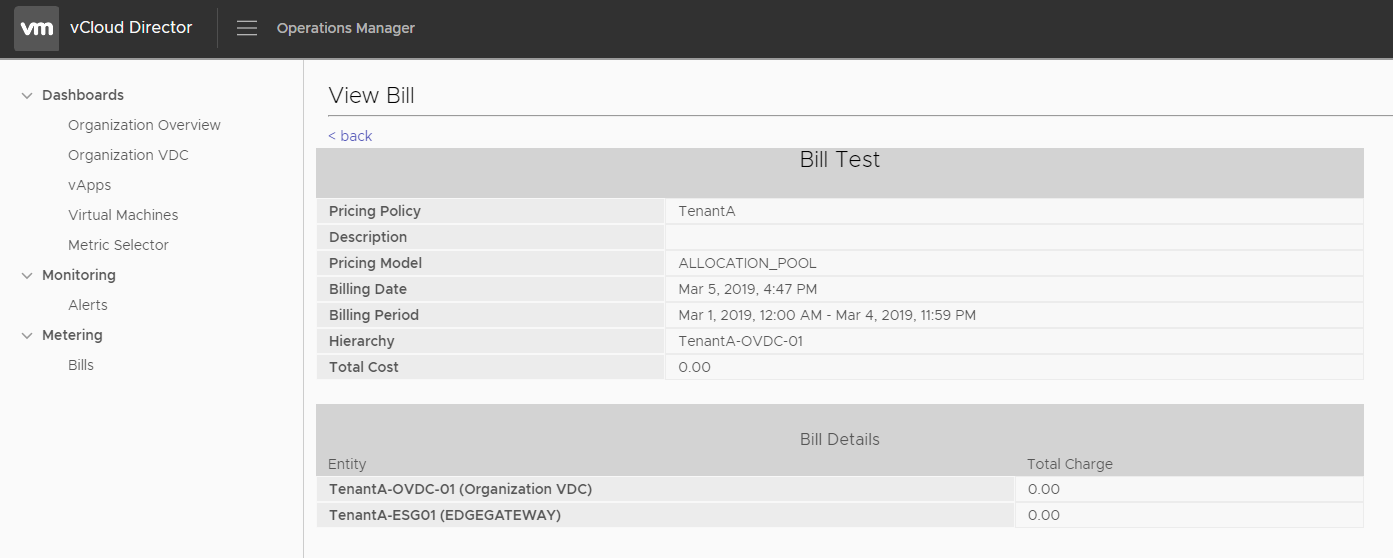
The bill details will depend on the policy settings you have selected and the workloads within the Tenant environment. I hope this run through has helped you get started with exploring the features available in the vRealize Tenant App for vCloud Director.
As always use the subscribe box above for new post notifications and follow me on twitter @steveonofaro
-
RabbitMQ Installation on CentOS 7
RabbitMQ is a messaging broker service which gives applications a common platform to send and receive messages. The messages themselves land in a queue ready for another application to retrieve.
In this post I will be setting up RabbitMQ and connecting it to vCloud Director. This is required if you have a multi-cell environment configured as the cells will use this communicate system notifications and updates etc. Another use case is when you are deploying the vRealize Tenant App for vCloud Director.
In a previous post I walked through setting up the first stage which is the base install of vRealize Operations Manager 7. So this post will cover the RabbitMQ requirements of the vRealize Tenant App 2.1.
If you are using this guide to just connect RabbitMQ to vCloud Director then the process is the same.
First off I have deployed a basic Centos 7 VM and I have given it a Name and IP Address. Then once it was at the login prompt I connected to the IP using putty.
So to get started we need to switch over to the root user
Type su and hit enter to put the root password in

Then make sure the system is up to date, to do this run the following command and let it complete,
yum -y update

Next we need to install Erlang which is one of RabbitMQ’s dependencies,
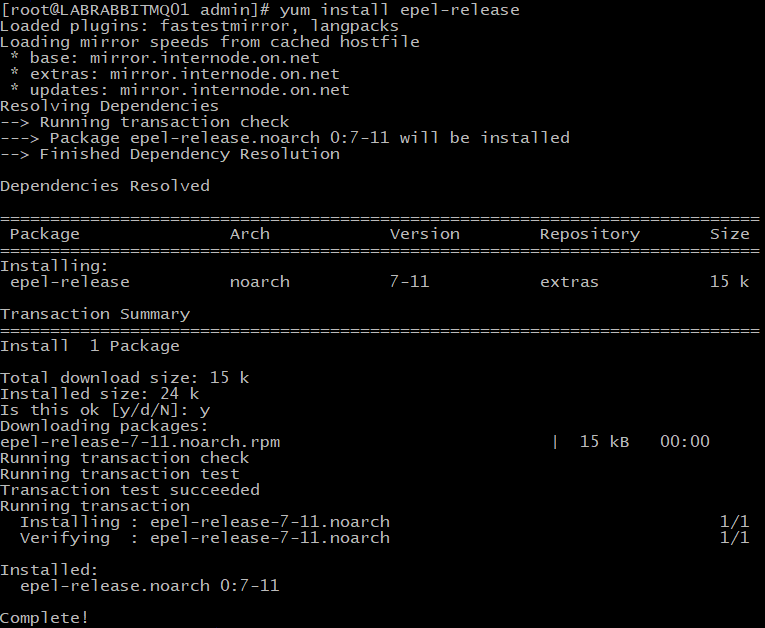
yum install epel-release and type Y to continue
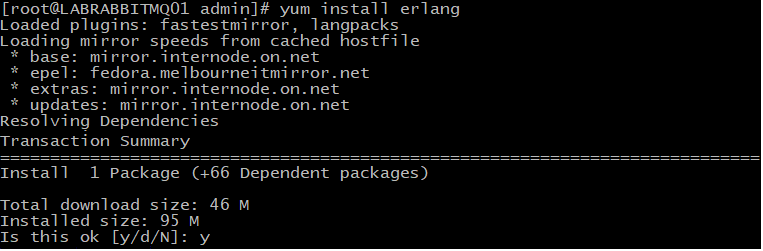
Then run the following command,
yum install erlang when prompted press Y to continue
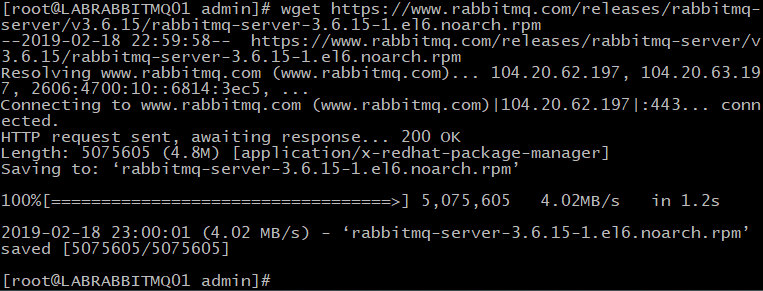
Now let’s start downloading the package to install,
wget https://www.rabbitmq.com/releases/rabbitmq-server/v3.6.15/rabbitmq-server-3.6.15-1.el6.noarch.rpm
Then it’s time to import the RabbitMQ key
rpm –import https://www.rabbitmq.com/rabbitmq-signing-key-public.asc

Next we can run the following command to install RabbitMQ
yum install rabbitmq-server-3.6.15-1.el6.noarch.rpm

Then we need to allow SELinux to enable the RabbitMQ Service,
setsebool -P nis_enabled 1

Start and Enable the RabbitMQ Services,
systemctl start rabbitmq-server
systemctl enable. rabbitmq-server

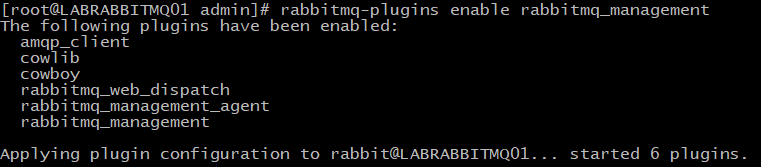
Now it’s time to enable the RabbitMQ management console,
rabbitmq-plugins enable rabbitmq_management
Then modify the ownership of the RabbitMQ Directory,
chown -R rabbitmq:rabbitmq /var/lib/rabbitmq/

Create a new user account called rabbitadmin and change password123 to your secure password,
rabbitmqctl add_user rabbitadmin password123

Enable access for the user and set the corresponding permissions,
rabbitmqctl set_user_tags rabbitadmin administrator

Then enter the following,
rabbitmqctl set_permissions -p / rabbitadmin “.*” “.*” “.*”

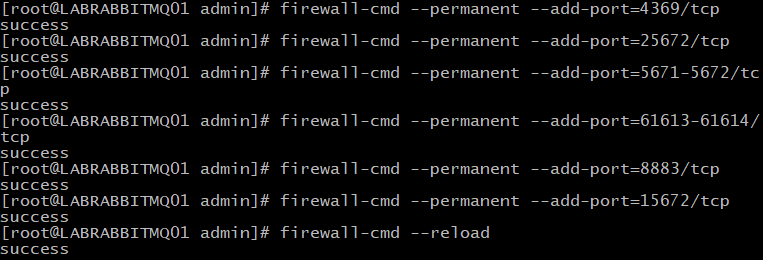
Allow the following firewall ports,
firewall-cmd –permanent –add-port=4369/tcp
firewall-cmd –permanent –add-port=25672/tcp
firewall-cmd –permanent –add-port=5671-5672/tcp
firewall-cmd –permanent –add-port=61613-61614/tcp
firewall-cmd –permanent –add-port=8883/tcp
firewall-cmd –permanent –add-port=15672/tcp
Once entered it’s time to reload the firewall
firewall-cmd –reload
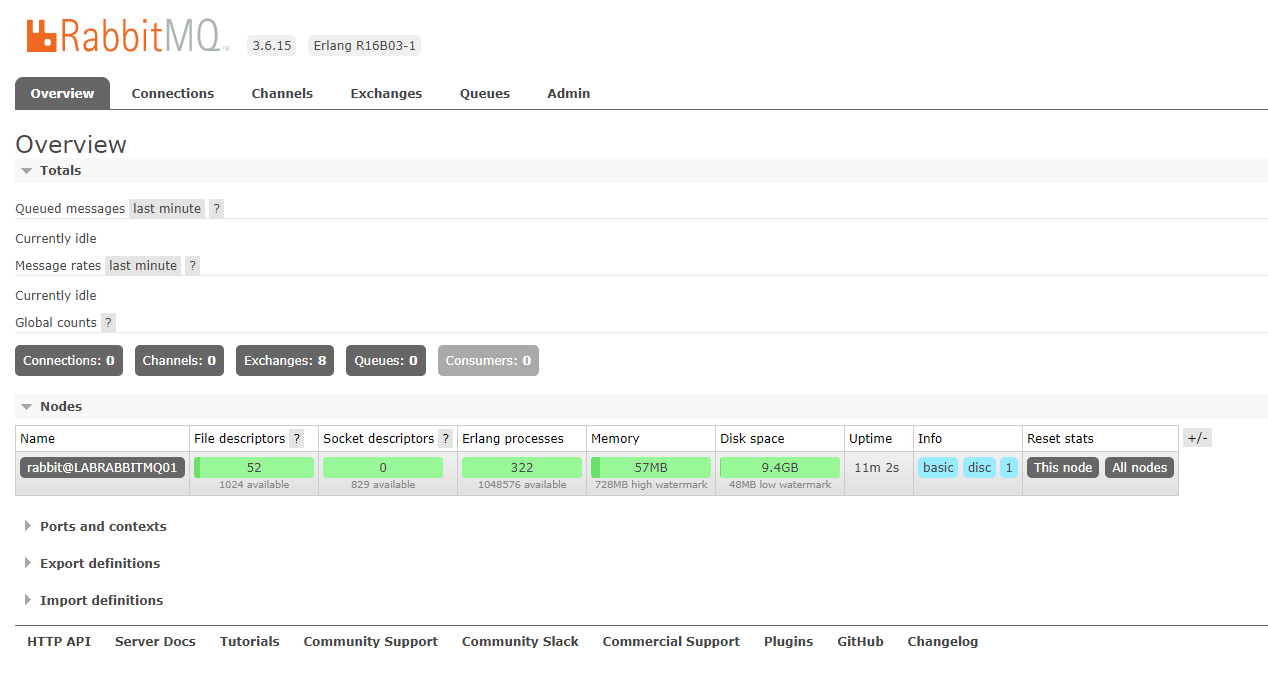
Then launch the web browser and browse to the IP or DNS name on port 15672
The username will be rabbitadmin and the password we set earlier
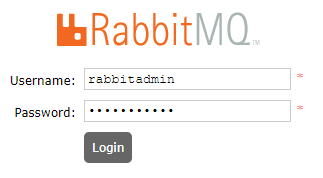
The following screen should now be displayed
Now let’s configure vCloud Director
Login to vCloud Director as a system administrator and then click on the Administration tab
Expand System Settings and then click on Extensibility from the left hand menu
Next we need to tick Enable Notifications
Enter the RabbitMQ host details in the first box
Leave the default settings for AMQP Port, Exchange, vHost, Prefix and SSL options.
Then enter the Username and Password
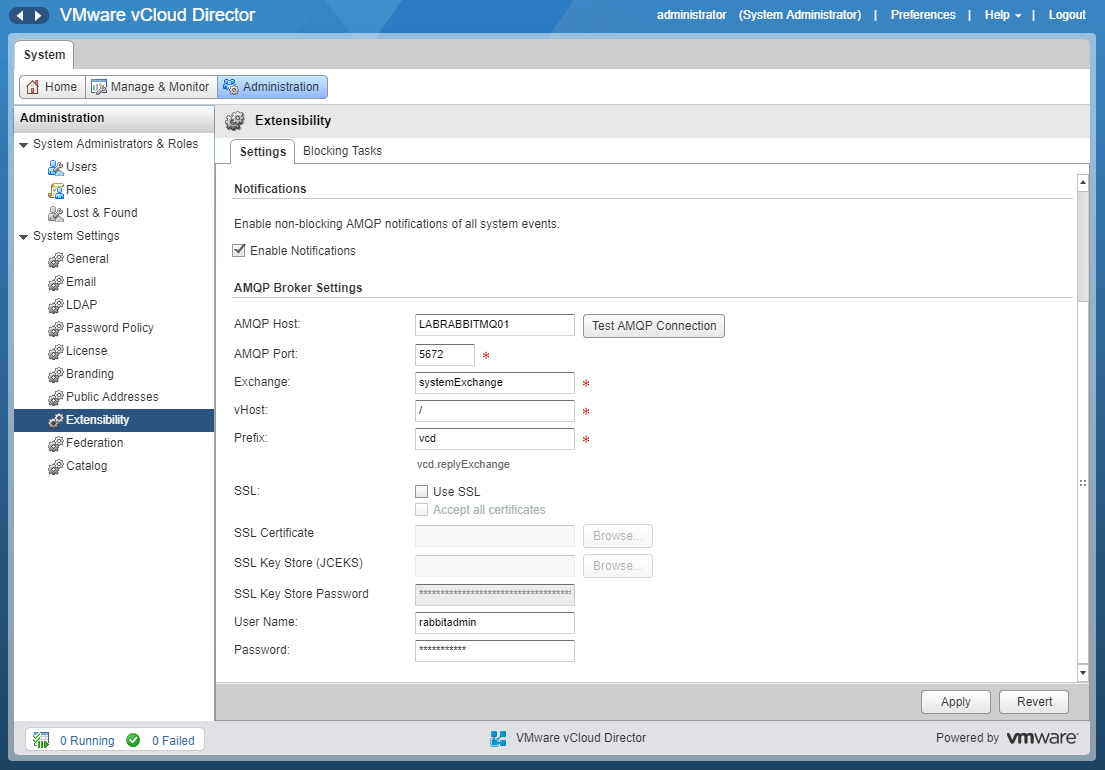
Once you have entered the information above click on Test AMQP Connection. You should see the following box
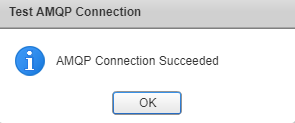
Click OK and then click Apply to save the settings.
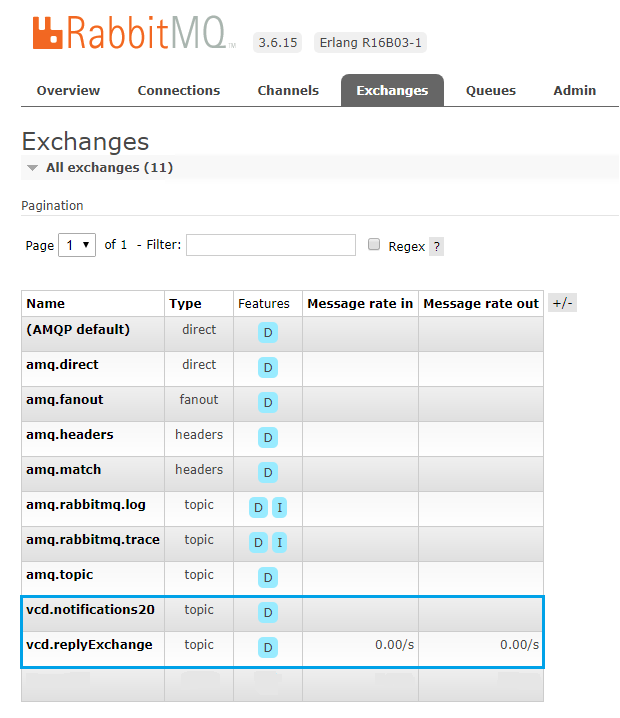
If you look back in RabbitMQ and check the Exchanges Tab you will notice that the new vCloud Director entries have been created.
Then again in the Queues Tab, new entries will be listed for vCloud Director
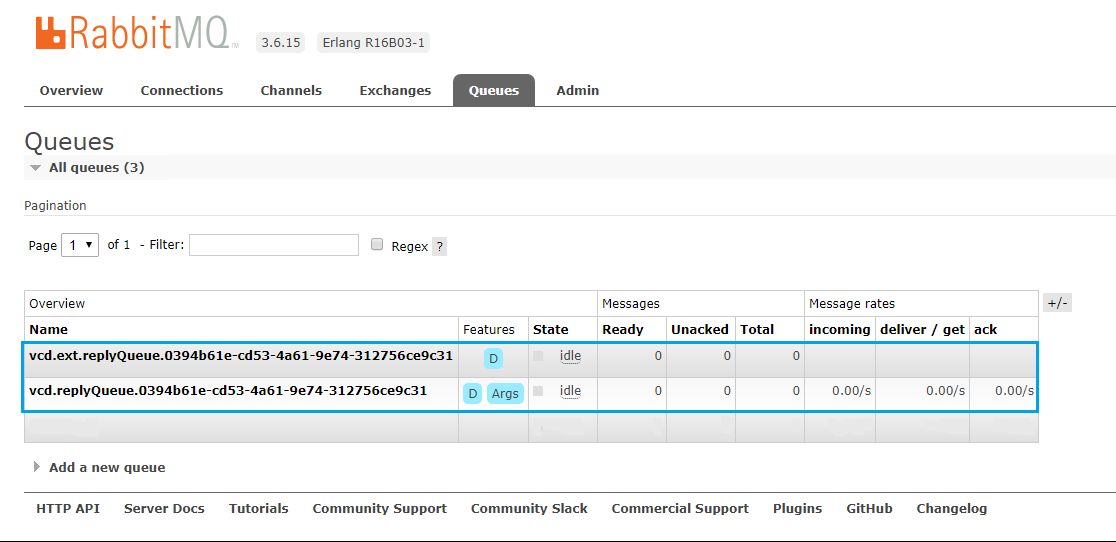
RabbitMQ is now installed and connected to vCloud Director. Keep a look out for my next post covering the install and configuration of the vRealize Tenant App for vCloud Director.
As always use the subscribe box above for new post notifications and follow me on twitter @steveonofaro
-
vRealize Operations Tenant App 2.1 for vCloud Director – Part 1
vCloud Director is one of the products I really enjoy working with and it has come a long way from when it was first released. I remember trying to work through deploying the early releases of v1 and 1.5 which seems like a life time ago now.
In my opinion one thing it has always needed is more visibility for the Tenant. Up until the release of version 1.0 of the vRealize Tenant App for VCD it was difficult for customers to get a detailed view of how their VMs inside of a hosted VCD environment have been performing. When a customer needed to troubleshoot issues at a VM level they would always have to reach out to their provider first.
Now with the combination of vRealize Operations Manager 7, vRealize Management Pack for VCD, vRealize Management Pack for NSX and the vRealize Tenant App for vCloud Director 2.1 this is no longer the case. Tenants can now access all of this information on an easy to read dashboard, along with reporting and billing capabilities from the drop down menu within vCloud Director.
To get started we need to have vRealize Operations Manager deployed with our environment so the following is a walk through for the base deployment of the vRealize Operations Manager 7 virtual appliance. As there are a few components we need to deploy and connect together this one post looks like it might turn into three as we also need to run through deploying RabbitMQ. Stay tuned for those as they will be up soon.
So to get started let’s download the appliance from VMware

Log into vCenter and right click on the host or cluster where you would like to deploy the VM and select Deploy the OVF Template
Enter a Name for the VM and click Next
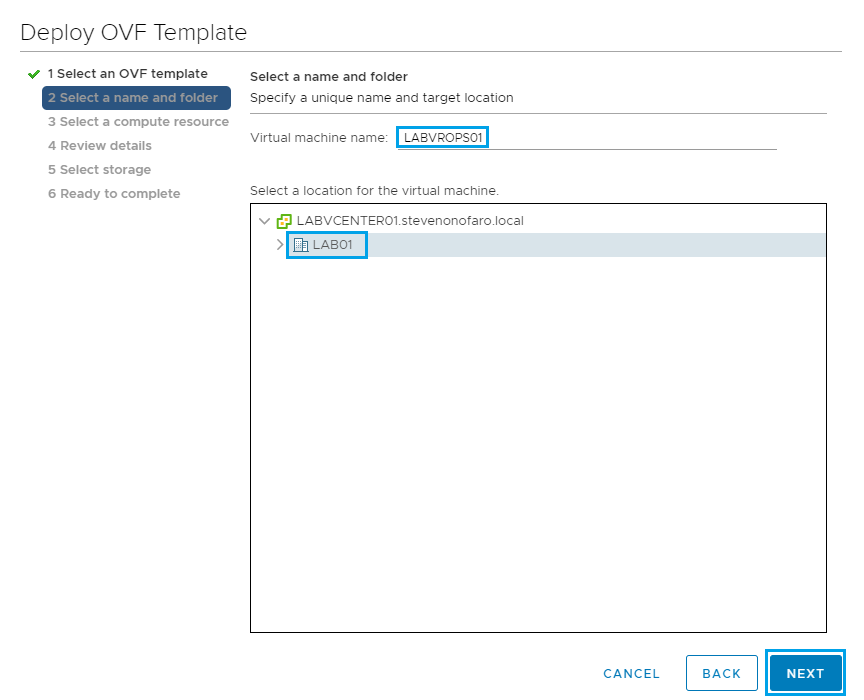
Select a location to install the OVF and click Next

Review the details and click Next
Accept the License agreement and click Next
For this deployment I will be selecting the Small deployment configuration. Pretty sure my lab won’t get anywhere near 3500 VMs.
Then click Next
From here modify the disk format if required and select the datastore to install the VM on. Then click Next
Select the Destination network and click Next
Fill out the following fields to complete the installation,
Timezone Setting
Default Gateway
Domain Name
Domain Search Path
Domain Name Servers
Network IP Address
Netmask
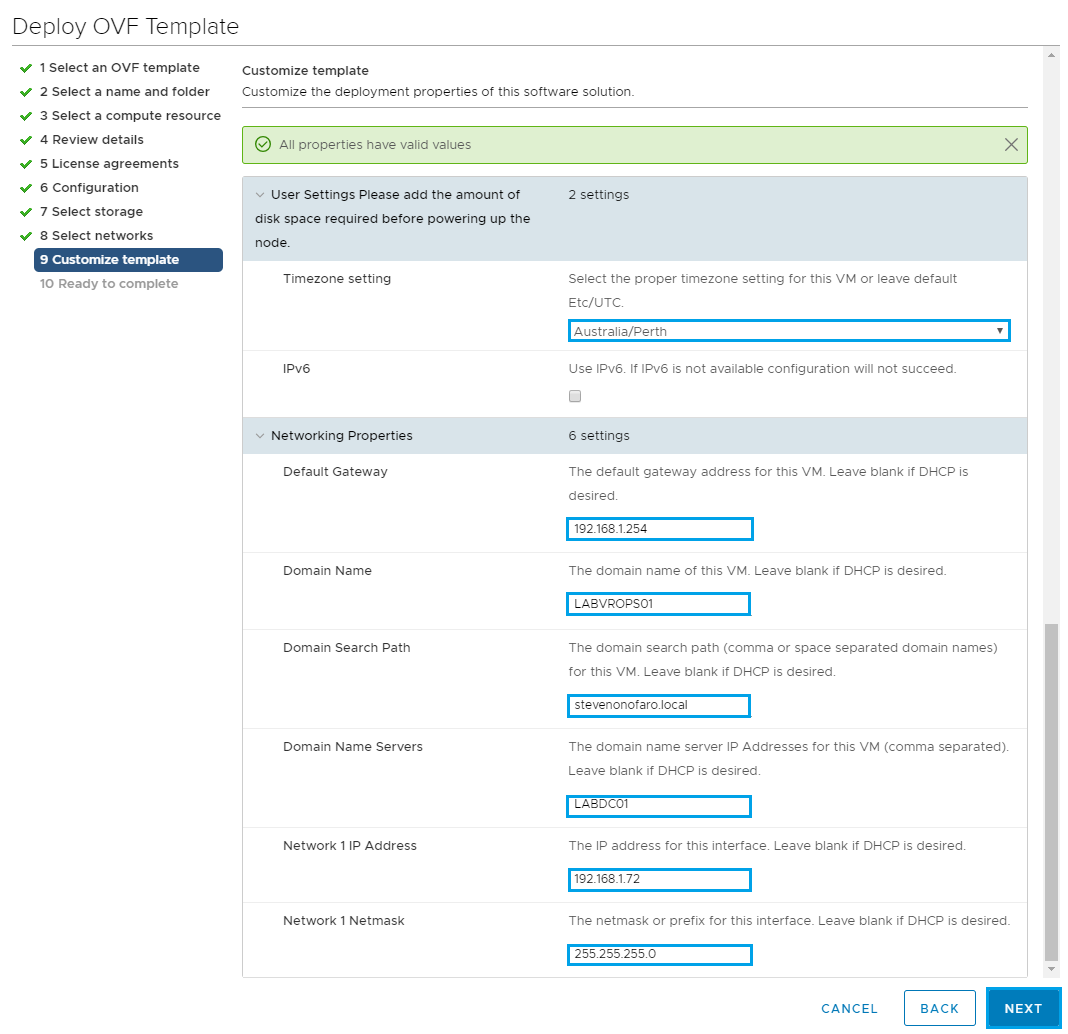
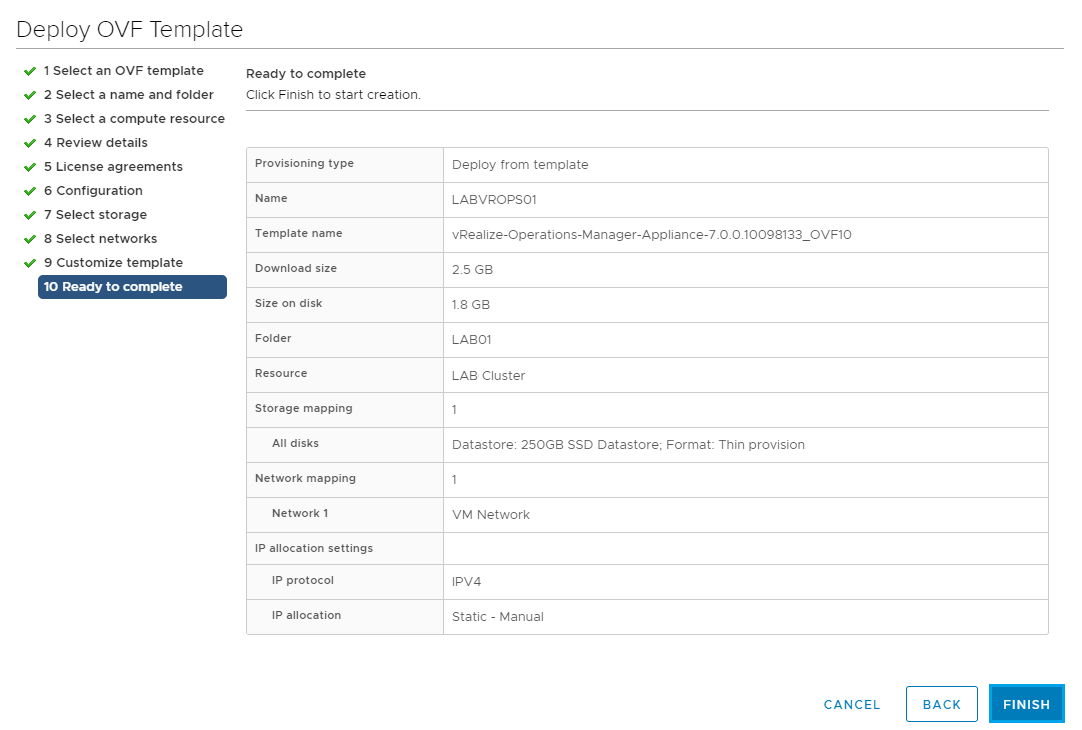
Review the settings and click Finish
Next we are going to log into the web portal to configure vRealize Operations Manager as a Master node. The Master node is required first and you can also add in a data node, a HA master replica node and a remote controller node. For this installation as we will only have a single master node so both administration and data functions will run from the same VM.
The default installation has the following configuration, 4 vCPU and 16GB of ram. It also has 3 hard disks attached, 20GB, 250Gb and 4GB.
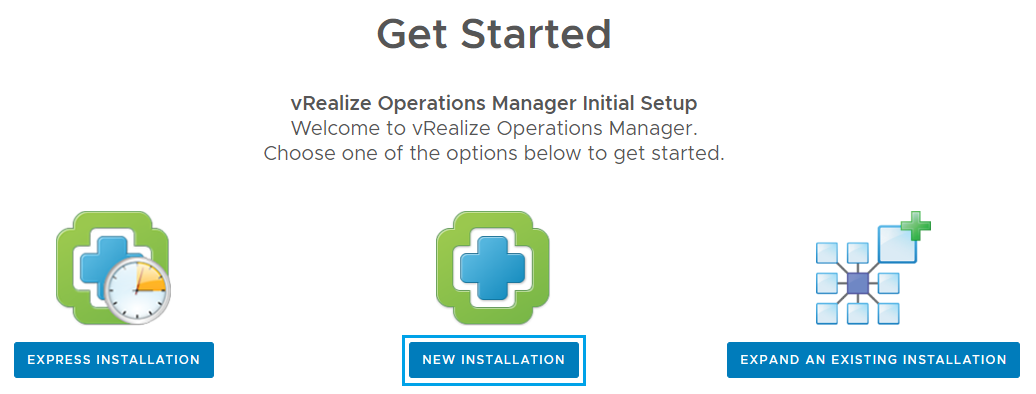
Browse to the newly deployed VM to start the setup https://LABVROPS01
Now you should see the Get Started screen. For this deployment we are going to select New Installation
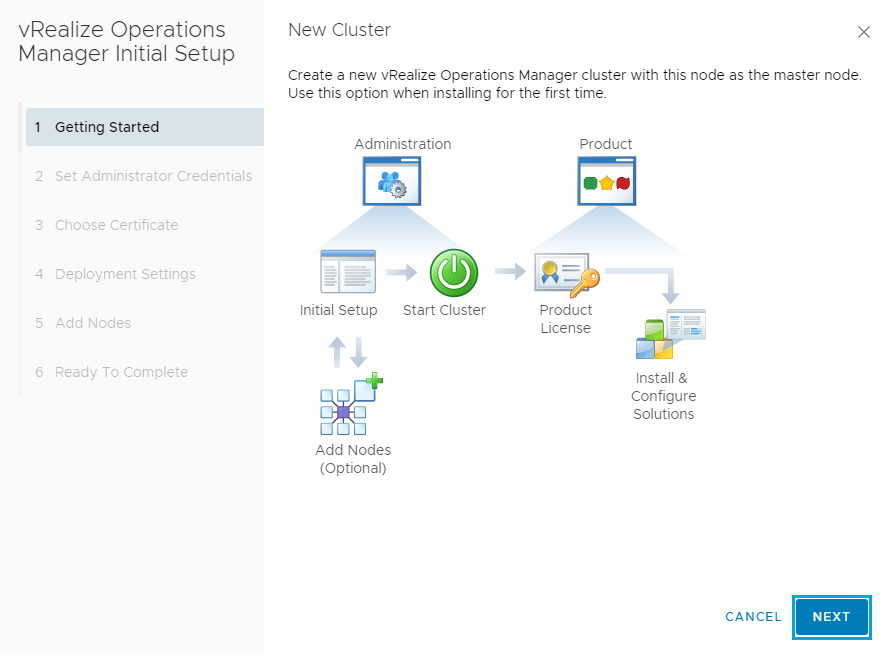
On the New Cluster screen click Next
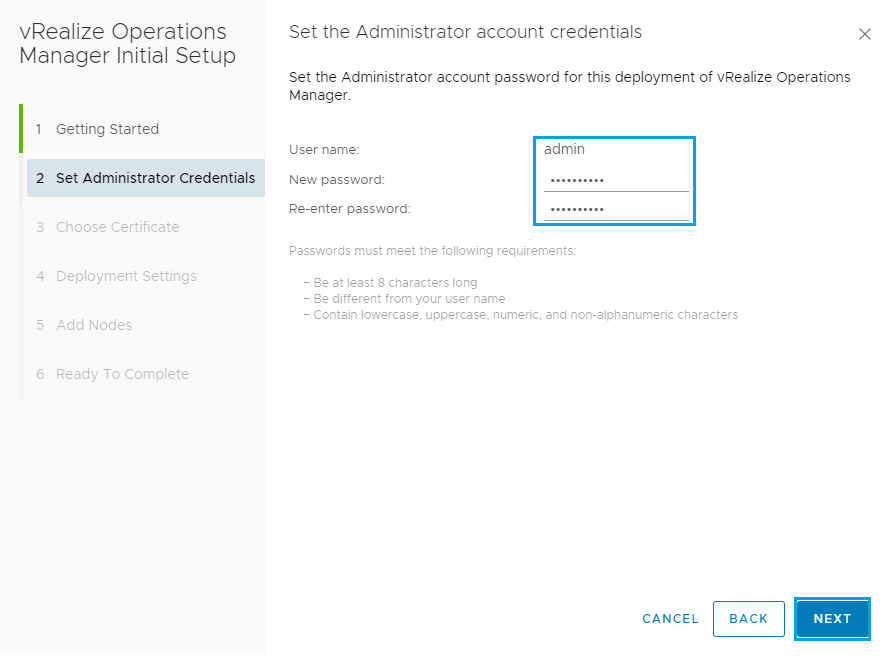
Enter the admin password you would like to use and click Next
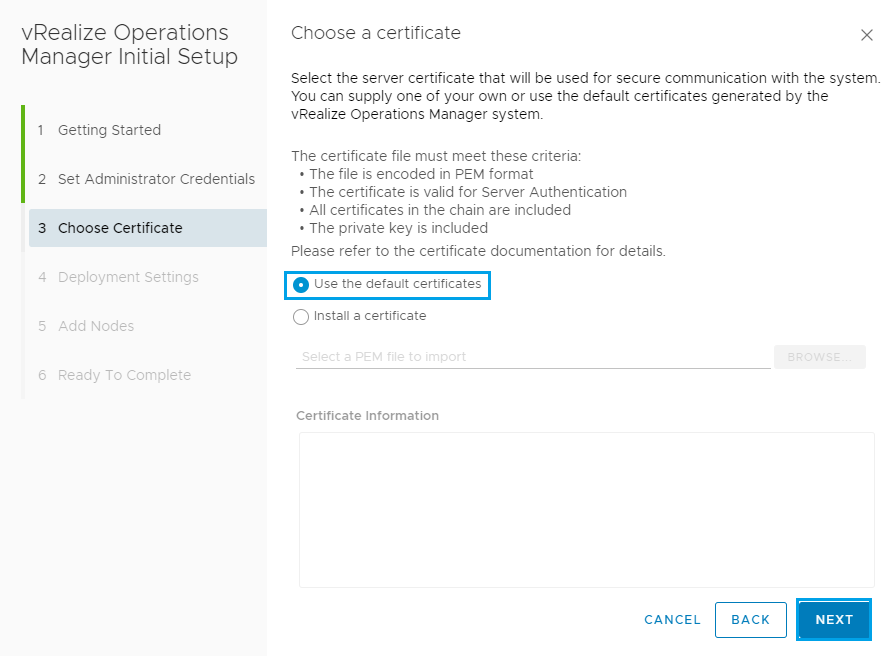
From here you can select a Certificate to use but for this example I am just going to use the default certificate as its being run up in my lab.
Click Next
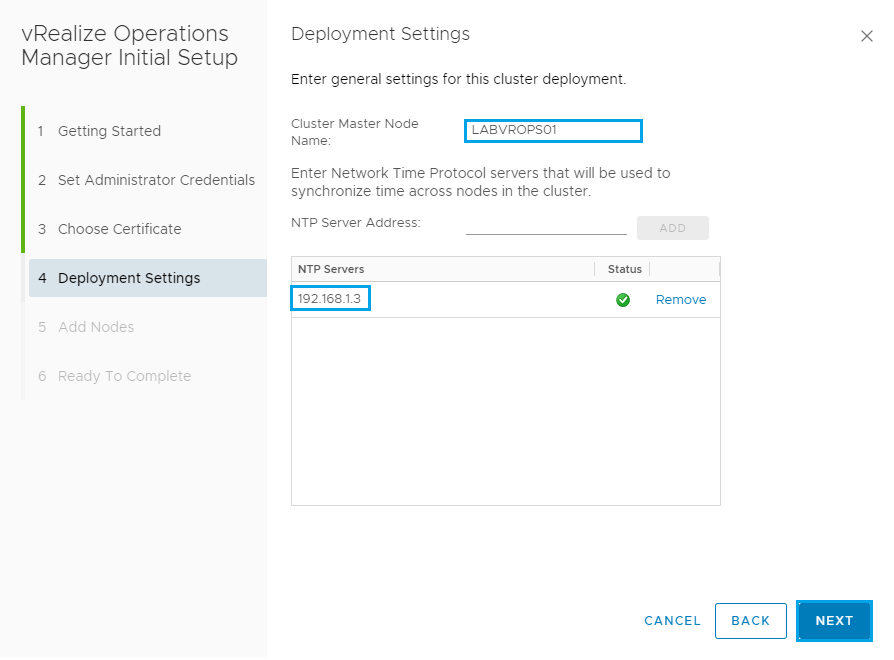
Enter the Cluster Master Node Name you would like to use and then add in an NTP Server.
Once complete click Next
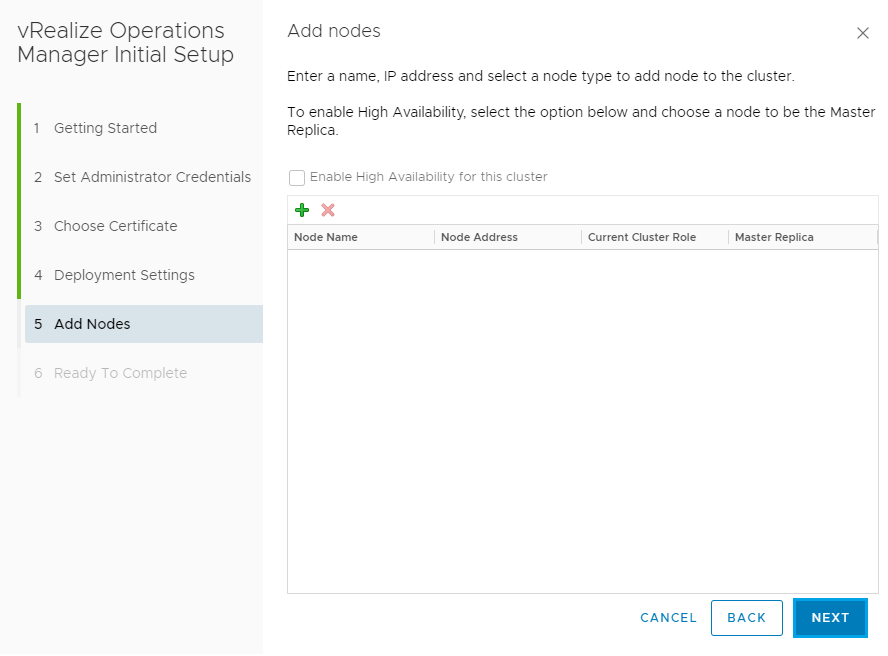
Since we have only setup the one node so far just click Next on the Add Nodes screen
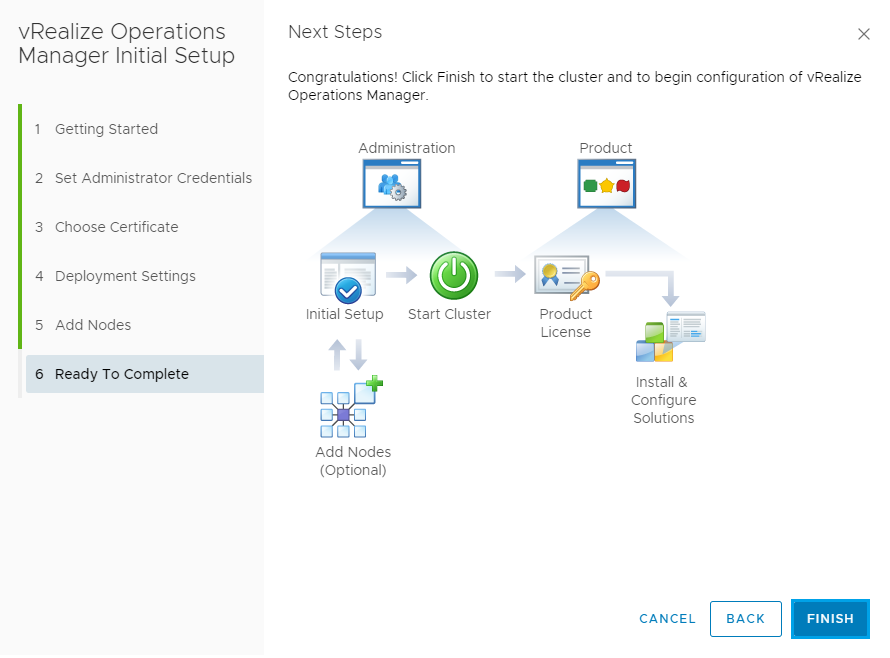
Then on the Ready to Complete screen click Finish
You will then be redirected to the vRealize Operations Manager screen. If at this point it logs out just log back in with admin and credentials you entered during the install and click Start vRealize Operations Manager.
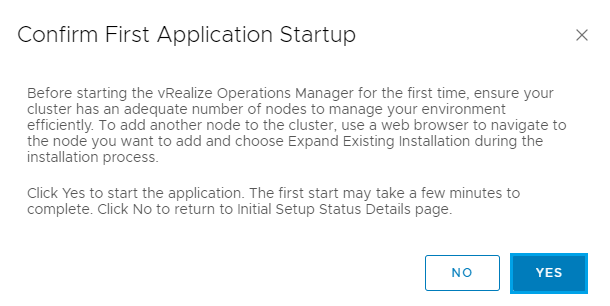
Then click Yes on the Confirm First Application Startup screen
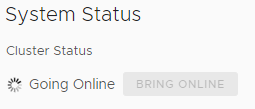
Now it’s time to get yourself a coffee and wait for the Master server Cluster Status to change to Online. This can take over 10 minutes in some instances.
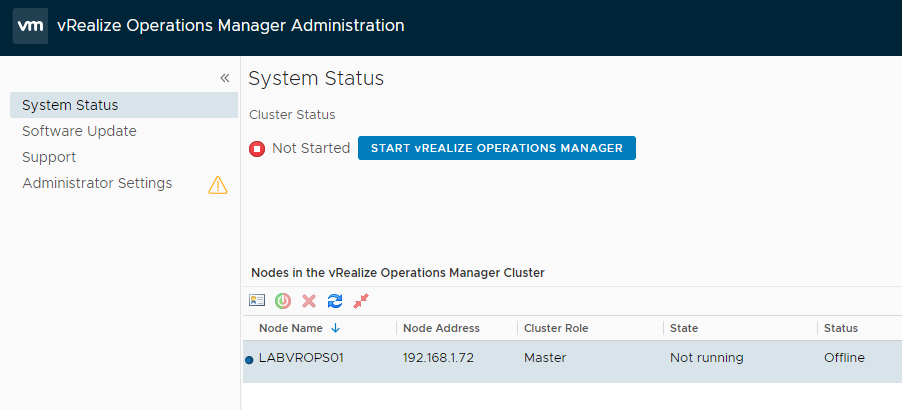
When everything is ready you should see the following screen. Both the Cluster Status and the Master Node should be Online.
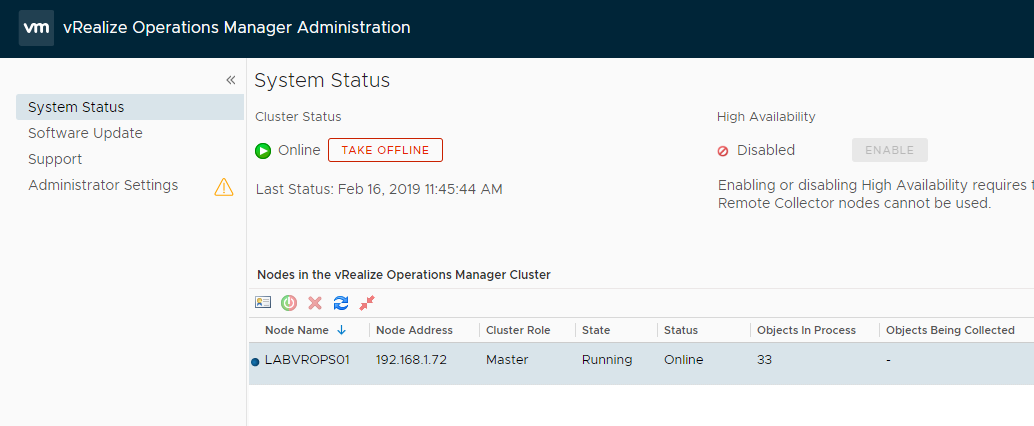
We have now deployed the Master Node which is required before any other additional nodes can be added in. You can now follow a similar process to add in additional collector nodes and replicas if required for your scenario. After deploying the OVF file again you will just need to select Expand An Existing Installation and follow the prompts.
For this guide I won’t be adding in any additional nodes as the main purpose of this post is to get us to a point where we are ready to deploy and integrate the vRealize Tenant App 2.1 for vCloud Director.
Now it’s time to login to vRealize Operations Manager and finish the setup.
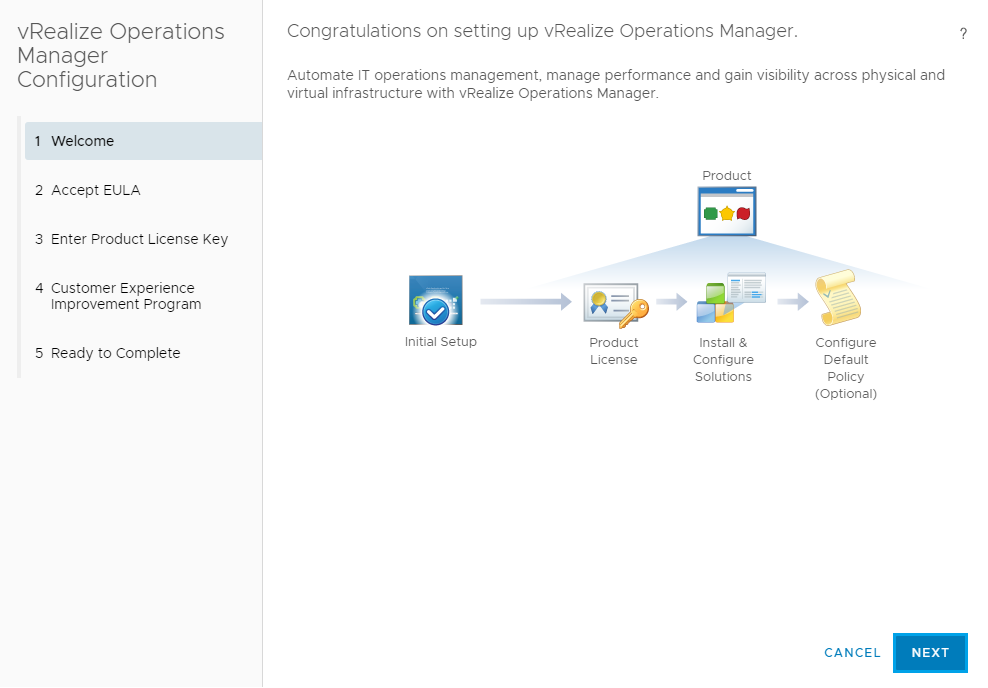
Connect to vRealize by entering the following url – https://labvrops01/ui
You will be presented with the Congratulations on setting up vRealize Operations Manager screen. Click Next to continue.
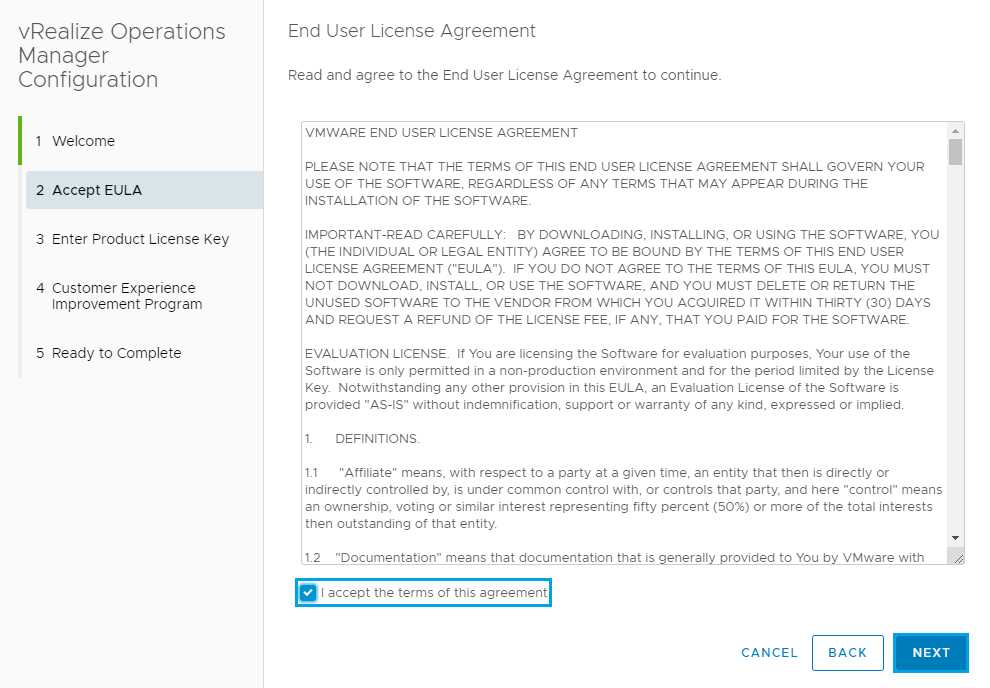
Accept the License Agreement and click Next
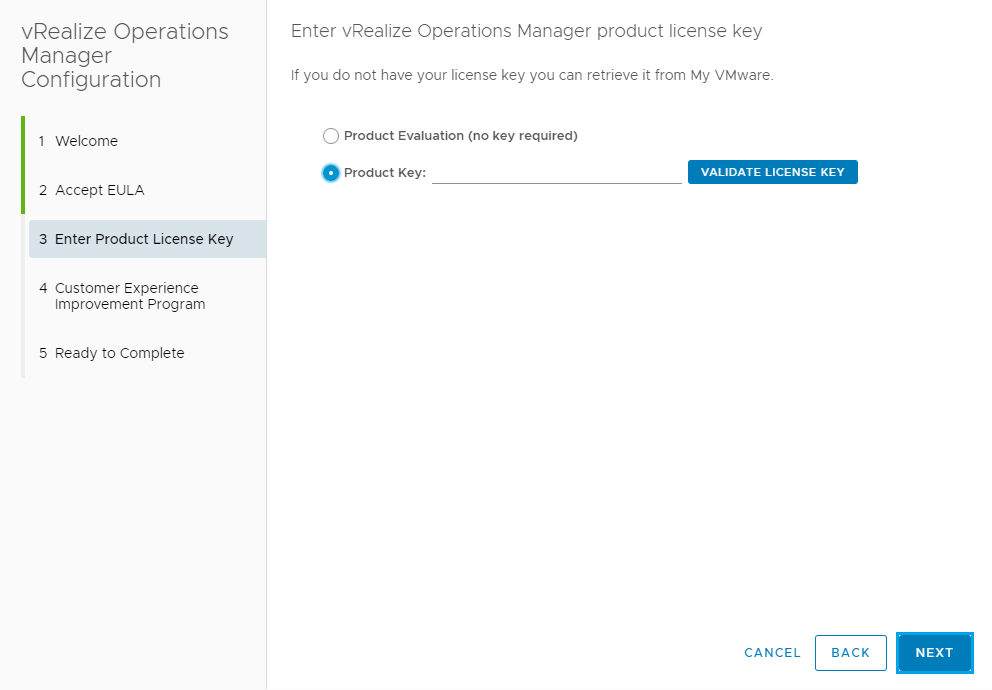
Enter the product key and click Next
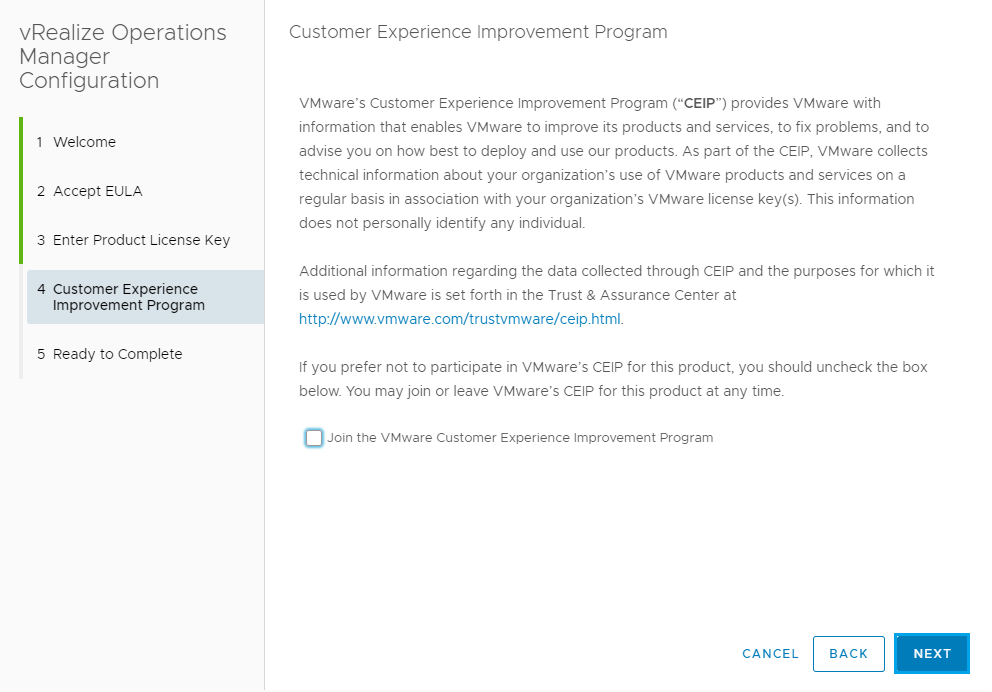
Select whether or not you would like to Join the Vmware Customer Experience Improvement Program and click Next
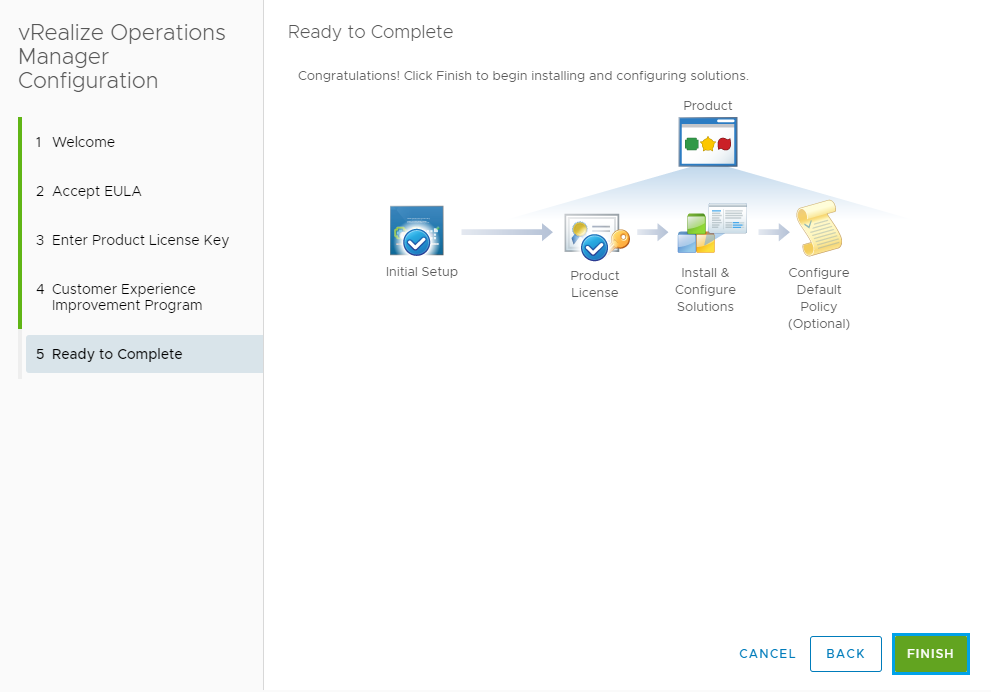
Then click Finish to complete the setup
Once complete you should see the following dashboard.
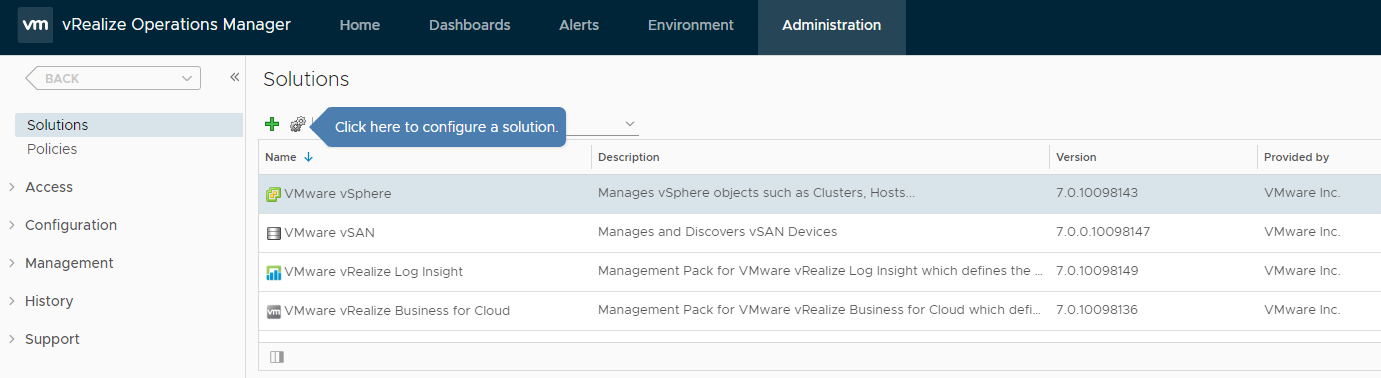
One thing we should do first is set the Currency. From the Administration tab expand Management and click on Global Settings. Then on the right locate Currency and click Choose Currency.

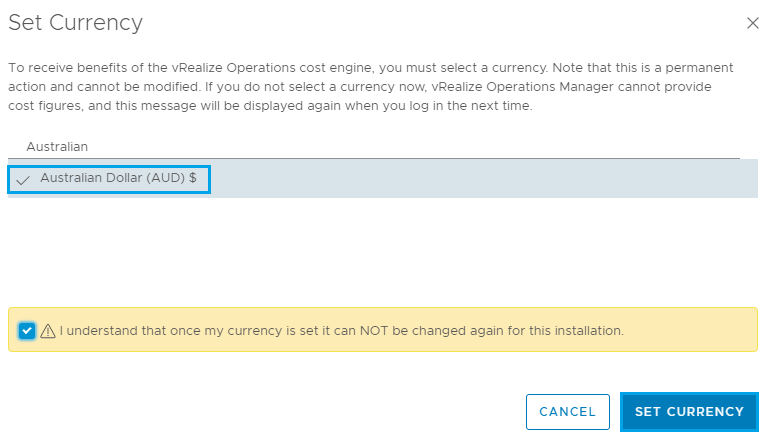
Then you can search for your currency to narrow down the list. Click on the currency you would like to use and then tick the box below explaining that once you set this you cannot change it. Then click Set Currency.
This is something that is required before you can setup the billing within the app.
Click OK on the Info box that is displayed.
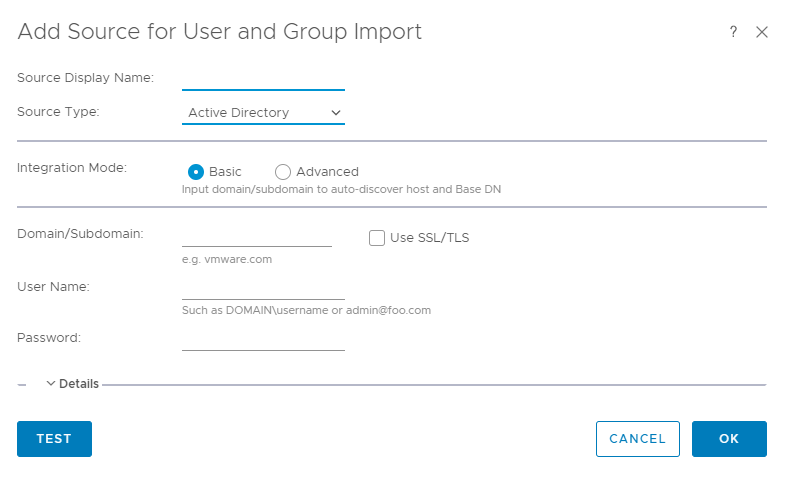
In the left hand menu expand Access and select Authentication Sources. From here you can go through and connect your vRealize Operations Manager deployment to AD. This part is optional.
You can select Active Directory from the Source Type drop down menu. Fill in the connection details for your environment, Test the connection and click OK.
Step 1 is now complete and we have the base installation of vRealize Operations Manager 7 in place. In my next post we will cover the RabbitMQ component and then go through deploying and configuring the Tenant App plugin so that it is available to Tenants within vCloud Director.
You can find a link to that post here
As always use the subscribe box above for new post notifications and follow me on twitter @steveonofaro
-
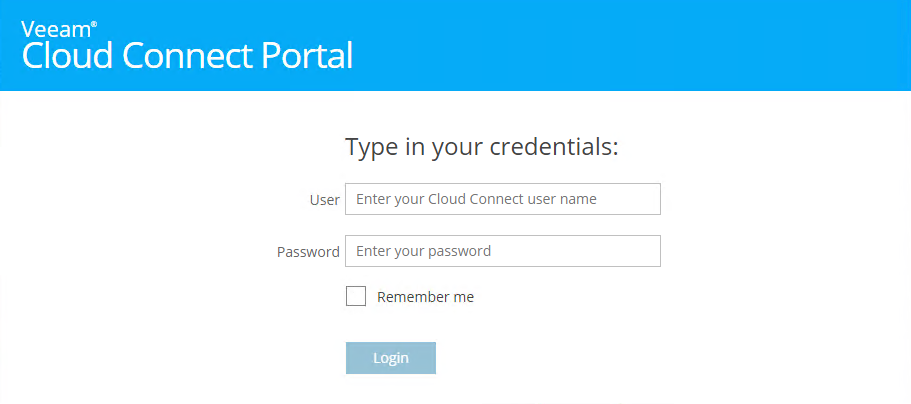
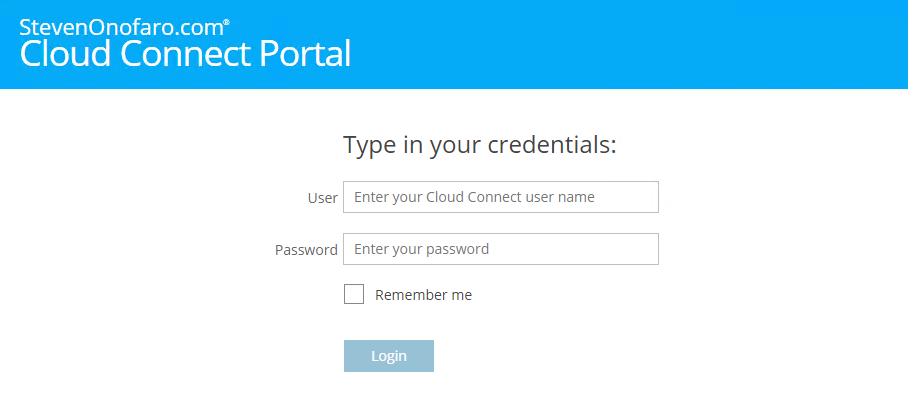
Veeam Cloud Connect Portal – How to Modify the Default Theme in 9.5 Update 4
The Veeam Cloud Connect Portal provides a secure method for Cloud Connect Tenants to initiate their cloud failover plans. From the portal tenants are able to perform the following tasks,
- Initiate a full site failover by a cloud failover plan
- Retry a full site failover by a cloud failover plan
- Undo a full site failover by a cloud failover plan
- Monitor the full site failover operation and view historical data on previous failover sessions
Since I have put already put together guides on how to change the portal theme for previous versions of Veeam Enterprise Manager I thought I better add one for the Cloud Connect Portal.
Branding is very important as you want your customers to know who they are connecting too. Having the ability to distinguish yourself from everyone else gives a more personalized experience for your customers. So with that lets gets started!
First let’s look at changing the colour from the default Veeam Green to Blue. I have used the same blue from my previous Enterprise Manager theme post so that both portals look the same.
Open the following files,
C:\Program Files\Veeam\Backup and Replication\CloudPortal\Scripts\build\production\LoginApp\resources\LoginApp-all.css
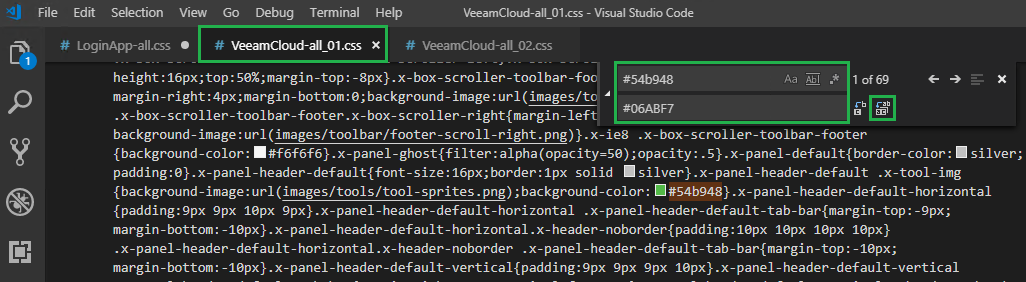
C:\Program Files\Veeam\Backup and Replication\CloudPortal\Scripts\build\production\VeeamCloud\resources\VeeamCloud-all_01.css
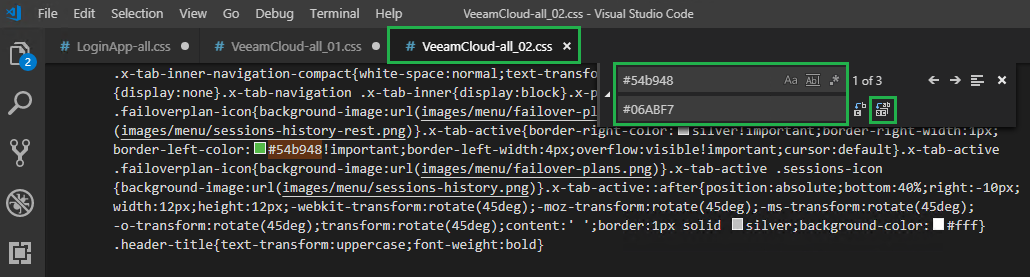
C:\Program Files\Veeam\Backup and Replication\CloudPortal\Scripts\build\production\VeeamCloud\resources\VeeamCloud-all_02.css
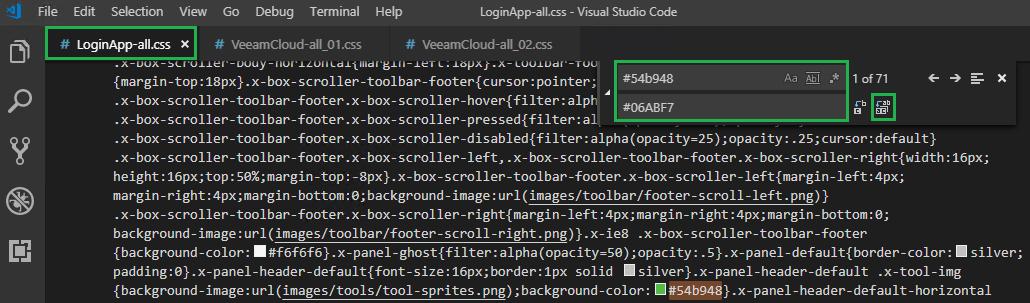
Search LoginApp-all.css for #54b948 and replace it with #06ABF7 (or any other colour you wish to use)
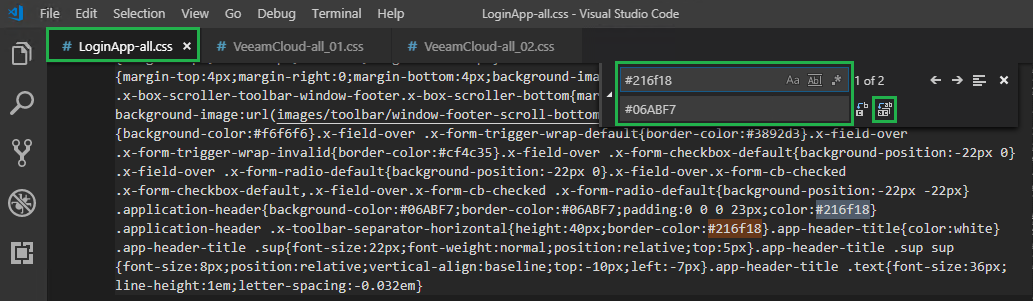
Then on the same file LoginApp-all.css search for #216f18 and replace it with #06ABF7
Then do the same in VeeamCloud-all_01.css, search for #54b948 and replace it with #06ABF7
Then again for VeeamCloud-all_02.css, search for #54b948 and replace it with #06ABF7
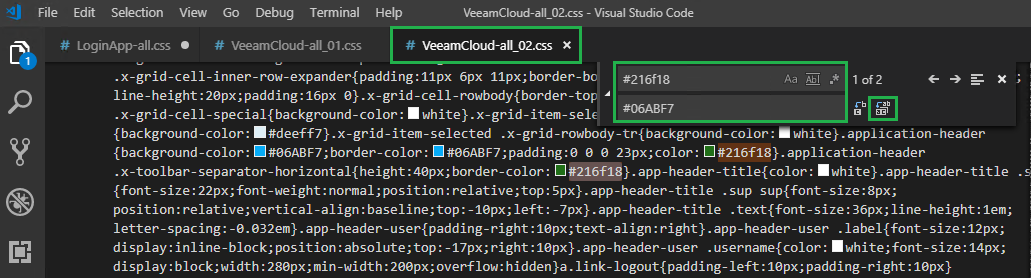
Then on the same file VeeamCloud-all_02.css search for #216f18 and replace it with #06ABF7
Then click on File, then Save All
If you refresh your browser now the Veeam Green colour should have changed
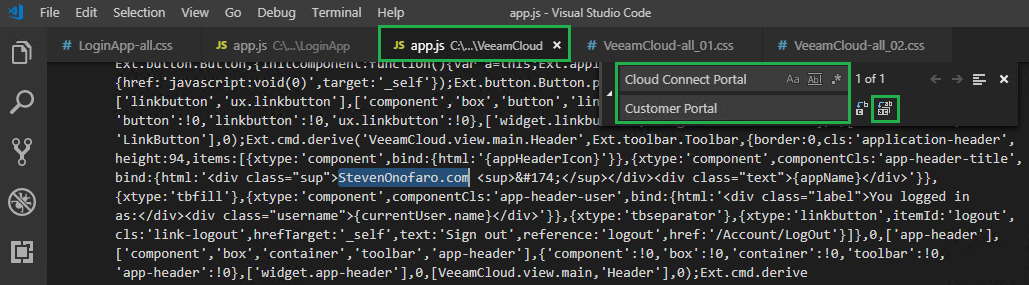
Now let’s look at changing the Company Name from Veeam to your Company Name
Open each of the following files,
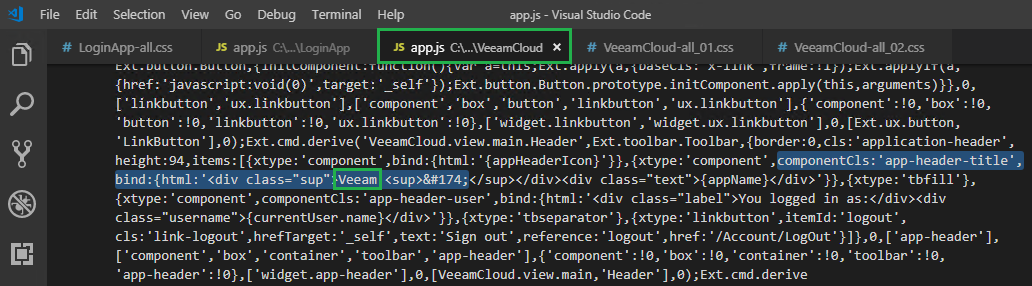
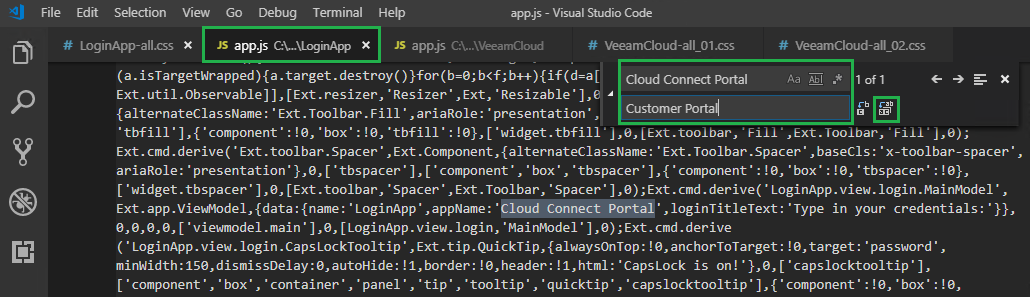
C:\Program Files\Veeam\Backup and Replication\CloudPortal\Scripts\build\production\VeeamCloud\app.js
C:\Program Files\Veeam\Backup and Replication\CloudPortal\Scripts\build\production\LoginApp\app.js
Scroll down to the bottom on each file and you should see the following entry,
componentCls:’app-header-title’,bind:{html:'<div class=”sup”>Veeam <sup>®
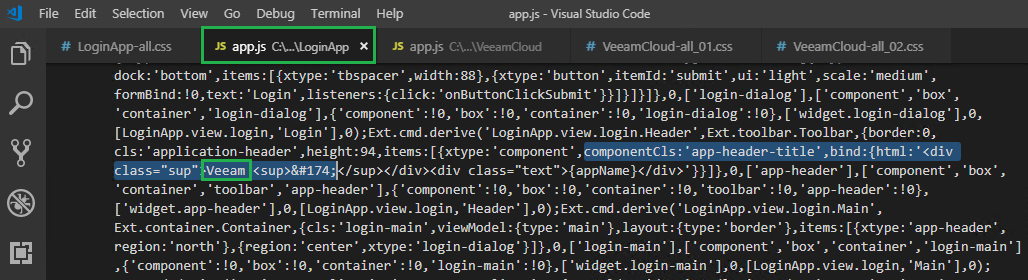
Now replace the word Veeam with your Company Name
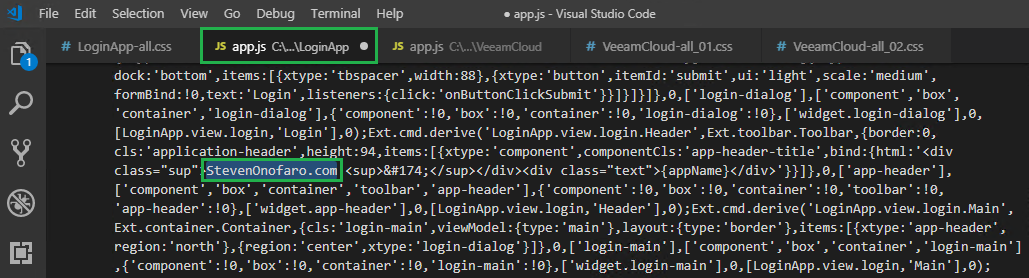
Then again on the second file
Replace the word Veeam with your Company Name
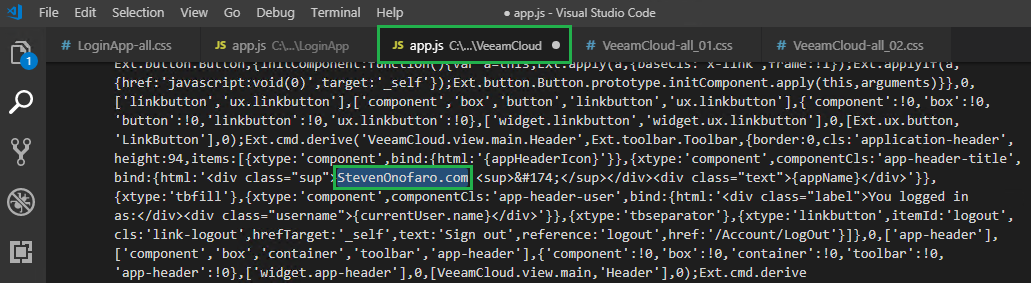
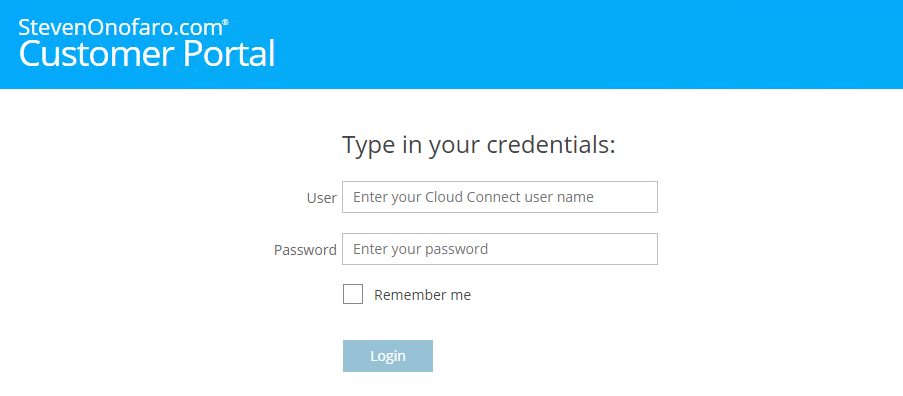
Then click File, Save All and refresh your browser
If you would like to change the “Cloud Connect Portal” section you can do so by making the following changes,
C:\Program Files\Veeam\Backup and Replication\CloudPortal\Scripts\build\production\VeeamCloud\app.js
C:\Program Files\Veeam\Backup and Replication\CloudPortal\Scripts\build\production\LoginApp\app.js
In the Visual Studio Code Menu click on Edit then Replace, in the Find box type Cloud Connect Portal and in the Replace box enter the text you would like it to display
Then do this for the second file
Then click File and Save All
Then refresh your browser
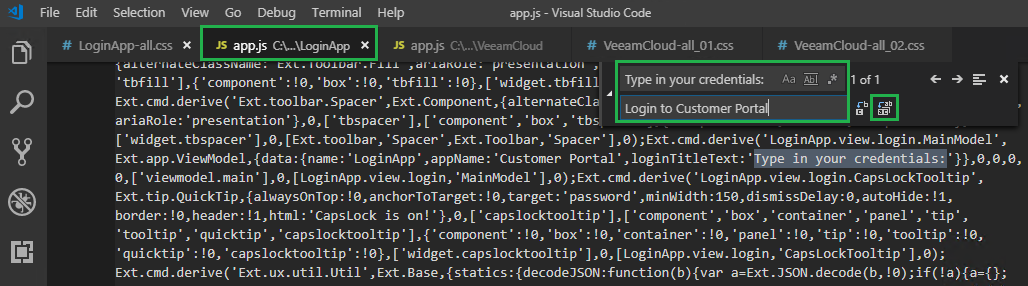
You can also change the txt above the logon box which by default is “Type in your credentials:“
To do this search for “Type in your credentials:” in the file listed below and replace it with what you would like the logon screen to display
C:\Program Files\Veeam\Backup and Replication\CloudPortal\Scripts\build\production\LoginApp\app.js
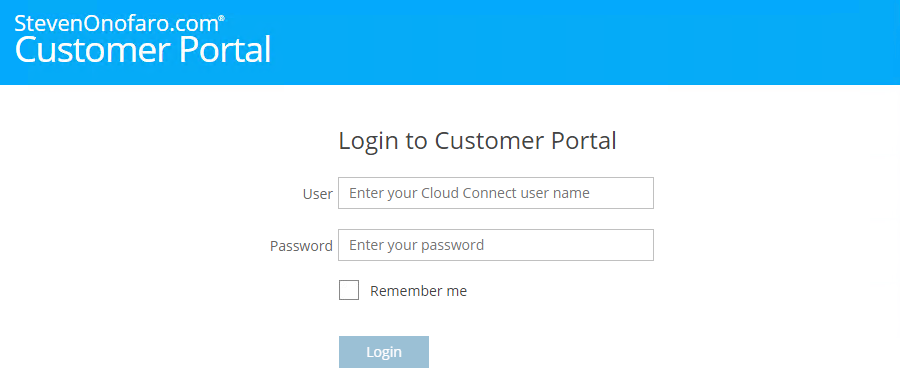
In this example I am going to change mine to say “Login to Customer Portal“
Then click File, Save All.
Then refresh your browser
Last thing we need to change is the name that appears in the browser tab,

To do this open the following file,
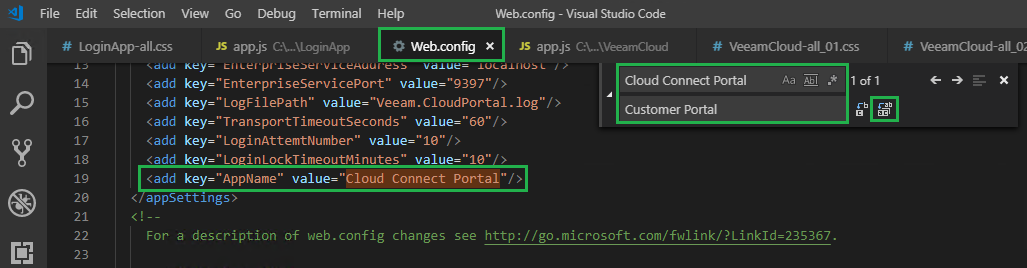
C:\Program Files\Veeam\Backup and Replication\CloudPortal\Web.Config
Then Edit the entry – add key=”AppName” value=”Cloud Connect Portal“
Change Cloud Connect Portal to the heading you specified earlier, for this example “Customer Portal“
Save the changes and refresh your browser

There you go all done!
As always use the subscribe box above for new post notifications and follow me on twitter @steveonofaro
-
Subscribe
Subscribed
Already have a WordPress.com account? Log in now.
