-
Migrating your vCloud Director 9.5 SQL Database to PostgreSQL
Before you start the migration its a good idea to snapshot the vCloud Director cells and manually backup the SQL database. Next you need to stop the vCloud Director services. You do this by connecting to each cell via SSH and running the following command.
Service vmware-vcd stop

Next we need to browse to the directory of the cell management tool. Enter the following,
cd /opt/vmware/vcloud-director/bin
Run the ls command and you will see the cell-management-tool located in the directory.

Then run the following command to start the database migration,
./cell-management-tool dbmigrate -dbhost 192.168.1.63 -dbport 5432 -dbuser vcloud -dbname vcloud -dbpassword ‘password123’ -verbose
Replace the dbhost ip with the ip address or hostname of you postgresql server, then update your dbuser account, dbname and your password.
If the migration starts successfully you should see the following output,
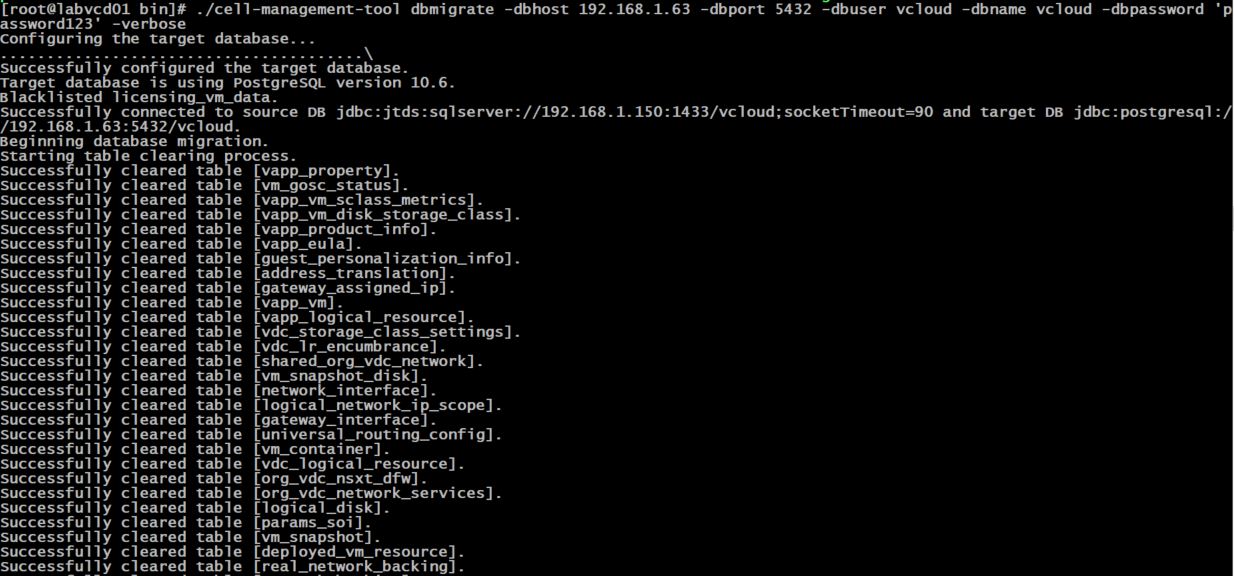
Once complete you will see the Database Migration Succeeded prompt. Check that no items failed or skipped.

Next we need to run the reconfigure database command on each of the vCloud Director cells.
/opt/vmware/vcloud-director/bin/cell-management-tool reconfigure-database

Then restart the vcloud director cell.
Service vmware-vcd restart

That’s about it, you have just migrated your vCloud Director SQL database to Postgresql!
-
PostgreSQL Deployment for use with vCloud Director
A quick guide on how to install PostgreSQL 10 on Centos 7. vCloud Director 9.5 officially supports PostgreSQL 10 and I thought I would setup a new database server to migrate my existing vCloud SQL database over too.

VMware recommends the database server is built with 16 GB of memory, 100 GB storage, and 4 CPUs.
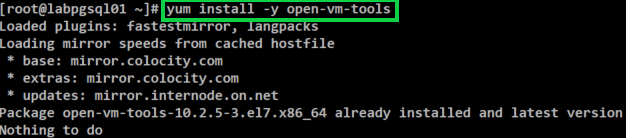
Deploy a basic Centos 7 VM and update the OS, then connect to the VM via SSH using Putty. If you have updated the OS then chances are open-vm-tools has been installed but run the following command to confirm.
yum install -y open-vm-tools
Next restart the Centos VM before continuing.
Then run the following command to retrieve the PostgreSQL 10 RPM.
rpm -ivh http://yum.postgresql.org/10/redhat/rhel-7-x86_64/pgdg-centos10-10-2.noarch.rpm

Then run the following command to install PostgreSQL.
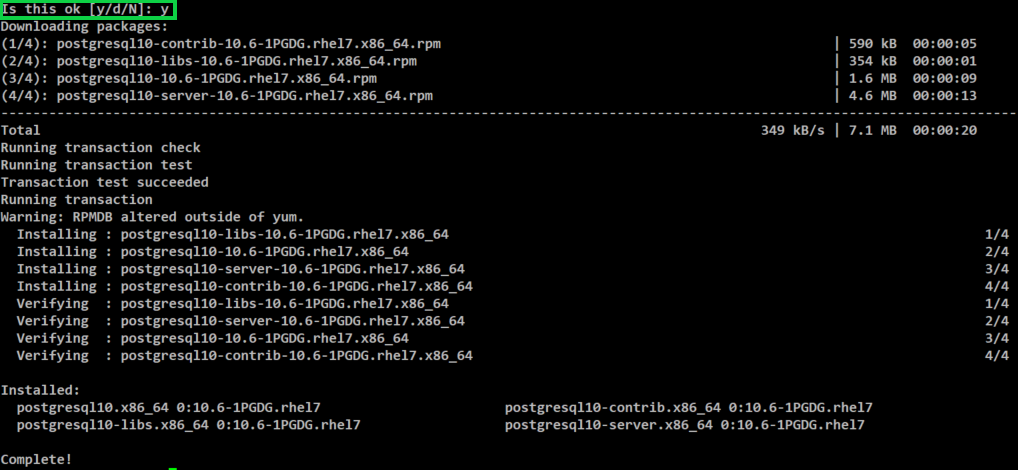
yum install net-tools postgresql10 postgresql10-server postgresql10-libs postgresql10-contrib
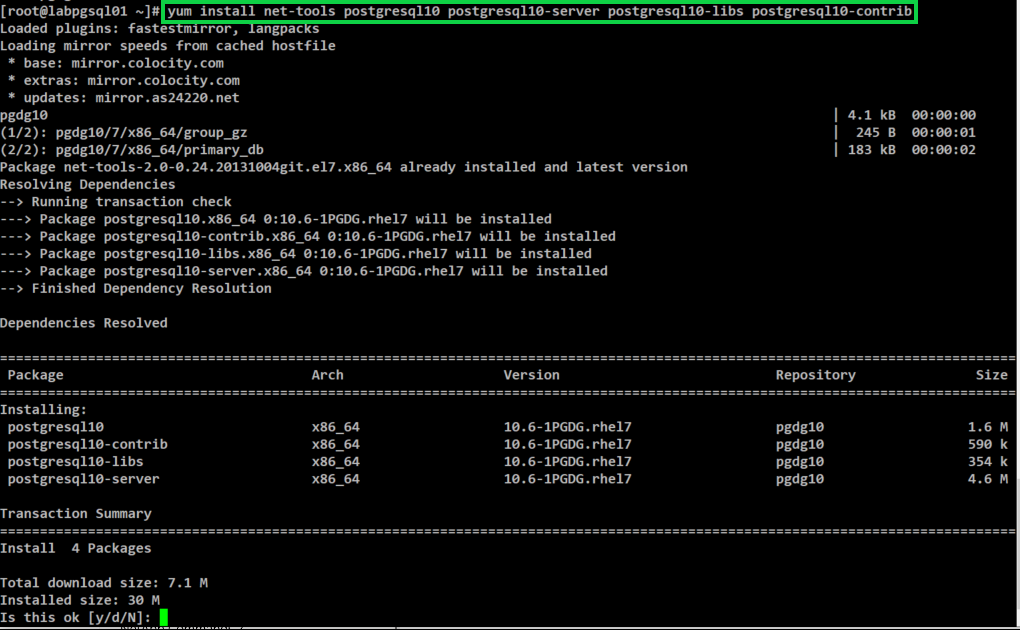
Type Y and press Enter to continue
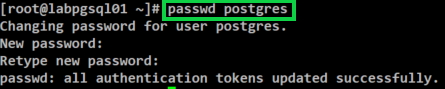
Next we need to change the default PostgreSQL password. To do so enter the following command.
passwd postgres
Then enter your new password.
The next thing we need to do is configure PostgreSQL to start on boot up. To do this enter browse to the following directory.
cd /usr/pgsql-10/bin/

Then run the command below.
./postgresql-10-setup initdb

Next we need to start the PostgreSQL service, to do this enter the following.
systemctl start postgresql-10.service
Then to enable the PostgreSQL service enter the following command.
systemctl enable postgresql-10.service

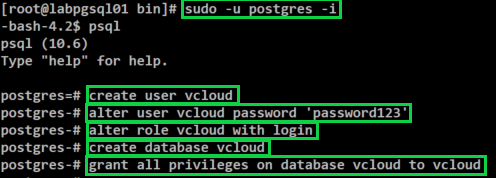
Switch over to the postres user by running the following command
sudo -u postgres -i
Then we create the vcloud user and database by issuing the following commands (one after the other). Please replace password123 with the password that you would like to use.
psql
create user vcloud
alter user vcloud password ‘password123’
alter role vcloud with login
create database vcloud;
grant all privileges on database vcloud to vcloud
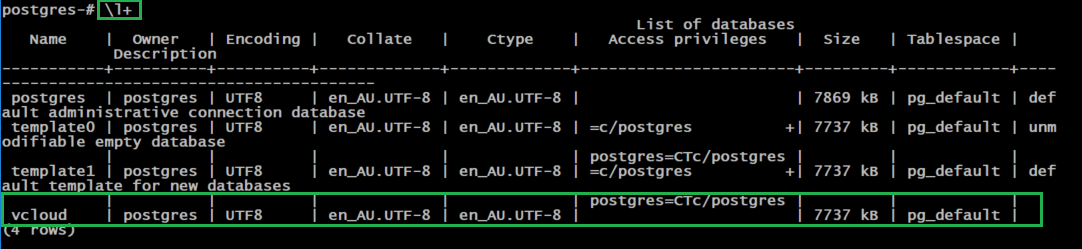
A good way to check that the DB was created is to run the following command.
\l+ or \list+
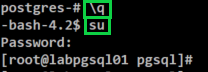
Type \q and press Enter
Type su and enter the root password to switch back to the root user account
Then we need to allow PostgreSQL connections through the default firewall configuration

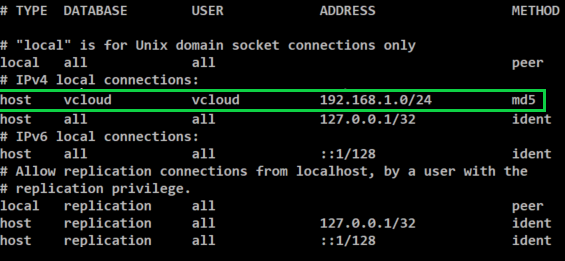
Next its time to allow the vcloud user to login. To do this we need to add a line to the pg_hba.conf file.
Enter the command below to edit the file.
vi /var/lib/pgsql/10/data/pg_hba.conf

Then add the following line as per below. Lock down the address access to suit your current deployment. As mine is currently in my lab I just allowed the range for this example.
Host vcloud vcloud 192.168.1.0/24 md5
Next we need to setup the PostgreSQL listening port and IP address. To do this we need to edit the postgres.conf file.
Run the following command to edit the file.
vi /var/lib/pgsql/10/data/postgres.conf
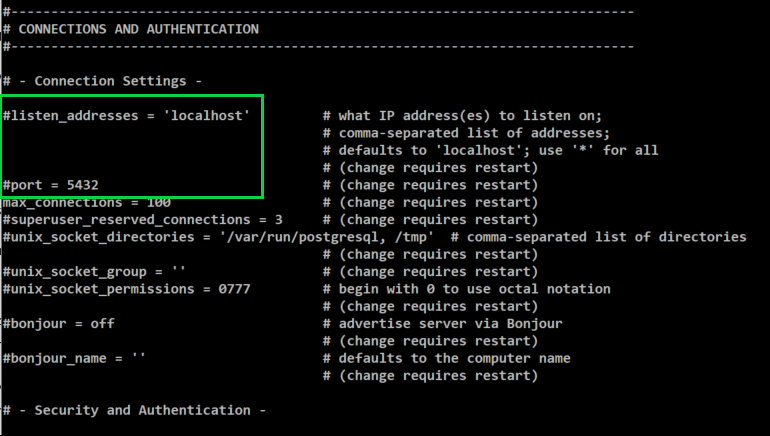
Remove the # in front of listen_addresses and the port. Then after listen_addresses change ‘localhost’ to ‘*’
listen_address = ‘*’
port= 5432
It should look like the below image after making the changes.
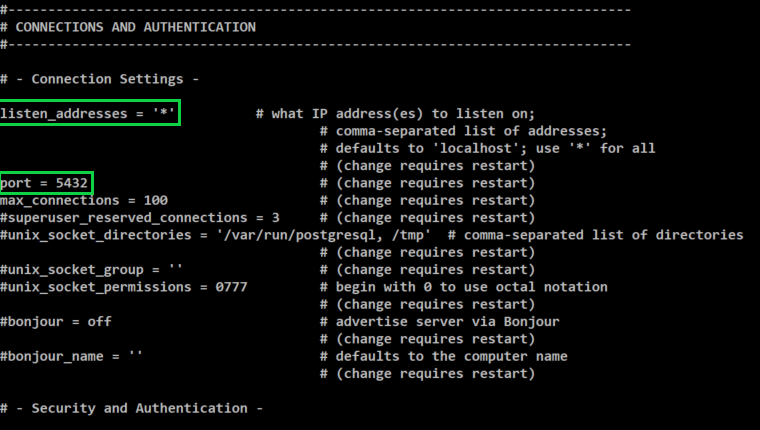
Press Esc and then type :wq and press Enter to save the changes you just made.
Now its time to install NTP and configure the required settings. Run the following command.
yum install ntp
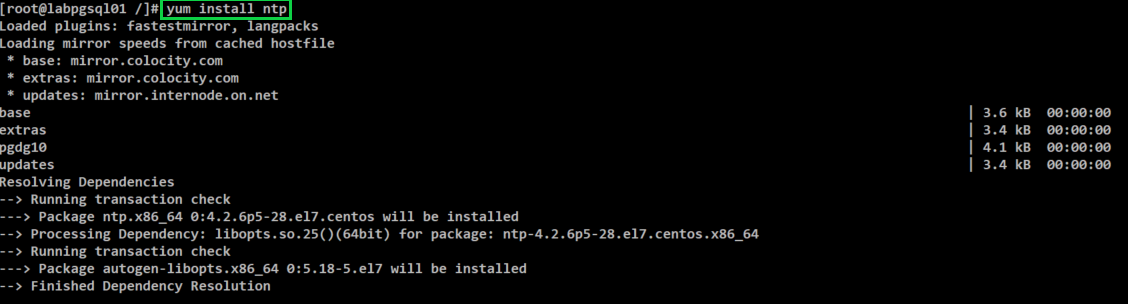
You will be prompted to press Y to complete the install.
You need to configure the NTP server for each of the vCloud Director servers, including the database server. The maximum allowed time drift is 2 seconds.
Enter the following to edit the NTP configuration.
vi /etc/ntp.conf
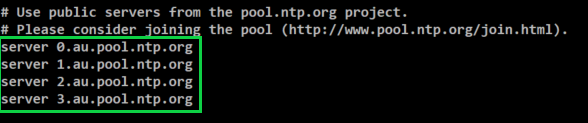
Scroll down to the list of public servers and update it to the ntp servers you would like set. For now I will just set the following.
Next we need to start and enable the ntpd service by entering the following commands.
systemctl start ntpd
systemctl enable ntpd

Then we need to ensure that ntpd is running by entering the following command.
systemctl status ntpd

Ensure that each of your DNS entries have been set for the database server and vCloud Director cells.
Last step is to turn off selinux, you can do that we need to edit the following file.
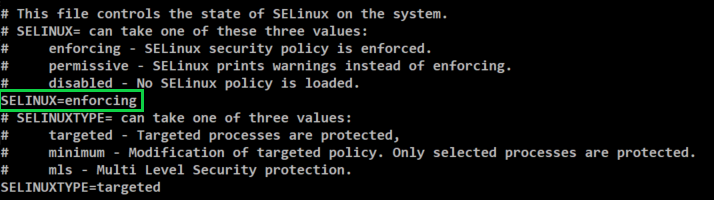
vi /etc/sysconfig/selinux Change SELINUX=enforcing to SELINUX=disabled
Then reboot the server to complete the installation.
VMware also offer some performance tuning options for previous versions here
Once you have completed your installation another good tip is to deploy PGAdmin. It provides a great web interface and helps make the transition from SQL to PostgreSQL a little easier. I have provided a link to the PGAdmin site here
I hope this has been helpful for those of you looking to move your current vCloud Director SQL databases over to PostgreSQL.
-
Cisco HyperFlex Upgrade – Part 3
Now that the UCS Manager Infrastructure Components are complete we need to move over to the HX Data Platform. The next step is to go through the manual bootstrap upgrade process. The following steps will upgrade the HX Data Platform and the Data Platform plug-in.
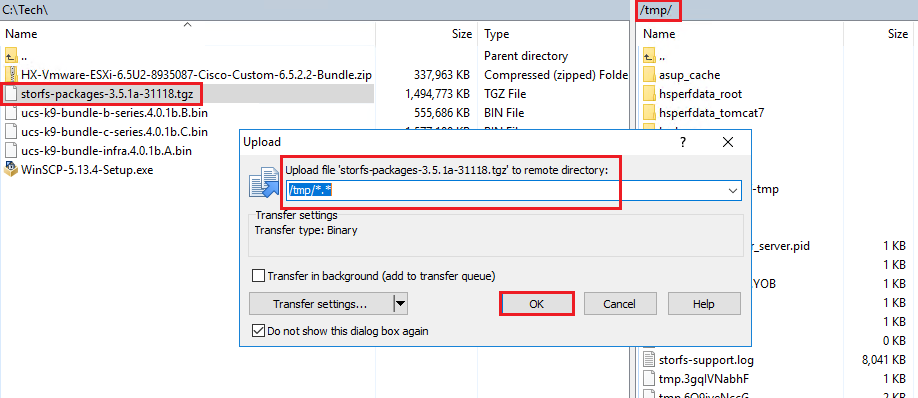
Open WinSCP and connect to the Cluster Management IP Address and login as the root user. Then we need to copy the HX Data platform upgrade bundle to the /tmp directory of the controller VM.
Next we need to open up Putty and connect to the Cluster Management IP address as the root user. Once logged in browse to the /tmp directory where we copied the installer bundle.

Then run the following command to un-compress the package,
tar –zxvf storfs-packages-3.5.1a-31118.tgz
Then run the following command to bootstrap the package for the upgrade,
./cluster-bootstrap.sh
You will be prompted to enter the vCenter FQDN and a username and password with administrator privileges. I have provided an image below showing each of the prompts but I have removed my entries.

After the script has run the System Management Service will restart and the bootstrap process will then be complete. You can now check the Plug-in is now updated in the vsphere client.
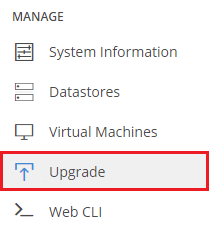
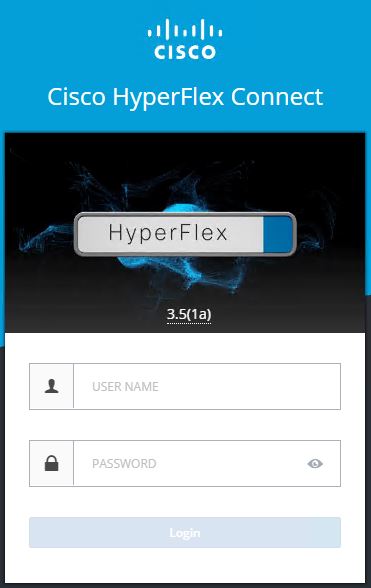
Next you need to log into the same Cluster Management IP address which will take you to the HX Connect client. You then need to login with the username admin as this has now changed for this new release. On the left hand side menu under Manage click on Upgrade
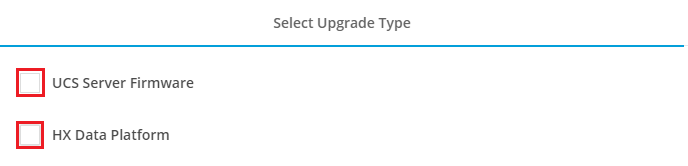
Then tick the UCS Server Firmware box and the HX Data Platform Box.
Next fill in each of the fields presented underneath UCS Server Firmware and then drag and drop a copy of the upgrade bundle we used earlier to run the manual bootstrap process. Note – The manual bootstrap process will no longer be required for future upgrades beyond the 3.5 release we are upgrading too.
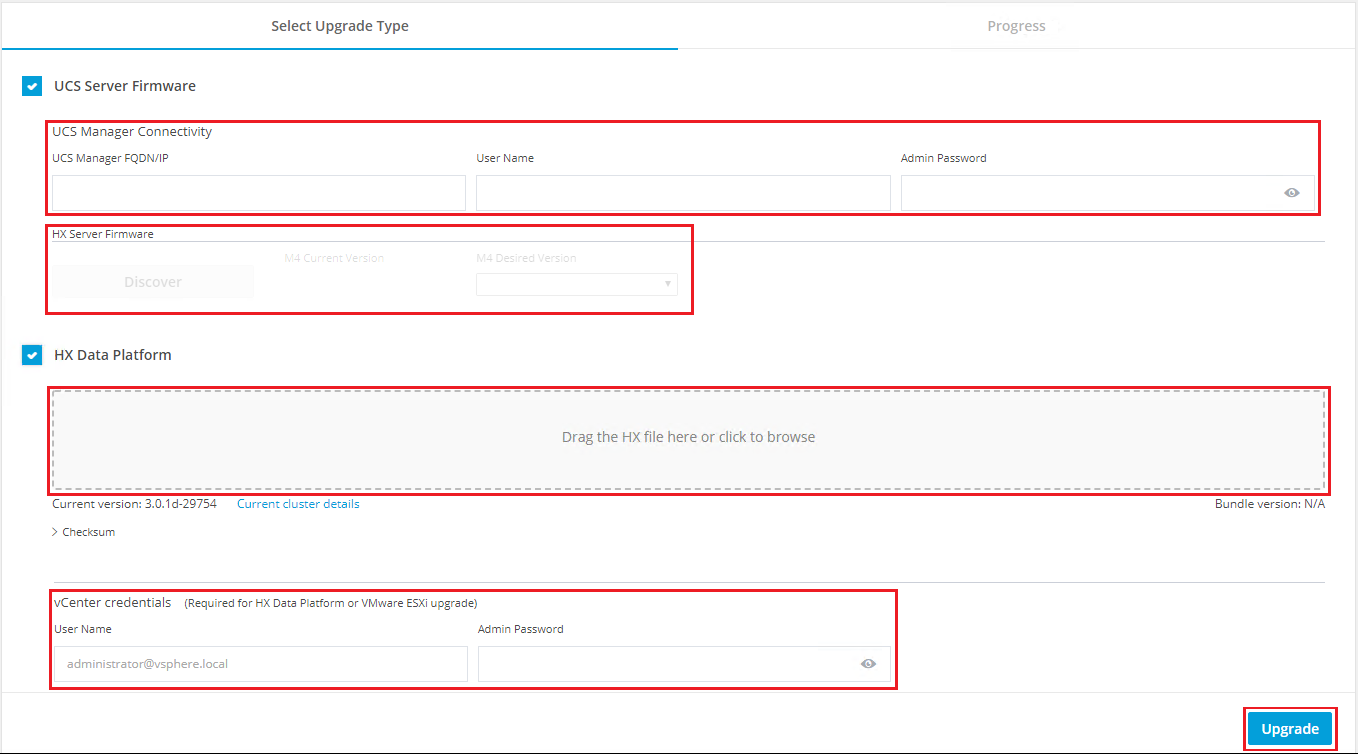
After filling in the UCS Manager details you will need to click on the Discover Button. This will located the current server firmware version and allow you to select the version you would like to upgrade to from the drop down menu.

Once complete you should see the following screen

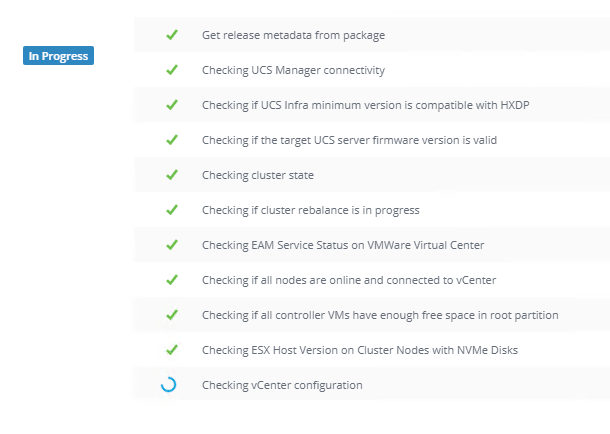
HX Connect will then go through a validation process and check each component to ensure it will be able to perform the upgrade. If any errors are found it will raise them here and allow you to resolve them before trying again.
Once the validations are complete it will run through upgrading each of the hosts in the cluster one at a time. It will display each of the steps it is running through as the host is upgraded. One thing to note is that if you have any VMs you have pinned to a certain host or if you have other VM rules in place you will need to address this before proceeding as you may get errors in the validation.
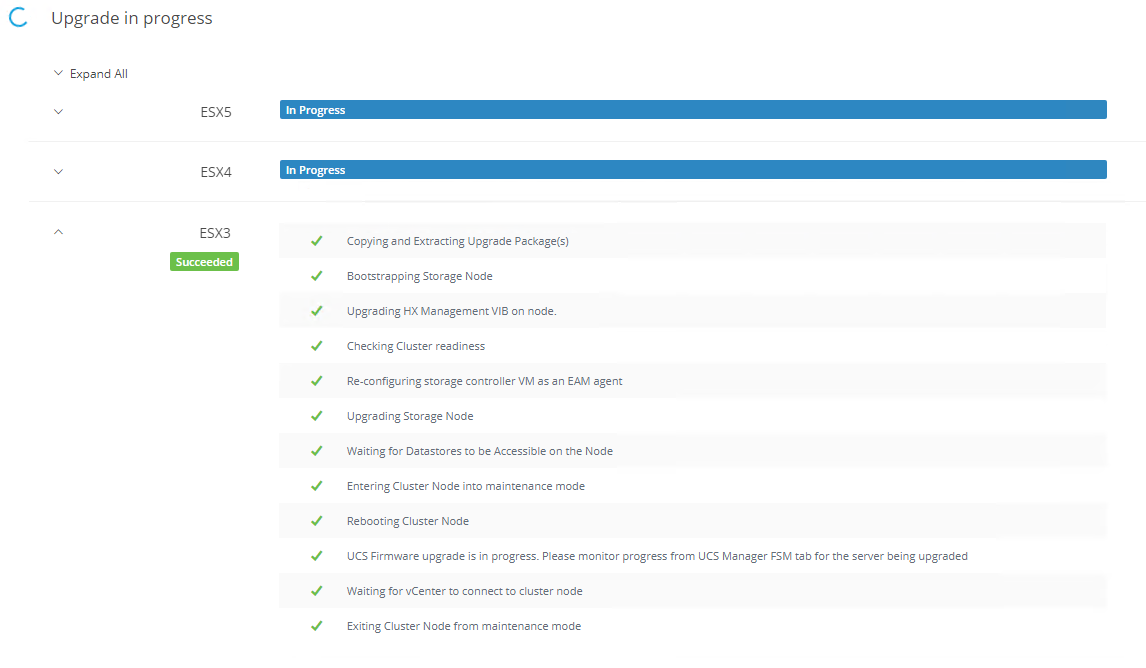
The process will take care of the hosts and the VMs in the background automatically. The VMs will be migrated off the host and it will enter HX maintenance mode before performing the upgrade. It will go through each host in the cluster until each one is upgraded.
You can monitor the progress of each host from the vsphere client and UCS Manager. You will still see prompts in UCS Manager about Pending Activities in relation to rebooting hosts but you won’t need to do anything with them. The process will take care of itself. Time to sit back and let the upgrade run its course!
Post Upgrade Checks
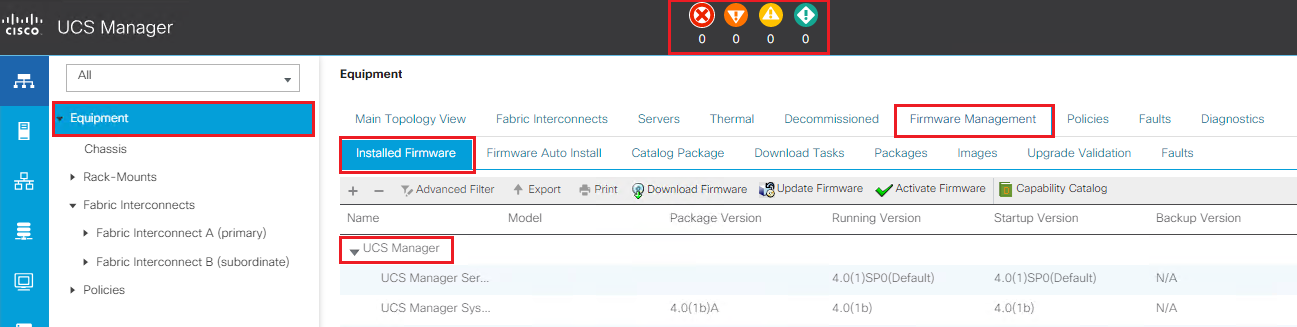
Log into UCS Manager and check the running firmware version for all of your components by expanding out each node.
Ensure that everything has been upgraded and there are no pending tasks or errors to resolve. I haven’t included a screenshot of everything we have connected to UCS Manager but expand out and check the servers you have running on your infrastructure.
Also log into HX Connect via the Cluster Management IP Address and check over the main dashboard for any alerts. When you log in you will notice that HX Connect now displays 3.5(1a) under the Hyperflex Logo.
Then to confirm that everything is now back online and healthy switch to your vSphere Web Client. Click On Home, then vCenter Inventory Lists, then Cisco Hyperflex Systems, then Cisco HX Data Platform, then Cluster and then Summary. This should now show the Cluster Status is Online and the Health Status is Healthy.
That’s it your all done! Thanks for checking out my upgrade guide!
-
Cisco HyperFlex Upgrade – Part 2
Upgrading the Hyperflex Cluster
We have now completed the first step which was to upload the UCSM Infrastructure A-bundle, Blade B-bundle and Rack C-bundle for version 4.0(1a) to the Fabric Interconnects.
Next step is to check the vMotion between hosts to ensure when you start to failover you won’t have any issues. If your cluster is already in production then more than likely this will not be an issue but it’s always worth checking from each host.
Now it’s time to upgrade the UCS infrastructure.
Modifying the Firmware Packages in Cisco UCS Manager
Now it is time to modify the firmware packages so that we can manually stage the firmware and start the upgrade. We will start UCS Manager.
Log into UCS Manager

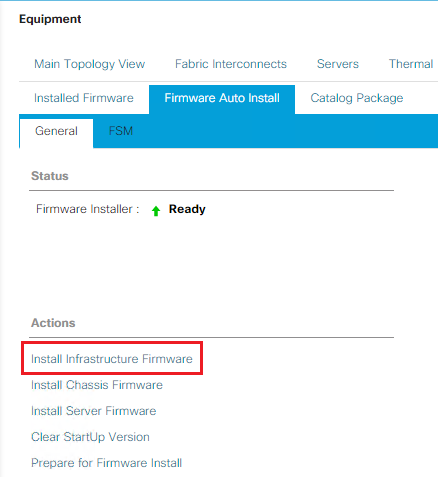
Click on Equipment, then Firmware Management, then Firmware Auto Install

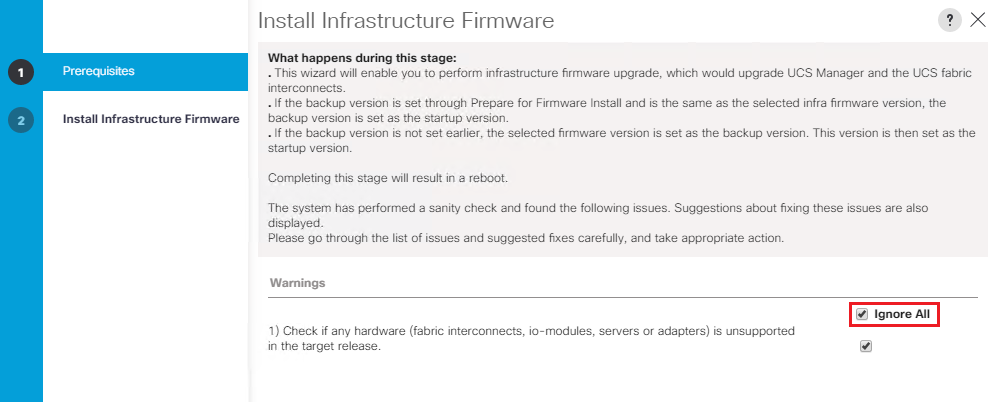
Next we need to click on Install Infrastructure Firmware
The Install Infrastructure Firmware wizard will now start, review the warnings and resolve any issues it may present. I have reviewed all of my hardware versions so it’s safe to select Ignore All and click Next.
From the Infra Pack drop down box select the new version you want to install, in our case 4.0(1b). Then tick the Upgrade Now box and click Finish.
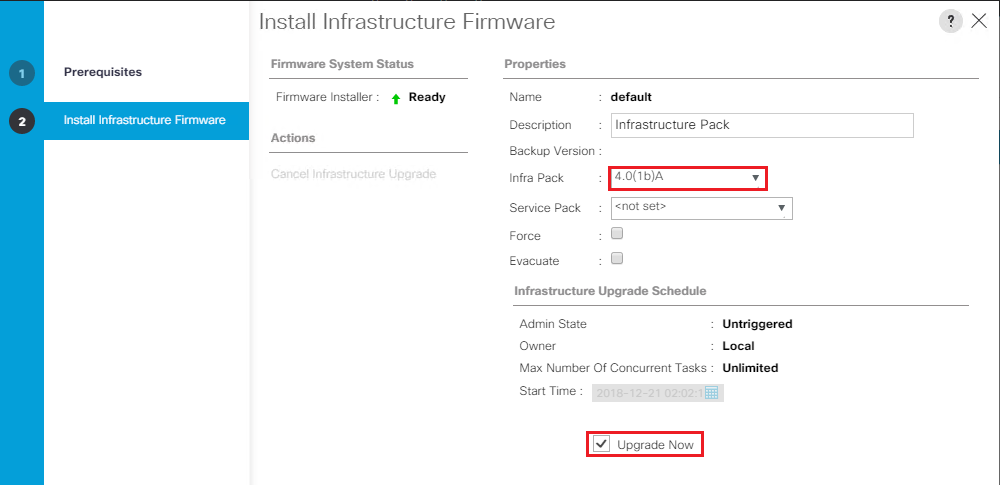
At this stage I don’t have any service packs we need apply with the base firmware so I will leave that blank. Service packs are patches that you can use to apply security updates to UCS Manager infrastructure and server components.
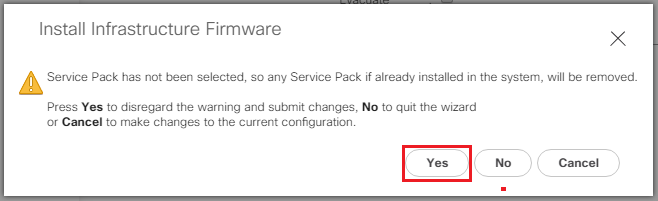
Then click OK

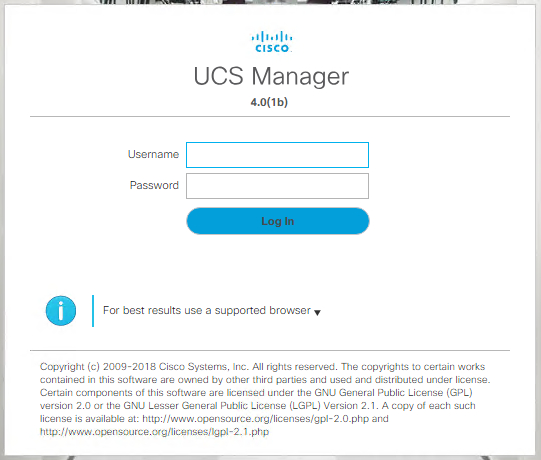
This will upgrade the UCS Manager software first so your connection will drop out at this point. Wait a few minutes before attempting to log back in. Don’t worry everything is still online as it is just upgrading the management software side.
Next it will look for any IO modules you have present in your 5108 chassis (if connected) and we need to wait while each one has the new software staged to it. They will display Pending Next Boot once complete but the new version will not be activated until the FI’s are each rebooted.
After a few minutes you should be able to log back into UCS Manager. Note the new version displayed 4.0(1b)
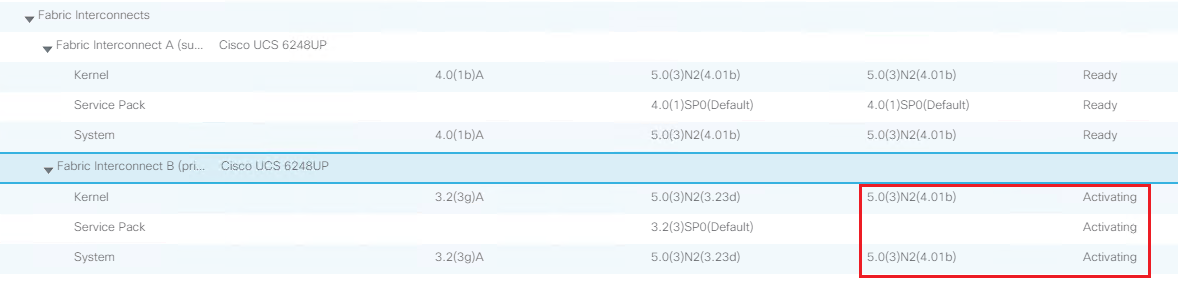
Next we need to wait while the subordinate fabric interconnect updates. If you click on Equipment then Fabric Interconnects, then Installed Firmware you will see that the subordinate is activating.
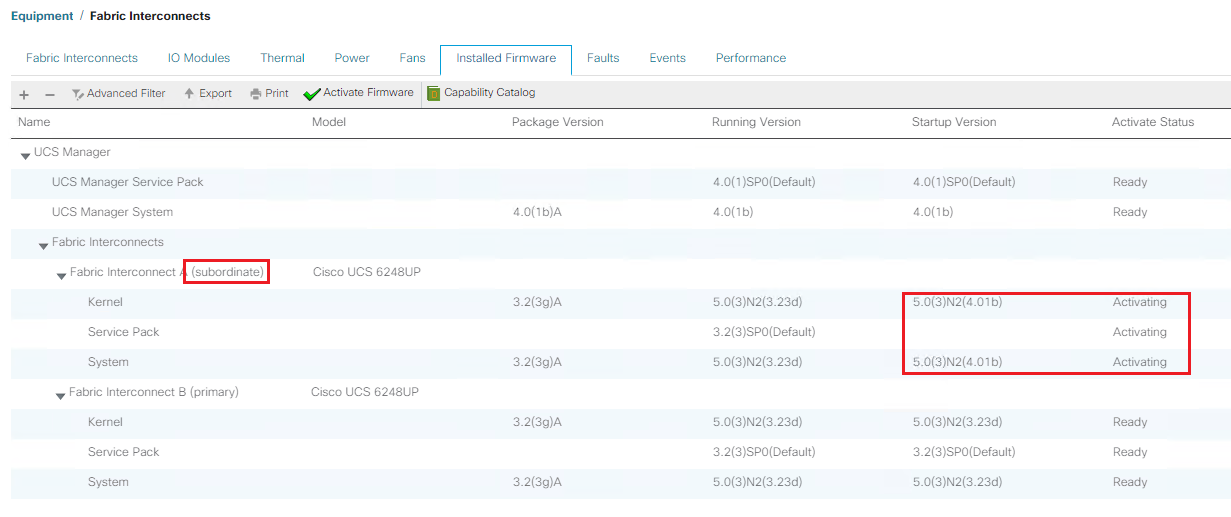
All traffic will now be forwarded to the primary FI while the subordinate is rebooted. After it has activated the startup version will be listed as 4.01b and the status will be set to Ready.
If you have a blade chassis present you will have to wait for the firmware to be staged to the IO modules and for the ones connected to the subordinate FI to display Ready. The ones connected to the Primary will still show Pending Next Reboot.
Wait until all errors have cleared from UCS Manager before continuing.

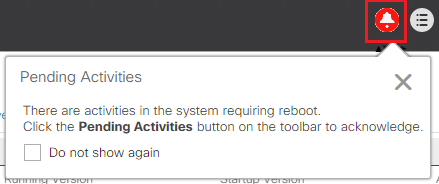
Next you will notice the Pending Activities alarm at the top of the UCS Manager page. Click on the Pending Activities image.
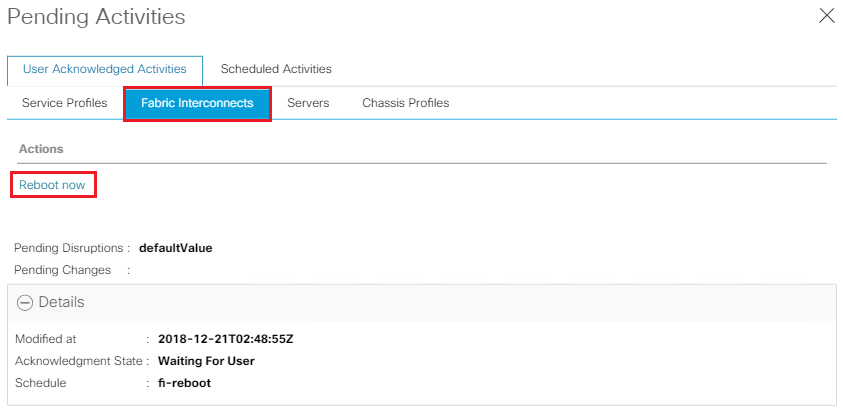
Click on Fabric Interconnects and then click Reboot Now.
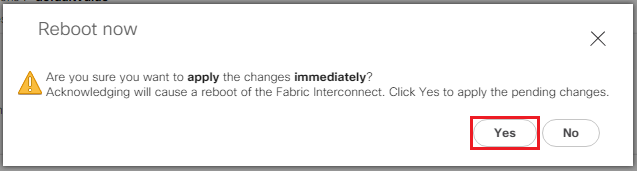
Click Yes to continue
Then Ok one more time for good luck.
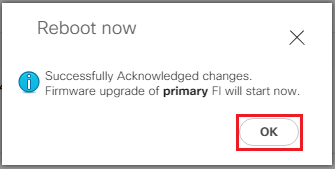
Can’t believe you just rebooted your primary FI.. What were you thinking? Just kidding its fine.
This will now reboot the Primary FI and the Subordinate will become the Primary. During the failover all traffic will now be directed via the new Primary FI. Don’t worry everything will still be connected!
The old Primary FI will now show Activating and will then reboot. At this point the failover kicks in your connection to UCS Manager will drop so just wait a few minutes and then log back into UCS Manager.
At this point you may notice your hosts reporting network uplink redundancy lost. Don’t worry the connectivity will be restored shortly.
Once the failover is complete you will be able to log back into UCS Manager. Click on Equipment then Firmware Management then Installed Firmware. Expand out the Fabric Interconnects.
Check that the Subordinate has now become the primary. Then wait for the activation status of the other FI to change to Ready. Wait for any IO Module activation’s to complete.
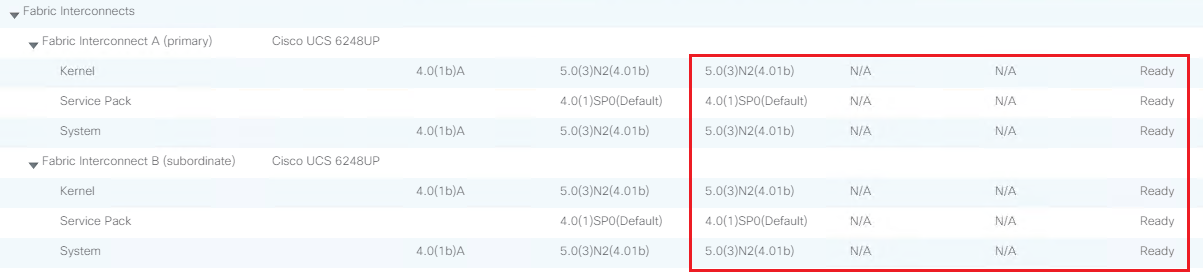
Once this is done the error counts at the top of UCS Manager should all go back to 0. Which is what all UCS admins love to see whenever they log into UCS.

To confirm that everything is now back online and healthy switch to your vSphere Web Client. Click On Home, then vCenter Inventory Lists, then Cisco Hyperflex Systems, then Cisco HX Data Platform, then Cluster and then Summary. This should now show the Cluster Status is Online and the Health Status is Healthy.
The HX Data Platform Installer and the Server Upgrades will be detailed in Part 3
-
Cisco HyperFlex Upgrade – Part 1
Working in the integrations and service provider space has provided exposure to a wide variety of platforms. Over the past few years we have seen the shift from clients running traditional 3-tier architecture to more adopting a hyper-converged platform. I have worked with a few different hyper-converged platforms but I have always been a huge fan of Cisco UCS, so when the two came together for me it was a perfect match. Being able to provide both hyper-converged and 3-tier in my eyes is a huge plus!
I have been working with Cisco Hyperflex for a while now and I thought its about time I put together an upgrade walk through. The following multi-part post will step through upgrading from Hyperflex 3.0(1d) to 3.5(1a)
As always we need to run through and check compatibility and upgrade paths for the each of the versions of hardware and software we are running. The following tables are referenced from cisco.com.
Hyperflex and VMware Interoperability Matrix
Review the Interoperability Matrix for Hyperflex and VMware and qualify the versions you are running and their upgrade path
HyperFlex Version
vSphere Versions
vCenter Versions
vSphere Editions
3.5(1a)
6.0 U3, 6.5 U1, 6.5 U2
6.0U3, 6.5U1, 6.5U2, 6.7U1
Enterprise, Enterprise Plus, Standard, Essentials Plus
3.0(1e)
6.0 U3, 6.5 U1, 6.5 U2
6.0U3, 6.5U1, 6.5U2
Enterprise, Enterprise Plus, Standard, Essentials Plus
3.0(1d)
6.0 U3, 6.5 U1, 6.5 U2
6.0U3, 6.5U1, 6.5U2
Enterprise, Enterprise Plus, Standard, Essentials Plus
3.0(1c)
6.0 U3, 6.5 U1, 6.5 U2
6.0U3, 6.5U1, 6.5U2
Enterprise, Enterprise Plus, Standard, Essentials Plus
3.0(1b)
6.0 U3, 6.5 U1, 6.5 U2
6.0U3, 6.5U1, 6.5U2
Enterprise, Enterprise Plus, Standard, Essentials Plus
3.0(1a)
6.0 U3, 6.5 U1
6.0 U3, 6.5 U1
Enterprise, Enterprise Plus, Standard, Essentials Plus
2.6(1e)
6.0 U1b, 6.0 U2, 6.0 U2 Patch 3, 6.0 U2 Patch 4, 6.0 U3, 6.5 U1
6.0U1/U2/U3, 6.5U1
Enterprise, Enterprise Plus, Standard, Essentials Plus
2.6(1d)
6.0 U1b, 6.0 U2, 6.0 U2 Patch 3, 6.0 U2 Patch 4, 6.0 U3, 6.5 U1
6.0U1/U2/U3, 6.5U1
Enterprise, Enterprise Plus, Standard, Essentials Plu
2.6(1b)
6.0 U1b, 6.0 U2, 6.0 U2 Patch 3, 6.0 U2 Patch 4, 6.0 U3, 6.5 U1
6.0U1/U2/U3, 6.5U1
Enterprise, Enterprise Plus, Standard, Essentials Plus
2.6(1a)
6.0 U1b, 6.0 U2, 6.0 U2 Patch 3, 6.0 U2 Patch 4, 6.0 U3, 6.5 U1
6.0U1/U2/U3, 6.5U1
Enterprise, Enterprise Plus, Standard, Essentials Plus
Use of vCenter 6.7U1 is supported only with the ESXi 6.0 and 6.5 versions listed. Support for ESXi 6.7U1 will come in a future release.
Cisco HX Data Platform Matrix
The following table outlines the supported upgrade paths. Here we can confirm upgrading Hyperflex 3.0 to 3.5 is supported.
Cisco HX Data Platform
Current Version
Supported Upgrade Paths
Desired version
3.5(x)
3.0(1x)
2.6(1x)
2.5(1x)
2.1(1x)
2.0(1x)
1.8(1x)
3.0(1x)
Yes
—
—
—
—
—
—
2.6(1x)
Yes
Yes
—
—
—
—
—
2.5(1x)
Yes
Yes
Yes
—
—
—
—
2.1(1x)
Yes
Yes
Yes
Yes
—
—
—
2.0(1x)
—
Yes
Yes
Yes
Yes
—
—
1.8(1f)
—
Yes
Yes
Yes
Yes
Yes
—
1.8(1a) to 1.8(1e)
—
—
Yes
Yes
Yes
Yes
—
1.7.x
—
—
—
—
Yes
Yes
Yes
Cisco UCS Manager Matrix
Currently with Hyperflex 3.0 the required firmware version is 3.2(3g) so checking below we can confirm that upgrading to 4.0(1a) is supported.
Cisco UCS Manager
Current Version
Supported Upgrade Paths
Desired Version
4.0(1a)
3.2(3g)
3.2(3d)
3.2(2d)
3.1(3j)
3.1(3h)
3.1(3f)
3.1(3c)
3.1(2g)
3.1(2f)
3.1(2b)
3.2(3g)
Yes
—
—
—
—
—
—
—
—
—
—
3.2(3d)
Yes
Yes
—
—
—
—
—
—
—
—
—
3.2(2d)
Yes
Yes
Yes
—
—
—
—
—
—
—
—
3.1(3j)
Yes
Yes
Yes
Yes
—
—
—
—
—
—
—
3.1(3h)
Yes
Yes
Yes
Yes
Yes
—
—
—
—
—
—
3.1(3f)
Yes
Yes
Yes
Yes
Yes
Yes
—
—
—
—
—
3.1(3c)
Yes
Yes
Yes
Yes
Yes
Yes
Yes
—
—
—
—
3.1(2g)
Yes
Yes
Yes
Yes
Yes
Yes
Yes
Yes
—
—
—
3.1(2f)
Yes
Yes
Yes
Yes
Yes
Yes
Yes
Yes
Yes
—
—
3.1(2b)
Yes
Yes
Yes
Yes
Yes
Yes
Yes
Yes
Yes
Yes
—
VMware ESXi Matrix
Please review the table below to ensure your hosts meet the requirements.
VMware ESXi
Current Version
Supported Upgrade Paths
Desired Version
6.5 U1
6.0 U3
6.0 U2 (All Patch Levels)
6.0 U1b
6.0 U3
Yes
—
—
—
6.0 U2 (All Patch Levels)
Yes
Yes
—
—
6.0 U1b
Yes
Yes
Yes
—
5.5 U3 (Only on HX240c)
Yes
Yes
Yes
Yes
Cisco HX Data Platform Versions Supported by Cisco UCS Manager
Review the below table to ensure the nodes you have in use will be supported.
Cisco UCS Manager
Version
Cisco HX Data Platform
3.5(x)
3.0(1x)
2.6(1x)
2.5(1x)
2.1(1x)
2.0(1x)
1.8(1x)
1.7.x
4.0(1a)
Yes
Supports hybrid, All Flash, M4 and M5 servers
Yes
Supports hybrid, All Flash, M4 and M5 servers
Yes
Supports hybrid, All Flash, M4 and M5 servers
—
—
—
—
—
3.2(3g)
Yes
Supports hybrid, All Flash, M4 and M5 servers
Yes
Supports hybrid, All Flash, M4 and M5 servers
Yes
Supports hybrid, All Flash, M4 and M5 servers
—
—
—
—
—
3.2(3g)
Yes
Supports hybrid, All Flash, M4 and M5 servers
Yes
Supports hybrid, All Flash, M4 and M5 servers
Yes
Supports hybrid, All Flash, M4 and M5 servers
—
—
—
—
—
3.2(3d)
Yes
Supports hybrid, All Flash, M4 and M5 servers
Yes
Supports hybrid, All Flash, M4 and M5 servers
Yes
Supports hybrid, All Flash, M4 and M5 servers
—
—
—
—
—
3.2(2d)
Yes
Supports hybrid, All Flash, M4 and M5 servers
Yes
Supports hybrid, All Flash, M4 and M5 servers
Yes
Supports hybrid, All Flash, M4 and M5 servers
Yes
Supports hybrid, All Flash and M4 servers
Yes
Supports hybrid, All Flash, and M4 servers
Yes
Supports hybrid, All Flash and M4 servers
Yes
—
3.1(3j)
Yes
Supports hybrid, All Flash, M4 and M5 servers
Yes
Supports hybrid, All Flash, and M4 servers
Yes
Supports hybrid and All Flash
Yes
Supports hybrid and All Flash
Yes
Supports hybrid and All Flash
Yes
Supports hybrid and All Flash
Yes
—
3.1(3h)
Yes
Supports hybrid, All Flash, M4 and M5 servers
Yes
Supports hybrid, All Flash, and M4 servers
Yes
Supports hybrid and All Flash
Yes
Supports hybrid and All Flash
Yes
Supports hybrid and All Flash
Yes
Supports hybrid and All Flash
Yes
—
3.1(3f)
Yes
Supports hybrid, All Flash, M4 and M5 servers
Yes
Supports hybrid, All Flash, and M4 servers
Yes
Supports hybrid and All Flash
Yes
Supports hybrid and All Flash
Yes
Supports hybrid and All Flash
Yes
Supports hybrid and All Flash
Yes
—
3.1(3c)
Yes
Supports hybrid, All Flash, M4 and M5 servers
Yes
Supports hybrid, All Flash, and M4 servers
Yes
Supports hybrid and All Flash
Yes
Supports hybrid and All Flash
Yes
Supports hybrid and All Flash
Yes
Supports hybrid and All Flash
Yes
—
3.1(2g)
—
—
Yes
Supports hybrid and All Flash
Yes
Supports hybrid and All Flash
Yes
Supports hybrid and All Flash
Yes
Supports hybrid and All Flash
Yes
—
3.1(2f)
—
—
—
—
—
Yes
Supports hybrid and All Flash
Yes
—
3.1(2b)
—
—
—
—
—
Yes
Supports hybrid
Yes
—
Pre-Upgrade Validation Checks
- Check that the HyperFlex cluster is healthy and online. Verify all HyperFlex cluster nodes are connected to the vCenter and are online.
- Check that no major Alarms are reported for the HyperFlex cluster in HyperFlex Connect.
- Check that DRS is enabled and set to fully automated.
- Check that vSphere services are running and ESXi Agent Manager (EAM) health is normal.
- Check the health of the cluster in Cisco UCS Manager.
- Cisco recommends using GUI upgrade over CLI for ease of use and better reporting
- During online upgrade, as one node is being upgraded (put into maintenance mode), the number of tolerated node failures is reduced based on the Data Replication Factor and Access Policy settings.
Time to Download the Software
The Hyperflex software can be accessed using the following link
Since we will be performing an upgrade of the existing data platform installer we will need the Upgrade Bundle highlighted below.

I will not be upgrading the ESXi version as I am already at 6.5 Upgrade 2b. I will put together a separate post detailing this process and will list out the steps when required.
If you will be upgrading your hosts during the process please make sure you download the required ESXi Custom Image.
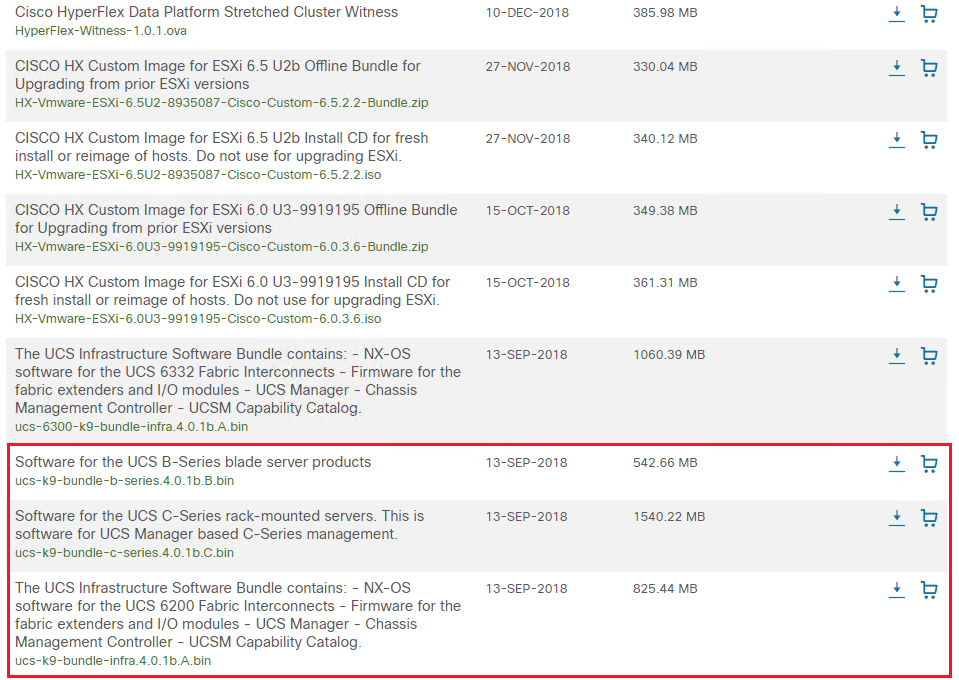
Check the model of fabric interconnect you have as it will determine which UCS Infrastructure Bundle you require. You will need to download the following packages,
- Software for the UCS B-Series blade server products
- Software for the UCS C-Series rack-mounted servers
- The UCS Infrastructure Software Bundle
Uploading the UCS Software to UCS Manager
Next we need to login to UCS Manager
Select the Equipment tab and then click on Firmware Management

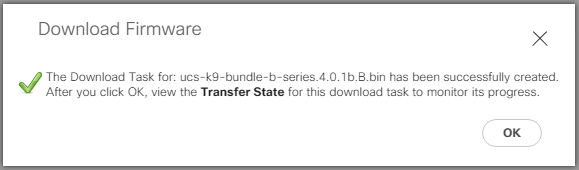
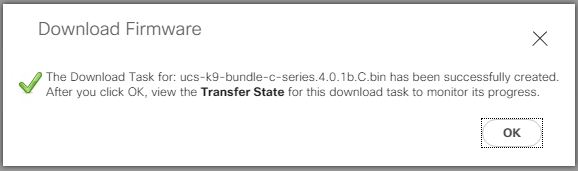
Under Firmware Management click on Download Firmware
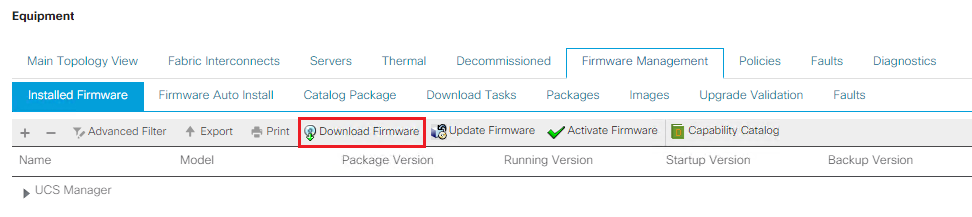
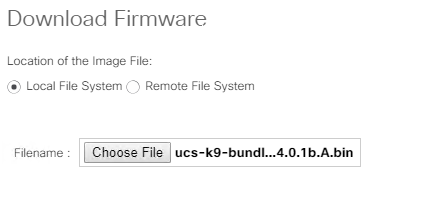
Click Local File System and Choose File should be selected by default. Select each of the following software bundles one at a time and select Open then click Ok to upload them to UCS Manager.
- Software for the UCS B-Series blade server products
- Software for the UCS C-Series rack-mounted servers
- The UCS Infrastructure Software Bundle
UCS Manager GUI now begins downloading the firmware bundle to the fabric interconnect.
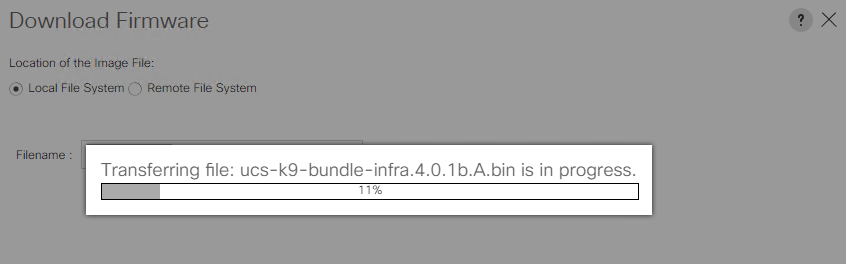
You can monitor the progress on the Download Tasks tab.
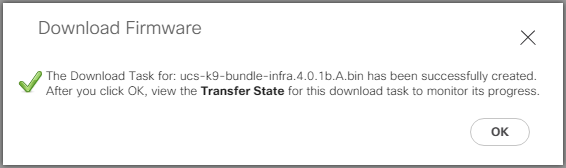
Once you have uploaded all 3 firmware bundles you are ready to move to Part 2.
-
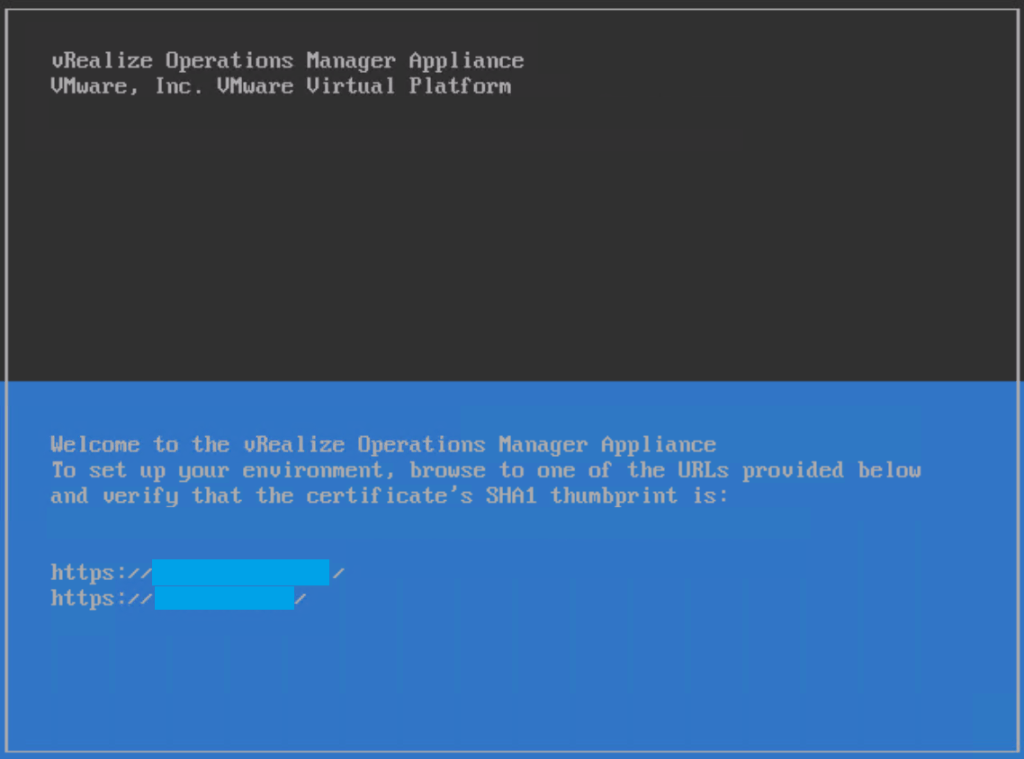
Renaming Nodes in VMware vRealize Operations Manager 7
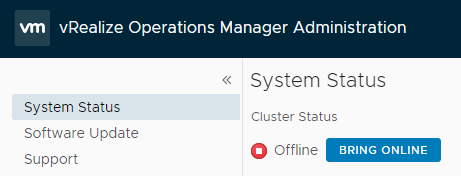
Login to vRealize Operations Manager via the admin interface https://vROPS-Server/admin
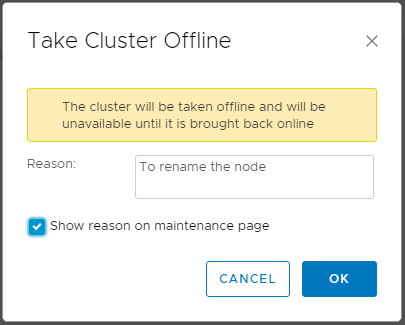
Under System Status select the node and click the Take Offline button

The following prompt will appear, enter your reason and click Ok
The status will then change to Offline

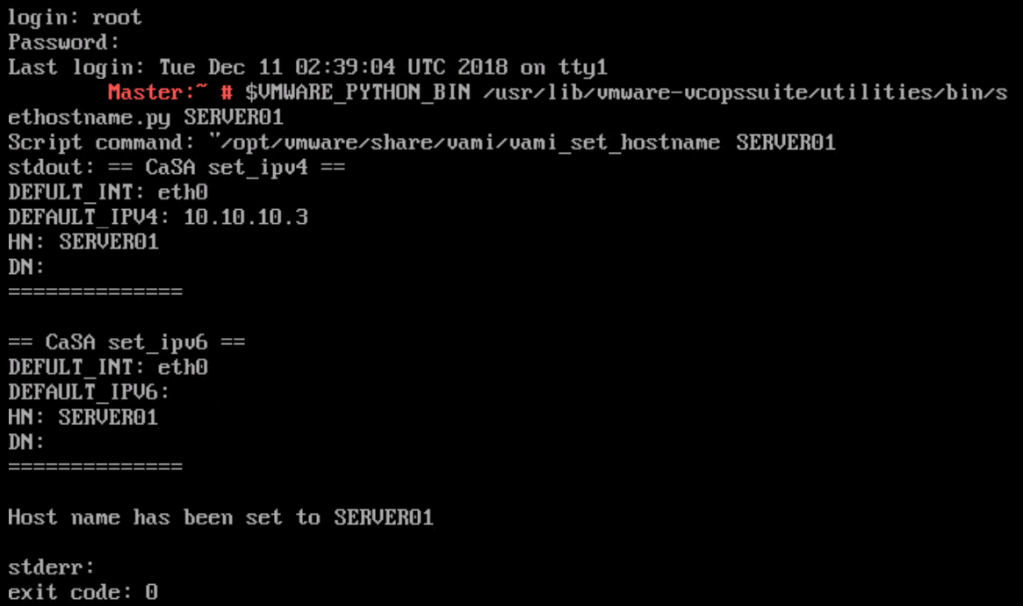
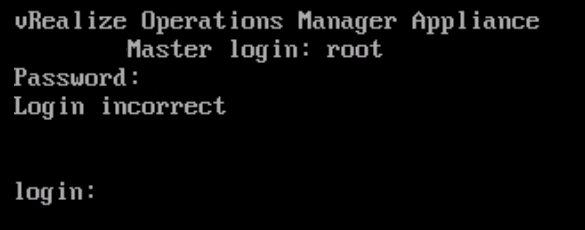
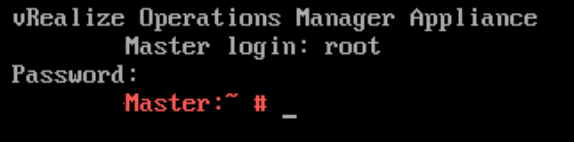
Login to the vRealize Operations Manager as the root user via the console or SSH.
Run the following command,
$VMWARE_PYTHON_BIN /usr/lib/vmware-vcopssuite/utilities/bin/sethostname.py NewHostName
Replace NewHostName with the host name you want to use, for this example SERVER01

If the command has been run successfully you should see the following entry
Then type reboot and press enter

Log into vRealize Operations Manager admin UI and click on the Bring Online button.
You will now need to check that the name has been updated in the casa.db.script file.
Log back into the shell as the root user. So press ALT+ F1 to switch to the shell then login.
Enter the following, service vmware-casa stop
Next take a backup of the casa.db.script file to be safe.
Type, cp /storage/db/casa/webapp/hsqldb/casa.db.script /tmp/casa.db.script.old then press enter
Now run the following, vi /storage/db/casa/webapp/hsqldb/casa.db.script then press enter
Scroll down until you find the cluster_name and the slice_name and update them accordingly. Once you are ready to save and exit the file press Esc and type :wq and press Enter.
Then restart the casa service, service vmware-casa start and press Enter.
Log into vRealize Operations Manager admin UI and the node name will now be updated in the nodes section.
-
How to Reset the Root Password in vRealize Operations Manager 7
The following process will help you reset the vRealize Operations Manager 7 root password. If you have locked the account out attempting to use what you thought was the password the steps below will also work as the account is unlocked after a reboot.
Open a console session from your vSphere Web Client to the vRealize Operations Manager.
Then restart the vROPS Appliance.
When you see the boot loader screen add the following to the end of the string init=/bin/bash
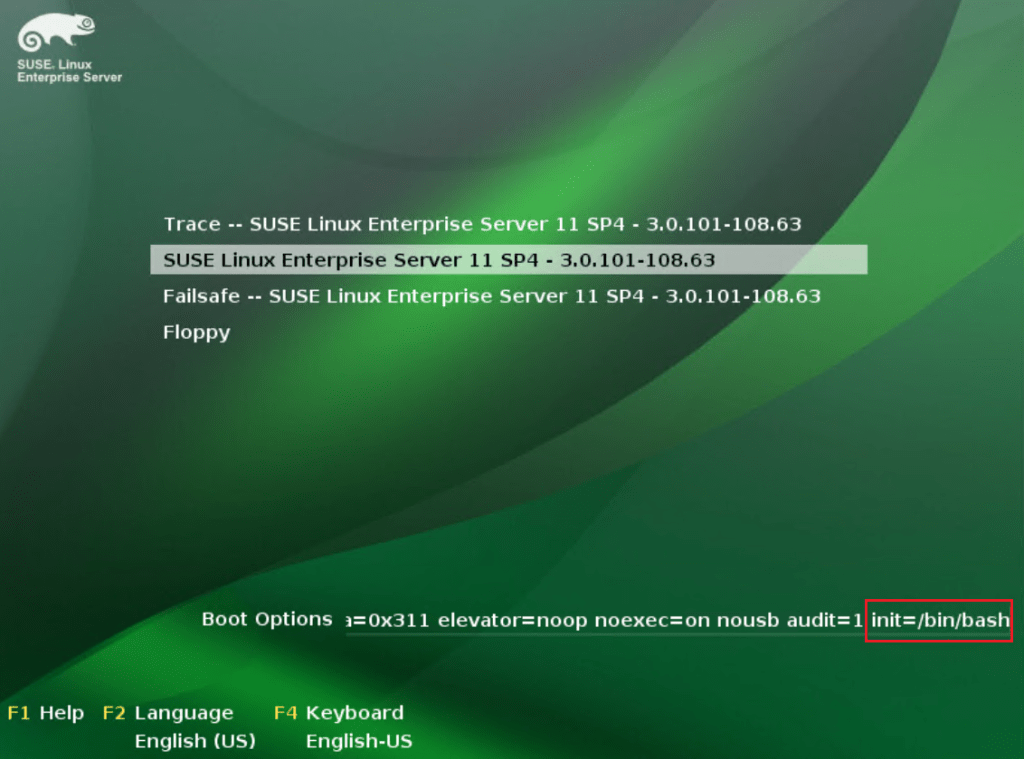
Press enter and wait while the appliance boots into the shell
Type passwd and press enter to input the new password twice for the root user.
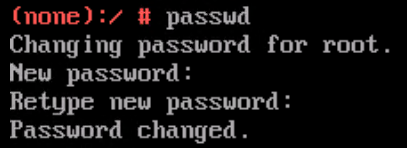
Type in reboot and press enter to restart the appliance.
Once the VM has rebooted press Alt + F1 to switch to the shell.
Now you should be able to login as the root user with the password you just configured.
-
How to modify the default theme of Veeam Enterprise Manager 9.5
I have been working with Enterprise Manager lately and I wanted to share one way you can customize the theme of the backup portal.

We need to edit the following files to change the default Veeam green to blue for this example. Take a backup of each file before continuing,
C:\Program Files\Veeam\Backup and Replication\Enterprise Manager\WebApp\css\app.min.css
C:\Program Files\Veeam\Backup and Replication\Enterprise Manager\WebApp\css\main.css
C:\Program Files\Veeam\Backup and Replication\Enterprise Manager\WebApp\css\veeam-theme.css
I used visual studio code to make the changes to each of the files. You can open each one in a different tab then select Edit from the drop down menu then Replace. Enter the default green #54b948 colour code at the top and then your new colour code #06ABF7 below, then click the Replace All icon to the right.
Then select File and Save All.

You will also need to modify the default green colour of the Main Menu items when you hover over them,

This can be done by modifying two of the previous files,
C:\Program Files\Veeam\Backup and Replication\Enterprise Manager\WebApp\css\app.min.css
C:\Program Files\Veeam\Backup and Replication\Enterprise Manager\WebApp\css\main.css
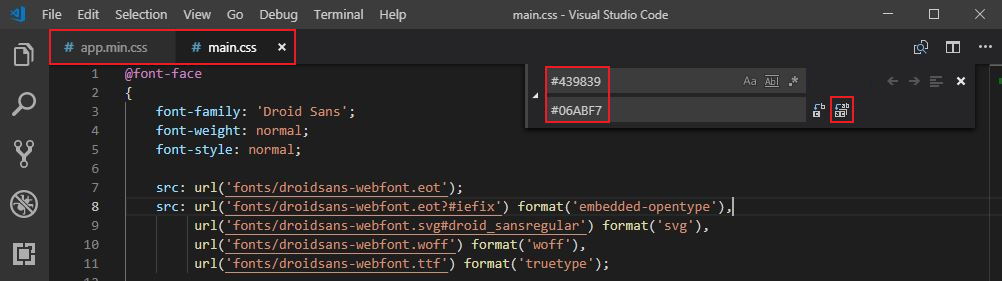
Select Edit from the drop down menu then Replace. Enter the default highlight green #439839 colour code at the top and then your new colour code #06ABF7 below, then click the Replace All icon to the right.
Then select File and Save All.
Then again for the Config Menu Items,
This can be done by modifying two of the previous files,
C:\Program Files\Veeam\Backup and Replication\Enterprise Manager\WebApp\css\app.min.css
C:\Program Files\Veeam\Backup and Replication\Enterprise Manager\WebApp\css\main.css
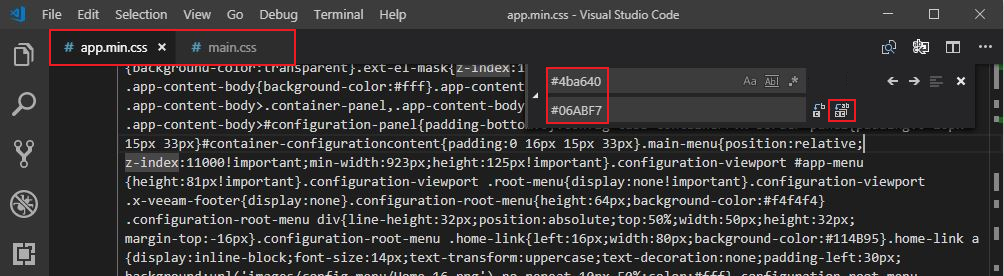
Select Edit from the drop down menu then Replace. Enter the default highlight green #4ba640 colour code at the top and then your new colour code #06ABF7 below, then click the Replace All icon to the right.
Then select File and Save All.
Once you have replaced each entry and saved the files you can refresh the enterprise manager portal.

Next it’s time to update the image file used to display (in green) what version you are running, in my case Enterprise Plus Edition
Locate the following directory,
C:\Program Files\Veeam\Backup and Replication\Enterprise Manager\WebApp\img\header\
Take a backup of the following files before continuing,
title_enterprise_plus.png
title_enterprise.png
title_standart.png
Open and edit the image of the version that you are running. The file itself has a transparent background so you will need to use software that can edit this to remove the images and replace them with your own text and logo etc.

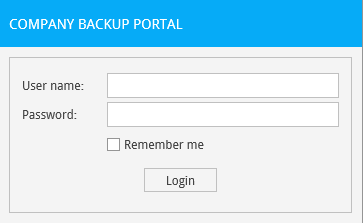
Here is a very basic change to the image, I just used the erase tool to remove the default image and text and replaced it with this very creative company name for this example. You can also add your company logo and customize it further.

Then save the file back to its original location and refresh your browser.

Now to update the admin logon box for Enterprise Manager
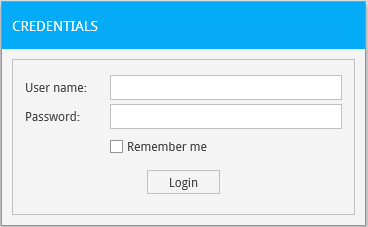
Open the following file,
C:\Program Files\Veeam\Backup and Replication\Enterprise Manager\WebApp\Login.aspx
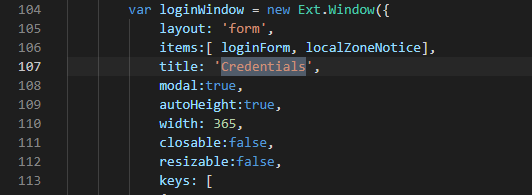
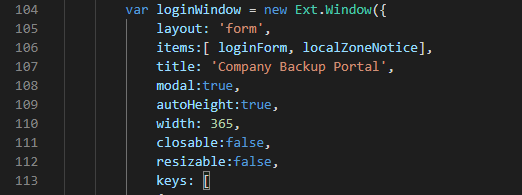
Search for ‘Credentials’ and replace it with the title you would like for your login page.
Then save the updated file.
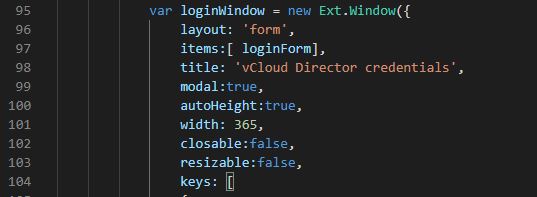
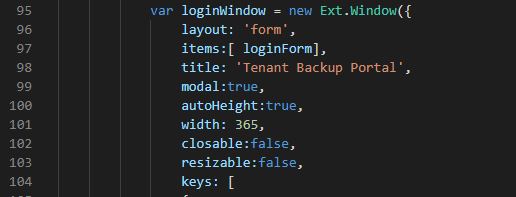
Next we need to update the vCloud Director tenant logon box for Enterprise Manager.
Open the following file,
C:\Program Files\Veeam\Backup and Replication\Enterprise Manager\WebApp\vCloud\Login.aspx
Search for ‘vCloud Director Credentials’ and replace it with the title you would like for your tenant login page.
Then save the updated file.
Refresh the page and the admin login portal should now be updated.
Then browse to one of the tenant URL’s by adding /vCloud/TenantOrgName to then end of the current admin portal. You should now see the updated Tenant Login box.
-
Replacing Certificates in vCloud Director 9.5
As a vCloud Director admin changing certificates has always been an interesting topic and there are so many different methods out there to do it. I thought I would share another way to change a self-signed or expired SSL certificate over to a newly purchased certificate using a program called Portecle. You can find a link to download the application here
Before you start its always a good idea to take a snapshot of the vCloud cells and a backup of the database!
Step 1 – Stop the services on each cell by running service vmware-vcd stop. Then export the Certificates.ks file from the vCloud director cell. In a multi-cell environment it will be located on the transfer store. You can use winscp to copy the file from the cell or complete the work directly from the redhat or centos desktop.
The path is /opt/vmware/vcloud-director/data/transfer/certificates.ks
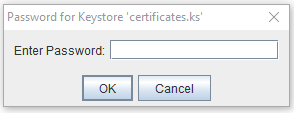
Step 2 – Launch Portecle then select File then Open Keystore File and select certificates.ks.

Step 3 – Enter the password for the Keystore file and click Ok
You will then see the http and console proxy certs in the keystore that you are looking to replace.

Step 4 – Delete the existing http entry and click Tools, then Import Key Pair.
Step 5 – Select your pfx certificate and enter the password.
Step 6 – It should then display the key pair for import, click Ok.
Step 7 – Enter an alias for the key pair, type in http and click Ok.
Step 8 – Enter a Password for the key pair and click Ok.
Step 9 -Delete the existing consoleproxy entry and click Tools, then Import Key Pair.
Step 10 -Select your pfx certificate and enter the password.
Step 11 – It should then display the key pair for import, click Ok.
Step 12 – Enter an alias for the key pair, type in consoleproxy and click Ok.
Step 13 – Enter a Password for the key pair and click Ok.
Step 14 – Save the certificates.ks file.
Step 15 – Copy certificates.ks back to the vcloud director cell and place in the same location it was copied from. Being a multi-cell environment it is located on the shared transfer store.
In our case /opt/vmware/vcloud-director/data/transfer/certificates.ks
Step 16 – Run the following command to update the http cert from the vcloud director/bin directory ./cell-management-tool certificates -j -k /opt/vmware/vcloud-director/data/transfer/certificates.ks -w password
Changing the new-certificates.ks for your certificates.ks file name and adding your password.
Step 17 – Then run the following command to update the consoleproxy cert from the vcloud director/bin directory ./cell-management-tool certificates -p -k /opt/vmware/vcloud-director/data/transfer/certificates.ks -w password
Changing the new-certificates.ks for your certificates.ks file name and adding your password.
Step 18 – Complete on both cells and start the services using service vmware-vcd start
Step 19 – Log back into the vCloud Director Portal (https://vclouddirectorurl/cloud) and go to Administration then Public Addresses. Update the certificate chain for the API, Tenant Portal and Web Console. The easiest way is to convert your existing certificate to a pem file, open with wordpad and remove the private key. Then paste the remaining chain into the 3 locations listed above.
I hope this helps some of you out there when it comes time to swap out your vCloud certs!
-
Subscribe
Subscribed
Already have a WordPress.com account? Log in now.
